
Fertilization
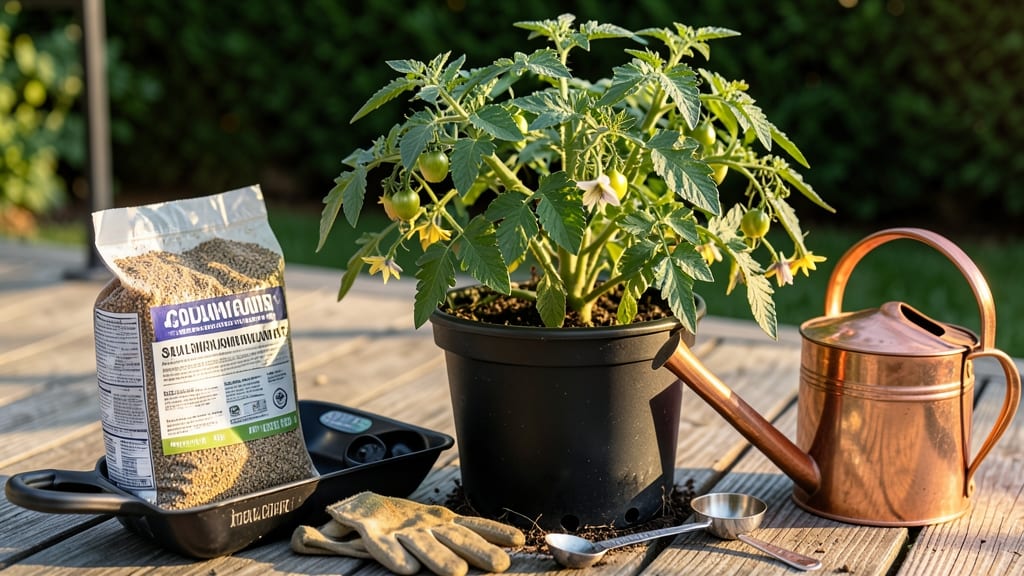
Adding fertilizer to plants transforms wilted stems into lush, vibrant growth—if you do it right. 🌱 I learned the hard way that too much, too soon can burn roots, while too little leaves plants starving.
The secret lies in matching the fertilizer type to your plants' needs and applying it at the right moment. Start with the basics: granular fertilizers for slow-release feeding, liquid ones for quick fixes, or organic options like compost for long-term soil health.
Most plants thrive with feeding every 4-6 weeks during growing season, but houseplants need less—often just once in spring. The key is reading labels (those NPK numbers) and adjusting for your plants' hunger. You'll see the difference in 3-4 weeks: deeper green leaves, stronger stems, and more blooms.
Vegetables grow faster, flowers last longer, and houseplants bounce back after winter. Just remember: less is more. Overfeeding is the fastest way to kill a plant's roots. Works for vegetable gardens, flower beds, and indoor plants alike. Let's get those nutrients where they belong—without the guesswork.
📚 In This Guide
- What you need
- Instructions
- Tips and common mistakes
- Wrapping up and next steps
What you need
- ● Fertilizer: Choose one of the following based on your plant type: Granular fertilizer (e.g., 10-10-10 NPK ratio, 5–10 lbs per 100 sq ft)
- ● Liquid fertilizer (e.g., 5-5-5 or slow-release, 1–2 tbsp per gallon of water)
- ● Organic options (e.g., compost, worm castings, or fish emulsion)
- ● Measuring tools: Measuring cup or spoon (for liquid/small quantities)
- ○ Garden spreader (for granular fertilizer, optional but helpful for even distribution)
- ● Watering can or hose: With a fine mist or rose nozzle (1–2 gallons capacity recommended)
- ● Gloves: Nitrile or rubber gloves (to protect hands from chemicals/organic matter)
- ● Garden trowel or small shovel: For mixing fertilizer into soil (6–12 inches deep)
- ● pH testing kit (to check soil acidity/alkalinity before fertilizing)
- ● Slow-release fertilizer tablets or spikes (for container plants)
- ● Organic matter (e.g., peat moss or coconut coir) to amend soil
- ● Label maker (to track fertilizer types and application dates)
- ● Knee pad or stool (for comfort during long sessions)
Step-by-step guide for fertilizing plants like a pro
Here’s how I feed my plants for vibrant, healthy growth—no guesswork, just science-backed steps.
🌱 Step 1: Choose the Right Fertilizer for Your Plants’ Needs
Not all fertilizers are created equal. I always match the fertilizer to the plant type: slow-release granules for long-term feeding (like roses or shrubs), liquid fertilizers for quick nutrient uptake (like vegetables or herbs), or organic compost for gradual soil enrichment (like perennials). Check the label for the NPK ratio (nitrogen, phosphorus, potassium)—for example, a 10-10-10 is balanced, while a 30-10-10 is better for leafy greens.
For houseplants, I opt for a diluted liquid fertilizer (half-strength) every 4-6 weeks during active growth. Outdoor plants usually need feeding every 6-8 weeks unless the label says otherwise. If your plants are flowering, look for a fertilizer with a higher phosphorus (the middle number) to encourage blooms.
💧 Step 2: Prep the Soil and Water Plants Before Applying
Fertilizer works best when the soil is slightly moist—not bone-dry, not soggy. Water your plants 24 hours before fertilizing to wake up the roots and prevent burn. If the soil is compacted or hard, loosen the top 2 inches with a fork or trowel to help nutrients penetrate deeper. This is especially important for container plants, where roots can get root-bound.
I always water again lightly right after fertilizing to help distribute nutrients evenly. Think of it like rinsing the fertilizer into the soil—this prevents salt buildup on the roots, which can damage them. If you’re using granular fertilizer, sprinkle it evenly over the soil surface and water it in thoroughly.
☀️ Step 3: Apply Fertilizer at the Right Time and Frequency
Timing matters more than you’d think. For most plants, I fertilize in early spring when new growth starts and again in mid-summer for a second boost. Avoid fertilizing in extreme heat (above 90°F) or dormant seasons (fall/winter), as plants won’t absorb nutrients efficiently. If you’re growing vegetables, follow the package instructions closely—over-fertilizing can lead to bitter leaves or poor fruit development.
For liquid fertilizers, I mix the solution in a watering can and apply it directly to the soil, avoiding the leaves. For granular fertilizers, I scatter them 2-3 inches away from the stem and water them in. Always wear gloves—some fertilizers (like bone meal or blood meal) can irritate skin.
✂️ Step 4: Monitor and Adjust Based on Plant Response
Watch for signs of over-fertilizing: yellowing leaves, crispy edges, or white crust on the soil surface. If you see these, flush the soil with plain water to leach out excess salts. Under-fertilizing shows up as pale, slow-growing leaves or small, sparse flowers. Adjust your feeding schedule accordingly—sometimes, less is more.
I keep a plant journal to track when and how I fertilize each plant. For example, my tomatoes get a balanced 10-10-10 every 2 weeks once they start fruiting, while my basil only needs a light feeding every 4 weeks. If your plants start looking leggy or weak, they might need more nitrogen. If flowers are sparse, they might need more phosphorus.
🌿 Step 5: Clean Up and Store Leftover Fertilizer Properly
After fertilizing, wipe down any spilled granules or splashed liquid from leaves or pots. Leftover fertilizer can attract pests like ants or rodents. Store unused fertilizer in a cool, dry place away from children and pets—some types (like iron sulfate or lime) can be toxic if ingested.
I also save used coffee grounds, eggshells, or banana peels in a sealed container to compost later. These organic amendments add nutrients naturally over time. If you’re using chemical fertilizers, dispose of empty containers according to local hazardous waste guidelines—never toss them in the trash.
Tips & tricks for perfect plant fertilizing
Took me years to figure out these tricks—here's how to fertilize like a pro without overdoing it.
Fertilizer Type Intelligence: The NPK ratio on the label isn't just numbers—it's a plant's nutritional GPS. For leafy greens like spinach or kale, focus on nitrogen (first number). For flowering plants like roses or tomatoes, prioritize phosphorus (second number) to encourage blooms. I keep a small notebook by my garden tools to jot down which ratios work best for each plant type. This prevents costly mistakes when switching fertilizers mid-season.
Application Technique: When applying granular fertilizers, don't just sprinkle randomly—create a donut shape around the plant, leaving a 2-inch circle bare around the stem. This prevents root burn while ensuring nutrients reach the outer root zone where most absorption happens. For liquid fertilizers, I've found that applying them in the early morning gives roots the whole day to absorb nutrients before the heat of afternoon sets in.
Seasonal Timing: The 4-6 week application schedule works for established plants, but young seedlings need a gentler touch. I start with half the recommended dose and monitor closely. In late summer, I taper off fertilizing completely to let plants prepare for winter. This seasonal adjustment prevents nutrient overload that can stress plants during dormancy. Think of it like giving your plants a well-timed vacation.
Troubleshooting Tips: If you notice brown leaf tips after fertilizing, it's often a sign of salt buildup. Flush the soil with plain water to leach out excess salts, then reduce your fertilizer application by half. For pale yellow leaves, it's usually a nitrogen deficiency—switch to a higher nitrogen fertilizer like 10-10-10 for leafy greens. I keep a small spray bottle of plain water nearby to quickly address any over-fertilizing incidents before they become serious problems.
Pro Tips for Add Fertilizer To Plants
- Took me years to figure out these tricks—here's how to fertilize like a pro without overdoing it.
- Fertilizer Type Intelligence: The NPK ratio on the label isn't just numbers—it's a plant's nutritional GPS.
- Application Technique: When applying granular fertilizers, don't just sprinkle randomly—create a donut shape around the plant, leaving a 2-inch circle bare around the stem.
Frequently asked questions
Got questions about fertilizing your plants? You’re not alone! Here are answers to some of the most common concerns—so you can fertilize like a pro without the guesswork.
How often should I fertilize my plants?
Most plants thrive with fertilizer every 4–6 weeks during the growing season (spring to fall). For houseplants, cut back to once every 2–3 months. Always check the label—some fertilizers (like slow-release types) require less frequent use. Overdoing it can burn roots!
What’s the best time of day to add fertilizer?
Morning is ideal! Apply fertilizer in the early hours (before 10 AM) so plants have time to absorb nutrients before the heat of the day. Avoid fertilizing in the evening—moisture can linger, increasing the risk of fungal issues. Rainy days? Wait 24 hours to prevent runoff.
Can I use coffee grounds or eggshells instead of fertilizer?
These are great organic alternatives:
- Coffee grounds: Add nitrogen-rich used grounds to compost or topsoil (1–2 cups per plant).
- Eggshells: Crush and bake to remove bacteria, then mix into soil for calcium.
Why are my plant leaves turning yellow/brown after fertilizing?
This is often a sign of fertilizer burn. Yellowing edges or crispy spots mean you’ve overdone it. Fix it fast:
- Flush the soil with water to dilute excess salts.
- Reduce fertilizer strength by half next time.
- Use a chelated or organic fertilizer for gentler absorption.
Do I need to fertilize dormant plants (like bulbs or deciduous trees) in winter?
Nope! Dormant plants don’t need fertilizer—they’re resting. Wait until you see new growth (spring for bulbs, early spring for trees). For evergreens, a light application of slow-release fertilizer in late winter can help, but avoid heavy feeding. Think of it like hibernation: no snacks until they wake up!
Wrapping up and next steps
Adding fertilizer to your plants doesn’t have to be complicated—just follow the right steps, and you’ll be rewarded with vibrant, thriving greenery! 🌱 Whether you’re a beginner or a seasoned gardener, understanding your plant’s needs and choosing the right fertilizer makes all the difference.
Start small, observe how your plants respond, and adjust as needed.
Now that you’re armed with knowledge, take the next step—try fertilizing one of your favorite plants today! Keep track of its progress, and soon you’ll be a pro at nurturing lush, healthy growth. Happy gardening! 🌟