
Tools
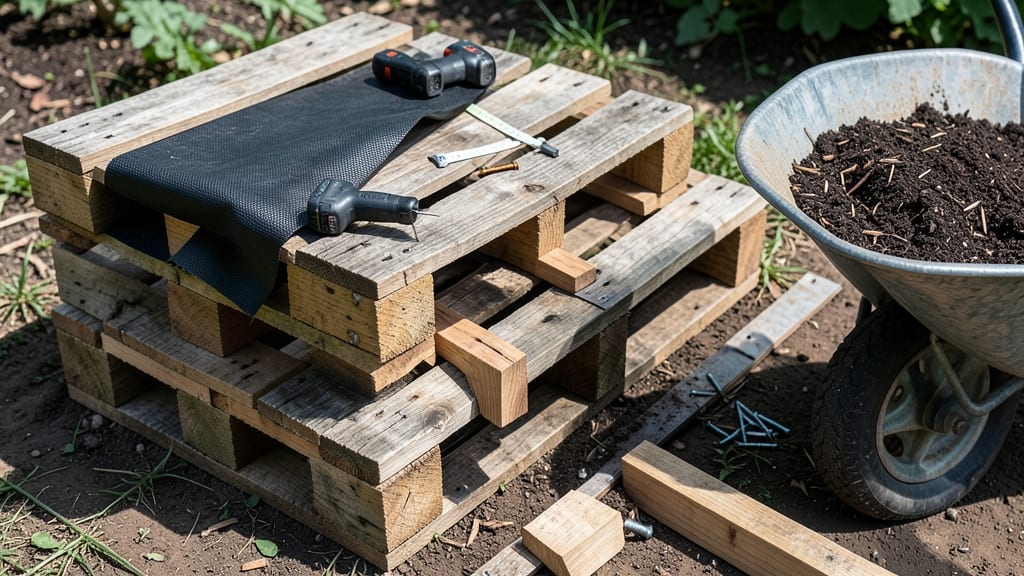
How to build a raised garden with pallets turns scrap wood into sturdy, budget-friendly planters that last longer than store-bought options—while saving your back. 🌱 I built my first one after struggling with poor soil and bending over in the garden, and now it’s my go-to for year-round growing. It only cost me $20 for materials.
The key is choosing the right pallets—heat-treated (HT) ones are safest for edibles, and a simple sanding removes splinters. You’ll need basic tools (saw, drill, screws), but no fancy skills. My 4’x8’ bed holds 10 cubic feet of soil, perfect for veggies, herbs, or flowers without breaking your back.
By the end, you’ll have a customizable planter with built-in drainage, no toxic chemicals, and room to add trellises or seating. The first harvest will prove it’s worth the effort—my tomatoes grew twice as big as in-ground plants, and the weeds? Almost none.
Works for any space—balconies, patios, or gardens—and scales to your needs. Let’s get building!
📚 In This Guide
- What you need
- Instructions
- Tips and common mistakes
- Wrapping up and next steps
What you need
- ● Wooden pallets: 4–6 (depending on size; opt for heat-treated or HT stamped pallets to avoid chemicals).
- ● Exterior-grade screws: 2–2.5" (1.5–2 lbs box).
- ● Landscape fabric: 1 roll (to block weeds).
- ● Garden soil: 2–3 cubic feet (or a mix of topsoil + compost).
- ○ Optional: Wood stain/sealer (for longevity).
- ● Corner braces (for extra stability).
- ● Drainage rocks (if elevating further).
- ● Drill/driver (with screw attachment).
- ● Saw (hand saw or circular saw for trimming).
- ● Measuring tape + pencil.
- ● Level (to ensure even placement).
- ● Work gloves + safety goggles.
- ● Flat, stable ground (clear debris/rocks).
- ● Sunlight access (6+ hours/day for most veggies).
- ● Basic DIY skills (or a helper!).
Step-by-Step instructions for building a pallet raised garden
Here's how to create a sturdy, long-lasting raised bed using basic pallets—perfect for extending your growing season.
🪴 Step 1: Select and Prepare Your Pallets
Choose heat-treated or weather-resistant pallets (avoid chemically treated ones—they can leach toxins into soil). Look for pallets with clean, intact slats and no visible rot or insect damage. I prefer 48-inch by 40-inch pallets because they create a 4-foot by 3-foot bed—ideal for most plants and easy to reach from all sides.
Sand down any rough edges or splinters with 80-grit sandpaper to prevent injury when handling. If you're using pallets with visible cracks, reinforce them by screwing in 1x2 inch wood strips along the weak spots. This ensures your bed stays structurally sound through multiple seasons.
✂️ Step 2: Assemble the Garden Frame
Arrange four pallets to form a rectangular frame, leaving a 4-inch gap between them for drainage and root access. Secure the corners using 3-inch deck screws and a power drill, driving screws at a 45-degree angle into the pallet ends. This creates a sturdy corner brace that won’t wobble over time.
For extra stability, add 2x4 inch wood supports along the inside edges of the frame, screwing them into the pallet slats. This prevents the wood from bowing outward as it absorbs moisture. If you're building a taller bed (over 12 inches), add a second layer of pallets on the bottom for added durability.
🌱 Step 3: Line the Interior for Longevity
Lay landscape fabric or cardboard inside the frame to block weeds and prevent soil from washing out through the pallet gaps. Staple it securely to the inner edges of the pallets, leaving a 2-inch overhang on the sides. This also helps protect the wood from direct soil contact, extending the life of your garden.
If you're concerned about the pallets breaking down over time, line the interior with hardware cloth (1/4-inch mesh) before adding the landscape fabric. This adds an extra barrier against burrowing pests like voles while still allowing water to drain freely.
💧 Step 4: Fill with Soil and Condition for Planting
Fill the bed with a 12-inch layer of high-quality garden soil, mixing in 2-3 inches of compost at the bottom for drainage and nutrient-rich topsoil. Avoid garden soil from your yard—it compacts easily and can introduce weeds. Instead, use a 50/50 blend of topsoil and compost for the best results.
Water the soil thoroughly after filling, letting it settle for 24 hours before planting. This prevents compaction and gives roots room to establish. If you notice any gaps or uneven spots after watering, add more soil to create a level planting surface. A well-prepared bed ensures your plants grow strong and healthy from day one.
☀️ Step 5: Position and Maintain for Long-Term Use
Place your raised bed in a location with at least 6 hours of sunlight daily, ideally on a level surface to prevent water pooling. If you're using the bed year-round, consider adding a clear plastic cover during winter to protect plants from frost and extend the growing season. I like to elevate the bed slightly with cinder blocks to improve drainage and airflow underneath.
To keep your pallet garden in top shape, refresh the soil annually by adding 1-2 inches of compost in early spring. Check for loose screws or splinters every season and reinforce as needed. With proper care, a pallet raised bed can last 5-10 years, making it a cost-effective and sustainable gardening solution.
Tips & tricks for perfect pallet raised garden construction
Took me a while to figure these out, so here's how to avoid common pitfalls—and build a garden that lasts.
Pallet Selection Insight: Heat-treated pallets are your best bet for safety, but always check the stamp code. Look for "HT" (heat-treated) or "MB" (methyl bromide-treated) stamps—these indicate they're safe for gardening. Avoid pallets marked with "MC" (methyl bromide) or "DB" (dry treated), as these can contain harmful chemicals. I've salvaged pallets from local hardware stores or construction sites, but always give them a thorough once-over for stability and cleanliness before use.
Corner Bracing Technique: When securing your four-pallet frame in Step 2, drive the 3-inch deck screws at a 45-degree angle—not straight down. This creates a stronger corner joint that resists wobbling over time. I like to pre-drill pilot holes to prevent the pallet wood from splitting, especially if you're working with slightly damp or older wood. A power drill with a counter-sink bit helps create clean screw heads that won't snag on your gardening gloves later.
Soil Layering Strategy: The 24-hour settling period after filling your bed is crucial, but don't rush it. This time allows the soil to compact naturally and reach its final volume before planting. I've found that adding a thin layer of coarse sand (about 1/4 inch) between the hardware cloth and landscape fabric improves drainage without affecting root growth. This is especially helpful if you're working with heavier clay soils that tend to compact easily.
Long-Term Maintenance Hack: For beds used year-round, I recommend installing a simple zippered plastic cover system along the top edges. This allows you to easily roll back the cover during warm months while providing frost protection in winter. You can find heavy-duty landscape fabric with zippered edges at garden centers, or create your own using clear vinyl tablecloth material. This small addition can extend your growing season by several weeks each spring and fall.
Pro Tips for Build A Raised Garden With Pallets
- Took me a while to figure these out, so here's how to avoid common pitfalls—and build a garden that lasts.
- Pallet Selection Insight: Heat-treated pallets are your best bet for safety, but always check the stamp code.
- Corner Bracing Technique: When securing your four-pallet frame in Step 2, drive the 3-inch deck screws at a 45-degree angle—not straight down.
Frequently asked questions
Got questions?
Building a raised garden with pallets is a rewarding project, but it’s natural to have concerns—especially about durability, timing, and troubleshooting. Here are answers to the most common queries to keep your project on track!
Are pallet gardens safe for growing vegetables?
Yes, but only if the pallets are heat-treated or stamped "HT" (indicating they’re free of harmful chemicals). Avoid painted or chemically treated pallets, as they can leach toxins into the soil. For extra safety, line the interior with landscape fabric or a thick layer of cardboard before adding soil.
How long will a pallet raised bed last?
With proper care, a pallet garden can last 3–5 years before wood deteriorates. To extend its life:
- Seal the wood with non-toxic outdoor sealant (like linseed oil) annually.
- Avoid placing it in constant direct sunlight or soggy soil.
- Replace individual pallets if they rot unevenly.
For longevity, consider adding a waterproof liner (like pond liner) to protect the wood from moisture.
When is the best time to build a raised garden?
The ideal time is early spring (before planting season) or late fall (after harvest). This gives the wood time to dry out and settle before you add soil and plants. If building in summer, water the pallets before assembly to prevent warping as they absorb moisture from the soil.
Can I use pallets for a raised bed if they’re missing slats?
Missing slats won’t ruin your garden—just reinforce the structure:
- Use 2x4s or metal brackets to secure loose sections.
- Fill gaps with hardware cloth (to deter burrowing pests) or extra wood scraps.
- For a cleaner look, flip the pallets inward so the rough side faces the soil.
Just ensure the bed remains sturdy and level to prevent collapsing.
What’s the cheapest way to improve drainage in a pallet garden?
Add a 5–10 cm (2–4 inch) layer of gravel, pebbles, or broken pottery at the bottom before filling with soil. This creates airflow and prevents waterlogging. For extra insurance, drill small drainage holes in the pallet’s base (if it’s solid wood) or prop it slightly off the ground with bricks or cinder blocks.
Wrapping up and next steps
Building a raised garden with pallets is a rewarding, budget-friendly way to create a durable and productive growing space—no matter your green thumb level! 🌱 With just a few tools, some basic materials, and a little creativity, you’ve got a sturdy planter ready for year-round gardening.
Now that your pallet garden is complete, it’s time to fill it with life—start by choosing your favorite plants, soil, and maybe even a few decorative touches to make it uniquely yours.
Ready to watch your garden thrive? Grab your gloves, pick out some seeds or seedlings, and get planting! 🌿 Happy growing!