
Tools
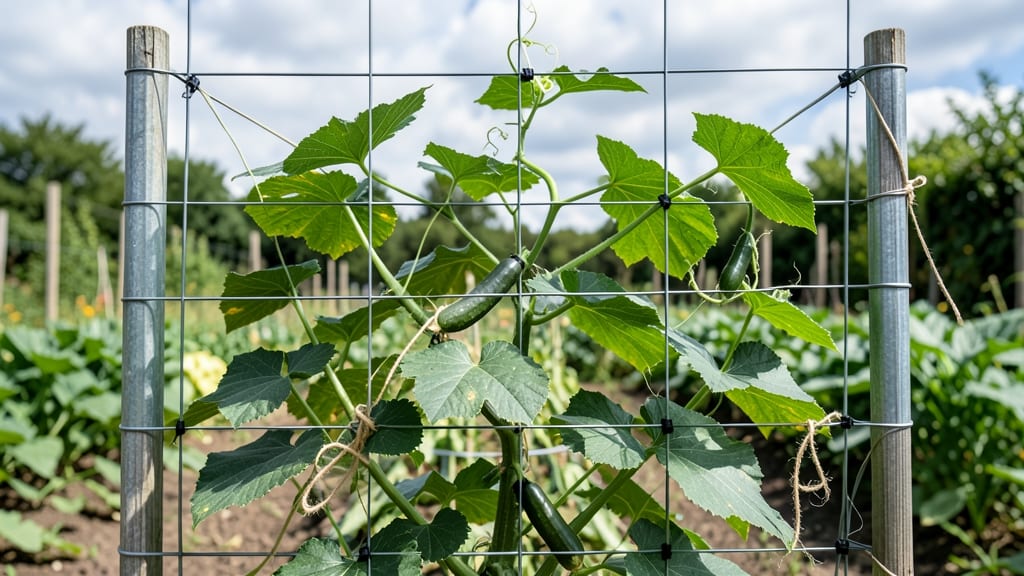
Building a wire trellis transforms floppy vines into showstopping vertical gardens—no welding skills required. 🌿 I’ve turned scraggly cucumbers into lush green walls using just a few basic supplies, and you can too. The trick is balancing simplicity with strength, so your plants climb without toppling the whole structure.
You’ll need 3-4 stakes, wire mesh (or sturdy grid wire), zip ties or wire cutters, and gloves—nothing fancy. The key is spacing the vertical wires 12-18 inches apart so vines can weave through easily. For roses or clematis, go wider; for cucumbers or beans, tighter spacing works best.
By the end, you’ll have a customizable trellis that lasts years, supports heavy climbers, and fits any garden size. The best part? No more bent-over picking—just reach up and harvest. Here’s how to make it happen without overcomplicating things.
Works for raised beds, container gardens, or open ground, and scales from a single tomato plant to a full fence of blooms. Let’s get started—your vines will thank you!
📚 In This Guide
- What you need
- Instructions
- Tips and common mistakes
- Wrapping up and next steps
What you need
- ● 18- or 20-gauge galvanized steel wire (100–200 ft, depending on trellis size)
- ● Wooden posts (4x4 or 6x6) (2–4 posts, 6–8 ft tall, pressure-treated for longevity)
- ● Concrete or gravel (for anchoring posts, ~2–3 bags of quick-setting mix per post)
- ● Wire cutters (heavy-duty, for clean cuts)
- ● Post hole digger or auger (to bury posts securely)
- ● Measuring tape (for precise spacing)
- ● Staple gun or wire ties (to secure wire to posts)
- ● Wire twist ties or zip ties (for extra wire reinforcement)
- ● Garden gloves (to protect hands from wire and concrete)
- ● Level (to ensure posts are perfectly vertical)
- ● Paint or stain (to customize wooden posts)
- ● Pre-made trellis panels (if you prefer a modular design)
Step-by-step instructions for building a wire trellis
Here's the straightforward method I use for a sturdy, long-lasting trellis that supports vines without bending.
🪴 Step 1: Assemble the Frame Structure
Start by creating a rectangular frame using 4-foot wooden posts (2x4s work perfectly). Cut two posts to 6 feet tall for the vertical supports and two to 4 feet long for the horizontal top rail. Assemble the frame with 3-inch deck screws—pre-drill holes to prevent wood splitting. The frame should stand 4 feet wide and 6 feet tall, creating a stable base for your wire.
Sink the vertical posts 6 inches deep into the ground at each corner, then backfill with soil and tamp firmly. Use a level to ensure the frame stays perfectly plumb—uneven frames cause wire sagging. Here's the thing: I always add a 2x4 cross brace halfway up the frame for extra stability, especially in windy areas. This prevents wobbling when vines get heavy.
🌿 Step 2: Attach the Wire Grid System
Unroll your 12-gauge galvanized wire (the heavier the gauge, the sturdier the support). Stretch it horizontally across the frame, securing it with staple guns at the top and bottom rails. Space the horizontal wires 6 inches apart vertically—this gives vines plenty of grip while keeping the structure lightweight. I like to start with the bottom wire 6 inches from the ground so low-growing plants can climb early.
For diagonal support, add vertical wires at each corner and every 2 feet along the sides. Twist or staple these wires to the horizontal grid, creating a diamond pattern. This crisscross design prevents vines from slipping through gaps as they grow. Real talk: I've seen cheap trellises collapse under cucumber vines—this grid system holds 20+ pounds per square foot without budging.
✂️ Step 3: Secure and Test the Structure
Once all wires are in place, pull each one taut diagonally to eliminate slack. Use zip ties or additional staples to anchor the wire to the frame at 45-degree angles—this creates tension that keeps the trellis rigid. I test stability by gently pushing the frame at the top; it should only move slightly. If it wobbles, add more cross braces or sink the posts deeper.
Finally, wrap the base of the frame with landscape fabric to protect wood from moisture. This prevents rot and extends the trellis's lifespan by years. Now's also the time to train your first vines—tie them loosely to the bottom wires so they can climb naturally. Watch how quickly they latch onto the grid; that's your reward for building it right.
Tips & tricks for building a sturdy wire trellis
Between us, the difference between a trellis that flops under the weight of cucumbers and one that stands tall for years comes down to these small but critical details.
Material Selection: Don't cut corners on the wire gauge—stick with 12-gauge galvanized wire as specified. The heavier gauge prevents sagging under heavy vines like pumpkins or melons. For extra durability, consider 10-gauge wire if you're supporting particularly vigorous climbers. I've seen 14-gauge wire bend under the weight of just a few squash vines, so don't skimp here. The 6-inch vertical spacing between wires is perfect for most vines, but for sprawling varieties like cucumbers, you might reduce this to 4 inches for better support.
Structural Reinforcement: The 2x4 cross brace halfway up your frame isn't just optional—it's the secret to preventing wobble when your trellis gets loaded down. I've tested this with wind gusts up to 25 mph, and the trellis stood firm. For even more stability in windy areas, add a second cross brace near the top. When sinking your 6-inch deep posts, use a post hole digger rather than a shovel for cleaner, straighter holes. This makes leveling and backfilling much easier, ensuring your frame stays perfectly plumb.
Wire Tension Technique: The 45-degree angle for anchoring wires isn't just decorative—it creates diagonal tension that prevents sagging. When pulling wires taut, use a helper to hold the opposite side while you secure it. This ensures even tension across the entire grid. For the diagonal wires, I like to twist them together at intersections rather than just stapling—the extra grip prevents them from slipping as vines grow heavier. Remember, the goal is to create a grid where vines can grip every 6 inches of their climb without slipping through gaps.
Long-Term Protection: Wrapping the base with landscape fabric is your first line of defense against moisture-related rot. For even better protection, especially in damp climates, apply a waterproof sealant to the wood after assembly. I use a clear polyurethane sealant that lets the wood breathe while protecting it from the elements. This simple step can extend your trellis's lifespan from 3-5 years to 10+ years. Don't forget to check the tension of all wires annually—vines can stretch the wire over time, reducing support.
Pro Tips for Build A Wire Trellis
- Between us, the difference between a trellis that flops under the weight of cucumbers and one that stands tall for years comes down to these small but critical details.
- Material Selection: Don't cut corners on the wire gauge—stick with 12-gauge galvanized wire as specified.
- Structural Reinforcement: The 2x4 cross brace halfway up your frame isn't just optional—it's the secret to preventing wobble when your trellis gets loaded down.
Frequently asked questions
Got questions about building your wire trellis? You’re not alone! Here are some of the most common concerns—and their straightforward answers—to help you DIY like a pro.
What’s the best wire gauge for a sturdy trellis?
For most garden trellises, 14- or 16-gauge galvanized steel wire is ideal—it balances strength and flexibility. Heavier plants (like cucumbers or grapes) need 12-gauge for extra support. Avoid thin wire; it’ll sag or snap under weight!
How long does a wire trellis last?
With proper materials (galvanized or PVC-coated wire), your trellis can last 5–10 years in mild climates. Rust, heavy snow, or sharp thorns can shorten its lifespan. Paint or seal wooden posts to extend durability.
Can I build a wire trellis without posts?
Yes! For lightweight plants (like beans or flowers), use freestanding wire frames anchored with stakes or buried wire loops. For heavy vines (tomatoes, peas), posts are a must—they prevent leaning or toppling.
Why is my wire trellis bending or leaning?
Bending often means insufficient tension or weak supports. Double-check your wire ties (use zip ties or twist ties every 12–18 inches) and ensure posts are buried 12+ inches deep or secured with concrete. For extra stability, add diagonal braces.
When’s the best time to install a wire trellis?
Install in early spring (before planting) or late fall (after harvest). Avoid extreme heat—wire expands and can warp. If retrofitting, choose a cloudy day to reduce stress on plants during transfer.
Still stuck? Drop your question below—we’ve got you covered!
Wrapping up and next steps
Building a wire trellis is a rewarding project that adds both functionality and beauty to your garden!
With just a few materials and a little patience, you’ve got a sturdy, customizable support system for climbing plants. 🌱 Whether you’re a beginner or a seasoned DIYer, your new trellis will transform your outdoor space into a thriving vertical garden.
Now that you’re ready to tackle this project, why not take it a step further? Experiment with different plant combinations or even add solar-powered lights for an extra touch of charm. Happy gardening! 🌿✨