
Propagation
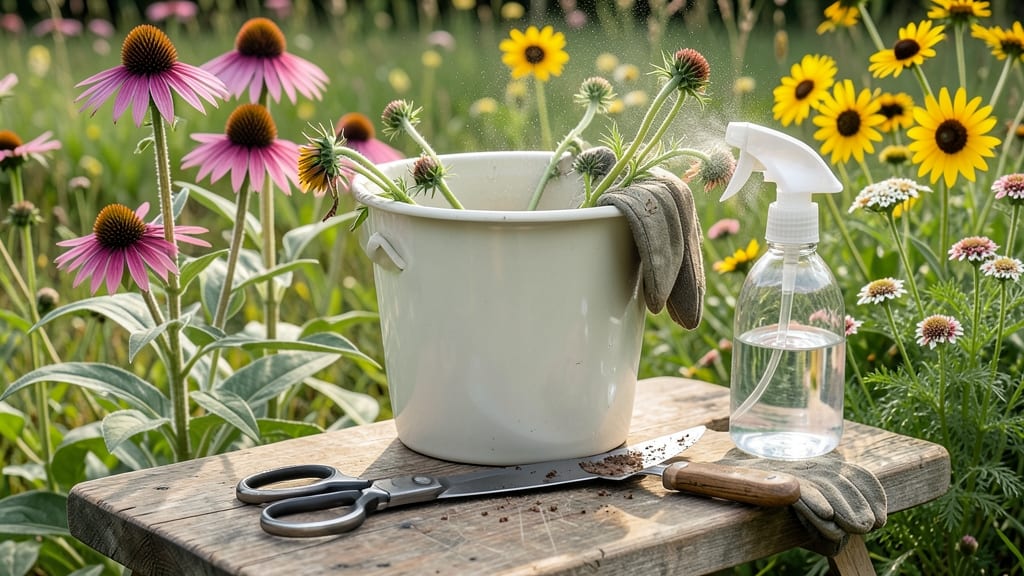
Your wildflowers deserve a sharp pair of shears—not just for bouquets, but to keep them blooming longer. ✨ I’ve spent years learning the subtle art of cutting wildflowers, and the difference between a messy snip and a precise cut is what turns a garden into a year-round showstopper.
The right technique extends bloom cycles, encourages stronger stems, and even helps your meadow thrive without overcrowding.
You’ll need just three tools: sharp pruning shears (or clean scissors), a bucket of water, and a clear day when blooms are fully open but before they start wilting. Timing matters—cut in the early morning when stems are hydrated, and always remove spent blooms to redirect energy into new growth.
Wildflowers like coneflowers and black-eyed Susans reward precision with weeks of extra blooms, while delicate varieties like baby’s breath need gentler handling.
After cutting, give your stems a fresh angle just above a leaf node to encourage branching. For drying, hang upside down in a dark, airy space; for arrangements, strip lower leaves and change water every two days.
The best part? Proper cutting prevents seed heads from dominating, keeping your meadow’s natural balance intact. You’ll end up with both stunning displays and a garden that keeps giving.
This works for wildflower meadows, cottage gardens, or even roadside patches—just adjust your approach based on plant type. Whether you’re harvesting for bouquets or maintaining your meadow, these techniques turn cutting from a chore into a way to extend the magic of summer well into fall.
Let’s get those stems looking their best!
📚 In This Guide
- What you need
- Instructions
- Tips and common mistakes
- Wrapping up and next steps
What you need
- ● Pruning shears or sharp garden scissors: Choose bypass pruners (for clean cuts) or anvil shears (for tougher stems). A 5-inch blade is ideal for most wildflowers. Pro tip: Keep blades sharp and sterilized with rubbing alcohol to prevent disease! 💡
- ● Clean, sharp knife or razor blade: For delicate stems (e.g., baby’s breath or cosmos). A X-Acto knife or utility knife works well.
- ○ Bucket or vase: Fill with lukewarm water (1–2 gallons) to keep cut flowers hydrated. Add a flower food packet (optional but recommended for longevity).
- ● Containers for propagation (if dividing plants): Small pots (4–6 inches in diameter) with drainage holes and well-draining soil (e.g., 60% potting mix + 40% perlite).
- ○ Gloves (optional): Lightweight gardening gloves to protect hands from thorns (e.g., roses, thistles) or prickly stems.
- ● Ruler or measuring tape: For trimming stems to uniform lengths (typically 10–18 inches, depending on flower type).
- ● Floral preservative: DIY mix (1 tsp sugar + 1 tsp bleach + 1 quart water) to extend vase life.
- ● Spray bottle: For misting cuttings if rooting new plants (e.g., for propagation).
- ● Hairspray or floral adhesive: To secure loose petals or stems during transport.
- ● Notebook & pen: Label stems if separating varieties for propagation or bouquets.
- ● Kneeling pad: For comfort during long cutting sessions.
Step-by-Step instructions for cutting wildflowers
Master this technique and you'll extend vase life by days while keeping your wildflower patch thriving.
✂️ Step 1: Choose the Right Time and Tools
Wildflowers bloom best when cut in the early morning after dew has evaporated but before the sun peaks. This ensures stems are hydrated and cuts cleanly. I always use sharp, clean pruners—dull blades crush stems, shortening vase life. For delicate blooms, I switch to clean scissors to avoid tearing petals.
Never cut with garden shears or hedge trimmers—they're too heavy and can damage stems. If you're harvesting a large bouquet, bring a bucket of fresh water to immediately submerge stems. This prevents air bubbles from blocking water uptake, which is the #1 reason cut wildflowers wilt fast.
🌿 Step 2: Select Healthy, Mature Blooms
Look for flowers that have fully opened but aren't past their peak—these will last longest in arrangements. Avoid buds that are still tightly closed or blooms with brown edges. I also skip any flowers with visible insect damage or spots, as these spread faster once cut.
Cut stems at a 45-degree angle about 2-3 inches below the bloom. This increases the surface area for water absorption. For stems with side shoots, trim them back to encourage bushier growth next season. If you're cutting from a wildflower meadow, work in small sections to avoid disturbing the entire patch.
☀️ Step 3: Condition Stems for Maximum Freshness
Immediately after cutting, strip all leaves that will sit below the water line in your vase. These rot and cloud the water. I use my fingers to gently pull leaves downward—never tear them, as this damages the stem. For stems with thorns or prickly leaves (like roses or black-eyed susans), wear light gardening gloves to protect your hands.
Place stems in a bucket of lukewarm water for 30 minutes to an hour before arranging. This hydrates them deeply. For extra longevity, add one teaspoon of bleach per gallon of water to prevent bacterial growth. You'll notice stems perking up almost instantly—this is your signal they're ready for the vase.
⏰ Step 4: Store and Transport Properly
If you can't arrange the flowers immediately, store them in a cool, dark place with stems submerged in water. A cooler or refrigerator works best—just wrap them in a damp paper towel to retain moisture. Never store them upright in standing water for more than a few hours, as this can cause stems to rot.
When transporting, secure stems in a container with water and place it in the trunk of your car where temperatures stay stable. Avoid leaving them in a hot vehicle—even for 10 minutes, stems can overheat and wilt before you even get home. I always carry a small spray bottle to mist stems if they start to droop during transport.
🌱 Step 5: Prepare for the Vase
Fill your vase with lukewarm water—cold water can shock stems, while hot water damages delicate petals. Add one tablespoon of flower food (or a mix of 1 teaspoon sugar, 1 teaspoon bleach, and 1/4 teaspoon aloe vera gel) to extend vase life. Trim stems again at the 45-degree angle just before placing them in the vase to ensure maximum water uptake.
Arrange stems in an odd-numbered grouping (3, 5, or 7) for natural balance. Start with the tallest stems in the center and work outward with shorter ones. Once placed, recut stems under water to prevent air bubbles from blocking the xylem. You'll see immediate perking up—this confirms your cutting technique worked.
Tips & tricks for perfect wildflower trimming
These precision techniques will transform your wildflower harvest from wilted disappointment to vase-ready masterpieces.
Timing is Everything: The early morning window between dew evaporation and peak sun isn't just ideal—it's essential. Dew keeps stems hydrated while cooler temperatures prevent wilting. I've learned the hard way that cutting after 10 AM often means flowers arrive home already drooping. If you must cut later, work in shade and submerge stems immediately in water to counteract heat stress.
Tool Selection Matters: I can't stress enough how dull blades ruin everything. Test your pruners by cutting a leaf—if it crushes instead of cleanly slicing, sharpen them first. For stems thicker than a pencil, I use heavy-duty pruners, while delicate blooms like baby's breath get the scissors treatment. Pro tip: Keep a small spray bottle of rubbing alcohol handy to wipe blades between cuts—this prevents bacterial transfer between stems.
Angle Precision: That 45-degree cut isn't just decorative—it's science. The increased surface area lets stems drink up to 30% more water. To get it right, hold your pruners at a 45-degree angle to the stem (not the ground) and make a clean, single motion. Practice on a few stems first—you'll know it's correct when the cut edge looks like a perfect diagonal slice through a pencil, not a jagged tear.
Hydration Hack: The 30 minutes to 1 hour soaking time in Step 3 is your secret weapon against wilt. But here's what nobody tells you: lukewarm water works better than cold for hydration. Cold water can shock stems, while hot water damages delicate petals. I use a thermometer to confirm it's between 70-80°F—right out of the tap is perfect. Add that bleach solution (just a teaspoon per gallon!) to keep bacteria at bay during the soak.
Pro Tips for Cut Wildflowers
- These precision techniques will transform your wildflower harvest from wilted disappointment to vase-ready masterpieces.
- Timing is Everything: The early morning window between dew evaporation and peak sun isn't just ideal—it's essential. ...
- Tool Selection Matters: I can't stress enough how dull blades ruin everything. Test your pruners by cutting a leaf—if...
Frequently asked questions
Got questions about cutting wildflowers like a pro?
Here are some of the most common concerns—plus quick, actionable answers to keep your blooms thriving and your garden looking its best.
When is the best time of day to cut wildflowers for the longest vase life?
The early morning (just after sunrise) is ideal—stems are fully hydrated, and the cool air helps preserve moisture. Avoid cutting in the heat of the day; stems can wilt faster due to transpiration. If morning isn’t possible, late afternoon works too, but trim immediately and place in water to prevent wilting.
How do I know which stems to cut to encourage more blooms?
Focus on spent blooms (those that have faded or are wilting) and overcrowded stems. Cutting them back to a healthy leaf node (about 1/3 of the way down) signals the plant to redirect energy to new growth. Avoid cutting back too much—leave at least 2-3 sets of leaves to support photosynthesis.
Why do my freshly cut wildflowers wilt so fast, even after trimming properly?
Wilting often stems from air bubbles in the stem or bacterial growth in the water. To fix it:
You can cut buds, but they’ll open slower in the vase. For the best results:
Use clean, sharp pruners or shears (disinfect with rubbing alcohol first!) and cut just above a leaf node at a slight angle. Avoid tearing stems—this can introduce disease. For delicate wildflowers, snip close to the ground (but not too low) to prevent uprooting. Always cut on a dry, sunny day when plants are hydrated. Don’t panic! Most wildflowers are resilient. If you’ve over-cut:
Can I cut wildflowers that are still in bud form, or should I wait for them to bloom?
What’s the best way to cut wildflowers without damaging the plant?
What should I do if I accidentally cut too many stems from one wildflower plant?
Wrapping up and next steps
Cutting wildflowers the right way isn’t just about snipping stems—it’s about celebrating their beauty while keeping them thriving. By following these steps, you’ll enjoy longer-lasting blooms, healthier plants, and stunning arrangements that brighten up any space.
Now that you’re armed with the know-how, grab those shears and get creative! 🌸
Your Next Step:
- Experiment with different cutting techniques to see what works best for your favorite wildflowers.
- Share your blooms with friends or create a DIY bouquet for your home.
- Join a local gardening group to swap tips and trade cuttings!