
Lawn
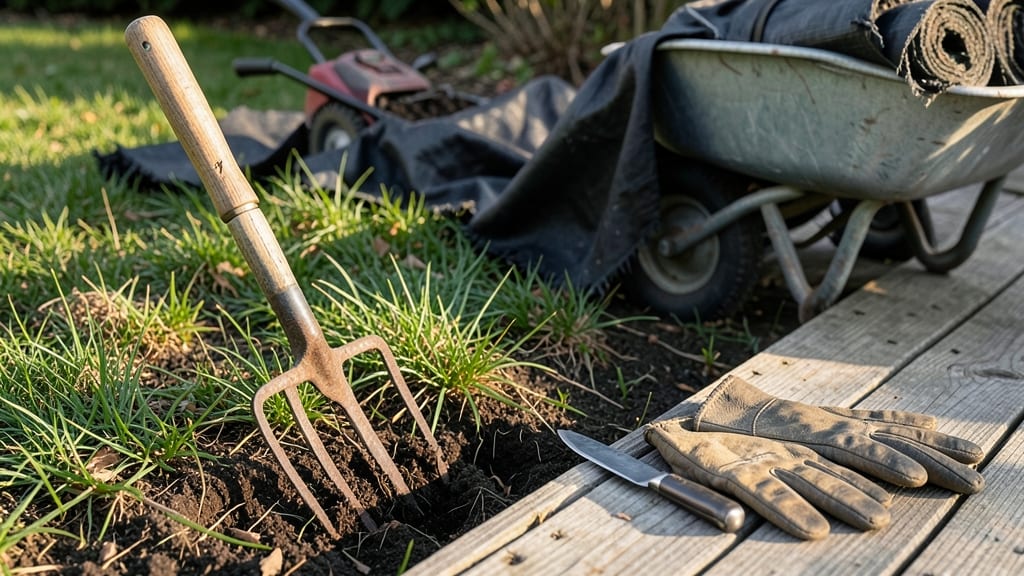
That first patch of bare earth feels like unlocking a secret garden. 🌱 Digging up grass doesn’t have to mean backbreaking work—this no-till method saves your back while preparing soil better than tilling ever could.
The key? Timing, the right tools, and knowing how to work with stubborn roots instead of fighting them.
You’ll need just three essential tools: a sharp sod cutter (or sturdy shovel), a rake for cleanup, and a tarp to haul away the sod. Spring or early fall are ideal—grass grows slower, so you’ll have less regrowth to battle.
And here’s the best part: that sod you remove? It’s not trash—it can become mulch, compost, or even new lawn patches elsewhere.
Within 2-3 hours, you’ll have a weed-free, loose soil bed ready for planting. No more compacted turf fighting your garden tools. The roots break down naturally, feeding your soil over time. Plus, this method preserves beneficial soil organisms that tilling would destroy.
Even if your grass fights back, don’t panic—we’ll cover how to handle stubborn roots and keep regrowth at bay. By the end, you’ll have soil so rich and workable, your first plants will practically sing with gratitude. Ready to transform that lawn into a thriving garden?
📚 In This Guide
- What you need
- Instructions
- Tips and common mistakes
- Wrapping up and next steps
What you need
- ● Shovel – A flat-edged digging shovel (16–18 inches wide) for breaking up soil and grass. Bonus tip: A mattress shovel (with a flat blade) works great for slicing through roots!
- ● Garden Fork – A sturdy heavy-duty fork (18–24 inches) to loosen compacted soil and remove debris.
- ● Pruners or Loppers – For trimming thick grass roots or weeds at the edges.
- ● Wheelbarrow or Large Bags – A 5–7 cubic foot wheelbarrow (or heavy-duty trash bags) to haul away sod and debris.
- ● Garden Gloves – Durable, reinforced gloves (waterproof if possible) to protect your hands from thorns and rough edges.
- ● Rake – A bow rake (for leveling soil) or a leaf rake (for clearing debris).
- ○ Knee Pads or Padding – Optional but highly recommended for comfort during long digging sessions!
- ● Sod Cutter – If you’re removing large sections, a manual or electric sod cutter speeds up the process.
- ● Vinyl or Landscape Fabric – To suppress weeds before planting your garden.
- ● Compost or Soil Amendments – Peat moss, compost, or aged manure to enrich the soil post-removal.
- ● Spray Bottle with Vinegar – For spot-treating stubborn weeds before digging.
- ● Measuring Tape – To mark out garden beds for precision.
Step-by-step instructions for removing grass without digging
Here's how I transform lawns into garden beds without the backbreaking work.
🌱 Step 1: Smother the Grass with Cardboard and Mulch
Lay down 2-3 layers of flattened cardboard over the grass area, overlapping seams by at least 4 inches. This blocks sunlight completely, which kills grass in 4-6 weeks without disturbing the soil structure. I always use plain, unprinted cardboard—no glossy finishes or tape, as these can leach chemicals.
Overlap the edges to prevent sunlight from creeping in around the edges. You'll see the grass turn yellow and eventually brown as it decomposes. This is the moment that matters: once the grass is completely dead, you're ready for the next step. I like to weigh down the edges with rocks or bricks to keep everything flat and secure.
💧 Step 2: Add 4-6 Inches of Mulch or Compost
Spread 4-6 inches of organic mulch or compost over the cardboard. I prefer wood chips or straw because they break down slowly and improve soil structure over time. This layer also prevents weeds from sprouting through the cardboard.
Work the mulch into the soil slightly by raking it gently. You want it to blend with the top layer of soil without disturbing the cardboard underneath. The mulch will start to decompose, adding nutrients to the soil while breaking down the cardboard layer over time. This process takes about 2-3 months to fully integrate into the soil.
☀️ Step 3: Test the Soil and Prepare for Planting
After 6-8 weeks, the cardboard will have decomposed enough to mix into the soil. Use a garden fork to gently loosen the top 6 inches of soil, breaking up any remaining cardboard pieces. You'll notice the soil is softer and easier to work with—this means the no-till process is working.
Test the soil pH using a simple kit from your garden center. Most vegetables prefer a pH between 6.0 and 7.0. If your soil is too acidic or alkaline, add lime or sulfur as needed. Once the soil is ready, you can plant directly without needing to till, preserving the beneficial soil organisms and structure.
⏰ Step 4: Plant and Maintain Your New Garden
Now that the soil is prepped, it's time to plant. Choose plants that suit your climate and sunlight conditions. Water deeply after planting to help the roots establish. I always water in the morning so the soil has time to dry slightly during the day, reducing the risk of fungal diseases.
Keep the area mulched to retain moisture and suppress weeds. You'll see new growth within 2-3 weeks, depending on the plants you've chosen. This method is gentle on the soil and saves you from the heavy work of digging, making it perfect for beginners or anyone looking for a simpler approach to garden prep.
Tips & tricks for perfect no-till soil prep
Here's what I wish I knew before transforming my own lawn into garden beds.
Cardboard Quality Matters: The cardboard you use makes all the difference. Avoid glossy or printed cardboard—those inks and finishes can leach chemicals into your soil. Plain, unbleached cardboard breaks down cleanly and won't introduce unwanted contaminants. I've found that the kind used for moving boxes works perfectly, just make sure it's not coated with plastic or tape.
Timing is Everything: Those 4-6 weeks for grass decomposition might seem like a long wait, but it's crucial for complete elimination. I learned this the hard way by checking too soon—some grass roots can survive if you remove the cardboard prematurely. Mark your calendar and be patient; you'll thank yourself when planting time comes. The key is seeing the grass turn completely brown and crispy before proceeding.
Mulch Layer Strategy: When adding your 4-6 inches of mulch, consider using a mix of materials for best results. I often combine wood chips with straw—the wood chips break down slowly while the straw adds nitrogen as it decomposes. This creates a balanced environment for your future plants. Just make sure to keep the mulch layer thick enough to block any remaining light to the grass below.
Soil Testing Shortcut: If you're unsure about your soil pH, there's a quick test you can do without buying a kit. Mix equal parts of your soil with white vinegar. If it fizzes, your soil is alkaline; if it doesn't react, it's likely acidic. This gives you a general idea before investing in a proper test kit. Most garden centers sell affordable pH testers that will give you precise readings for about $10.
Pro Tips for Dig Up Grass For A Garden
- Here's what I wish I knew before transforming my own lawn into garden beds.
- Cardboard Quality Matters: The cardboard you use makes all the difference.
- Timing is Everything: Those 4-6 weeks for grass decomposition might seem like a long wait, but it's crucial for complete elimination.
Frequently asked questions
Got questions about digging up grass for your garden? You’re not alone! Here are some of the most common concerns—and their straightforward answers—to help you tackle the project with confidence.
When is the best time of year to dig up grass for a garden?
The ideal times are early spring (before grass grows aggressively) or late summer/early fall (when grass is dormant). Avoid peak summer heat or winter freezes, as these can stress the soil and plants. If you’re in a mild climate, spring is usually the easiest option!
Do I need to remove all the grass roots, or can I just dig shallowly?
While you don’t need to dig every single root, removing as much as possible (especially deep roots) prevents regrowth and reduces competition for nutrients. For a no-till approach, smothering the grass with cardboard or landscape fabric first can weaken it before digging. Shallow digging may leave stubborn patches—patience pays off!
What if my grass keeps growing back after I dig it up?
Persistent grass regrowth usually means roots or rhizomes (like in Bermuda or Kentucky bluegrass) survived. To fix it, double-check for missed roots and consider smothering the area with thick layers of mulch or black plastic for 4–6 weeks before planting. Solarization (covering with clear plastic in hot sun) can also kill lingering grass.
Can I reuse the grass clumps as mulch or compost?
Yes! Grass clumps can be chopped into small pieces and used as mulch (especially for pathways or weed suppression) or added to a compost pile. Just mix them with nitrogen-rich materials (like manure or coffee grounds) to balance the carbon-to-nitrogen ratio. Avoid using it directly on fresh garden beds, as it can mat and hinder water absorption.
What’s the easiest way to dig up grass without a shovel?
If you’re short on tools, try these methods:
- Garden fork: Puncture the soil in a grid pattern to loosen roots, then pull up chunks.
- Sod cutter: Rents cheaply and slices grass into manageable strips.
- Sheet mulching: Layer cardboard + compost over grass, wait 3–6 months, then plant directly.
- Rent a tiller: Speeds up the process for larger areas.
Wrapping up and next steps
Digging up grass for your garden doesn’t have to be a daunting task—with the right tools and techniques, you can transform your lawn into a thriving garden bed in no time! 🌱 The key is patience, proper prep, and a no-till approach to preserve your soil’s health.
Whether you’re clearing a small patch or a larger area, these steps will set you up for gardening success.
Now that you’re ready, take the next step! Start small—pick a section of your lawn, follow the steps, and enjoy the satisfaction of watching your garden grow. Happy digging, and may your new garden be as rewarding as the effort you put in! 🌿✨