
Watering
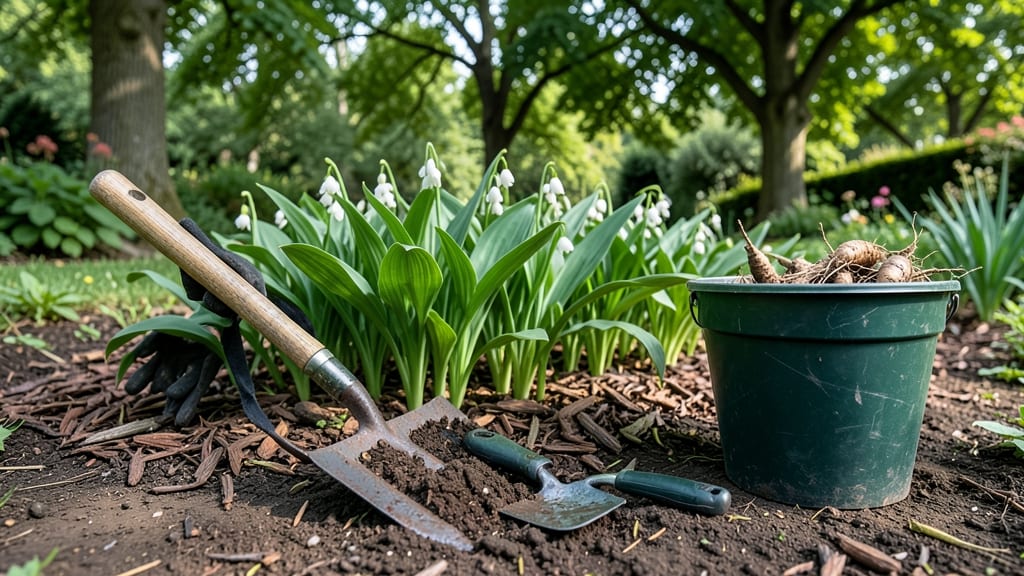
Digging up lily of the valley feels like handling a delicate treasure—one wrong move and you risk damaging the roots. ✨ I’ve learned the hard way that patience and the right tools make all the difference when relocating these classic perennials without stressing the plants.
Timing matters most: early autumn or spring, when the soil is soft and the plant isn’t actively flowering. You’ll need a sharp trowel, sturdy gloves, and a bucket of water nearby to keep roots hydrated.
The goal is to lift entire root clumps gently, shaking off excess soil to assess health before replanting or dividing.
Once you’ve carefully extracted the roots, you’ll see why gardeners love this plant—thick, fibrous networks that spread easily. Replant immediately in well-draining soil with partial shade, or store roots in a cool, moist environment until you’re ready. The key is keeping them from drying out during the process.
This method works for both small divisions and larger clumps, making it perfect for expanding your garden or sharing plants with friends. Just avoid digging during extreme heat or cold, and you’ll have healthy transplants ready to thrive in their new home.
📚 In This Guide
- What you need
- Instructions
- Tips and common mistakes
- Wrapping up and next steps
What you need
- ● Garden fork or digging fork – A 4- to 6-tine, sturdy fork (18-24 inches long) to loosen soil without crushing roots.
- ● Hand trowel – A small, sharp-edged trowel (4-6 inches wide) for precision around roots and crowns.
- ● Garden gloves – Thick, reinforced gloves to protect your hands from sharp soil and rhizomes.
- ● Pruners or sharp scissors – For trimming dead or damaged foliage before or after digging.
- ● Watering can or hose – To pre-moisten the soil (1-2 gallons) before digging for easier extraction.
- ● Buckets or containers – 2-3 large, sturdy buckets (5+ gallons each) to hold dug-up plants and soil.
- ● Burlap or landscape fabric – A small piece (2x2 feet) to wrap roots for transport if relocating.
- ● Root stimulator or mycorrhizal powder – To boost root health before replanting (follow package instructions).
- ● Mulch or compost – A small bag (5-10 gallons) to amend the soil in the new planting area.
- ● Kneeling pad – For comfort during long digging sessions.
- ● Spray bottle with water – To keep roots moist while handling.
- ● Labeling tags – If dividing multiple clumps, writeable tags help track varieties.
Step-by-Step instructions for digging up lily of the valley
Here's how to carefully relocate these delicate perennials without shocking the plants.
🪴 Step 1: Choose the Right Time and Tools
Dig up lily of the valley in early spring or fall when the plant is dormant but still has some roots intact. Avoid mid-summer when roots are fully active. You'll need a sharp spade (not a shovel—it's too heavy), pruning shears, and a bucket of water to keep roots moist during the process.
Work on a cool, overcast day to reduce stress on the plants. If you must dig on a sunny day, move the clumps to shade immediately after extraction. The goal is to keep the roots from drying out—lily of the valley roots are fibrous and break easily when dry.
✂️ Step 2: Loosen the Soil Around the Clump
Use your spade to cut through the soil 2-3 inches away from the outer edge of the lily of the valley clump. Work your way inward in a circular motion, keeping the blade vertical to avoid slicing into the roots. The soil around these plants is often dense, so you may need to press down firmly with your foot while pulling the spade upward.
Once you've created a 1-inch-wide trench around the entire clump, gently wiggle the spade underneath to lift the root ball rather than pulling upward. Lily of the valley spreads aggressively through underground runners, so you'll often find multiple connected clumps. Use pruning shears to separate these at the roots if needed—just cut through the connecting rhizomes cleanly.
💧 Step 3: Extract and Prepare for Transport
Lift the entire root ball out of the ground, keeping it upright to prevent roots from tangling. If the clump is large, you can divide it into smaller sections (3-4 inches wide) for easier handling. Place each section immediately into the bucket of water to keep roots hydrated—this prevents them from drying out during transport.
Inspect the roots for any rotted or mushy sections, which should be trimmed away with clean pruning shears. Healthy roots should be white or light tan and firm to the touch. If you notice dark, slimy areas, that's a sign of root rot—discard those sections entirely to prevent spreading disease to your new planting site.
☀️ Step 4: Replant Immediately or Store Properly
Lily of the valley thrives when replanted within 24 hours of digging. Choose a new location with partial shade and well-draining soil—these plants hate soggy roots but also won't tolerate harsh afternoon sun. Dig a hole twice as wide as the root ball but only as deep as it was originally planted.
If you can't replant right away, store the clumps in a cool, dark place (like a garage) wrapped in damp sphagnum moss or buried in a container of moist potting mix. Check daily to ensure the moss or soil stays damp but not waterlogged. Replant as soon as possible—roots can dry out quickly even with these precautions.
🌱 Step 5: Water and Monitor Newly Transplanted Clumps
After replanting, water the area deeply to settle the soil around the roots. Use a soaker hose or watering can to avoid disturbing the newly placed clumps. Keep the soil consistently moist (not soggy) for the first 2-3 weeks—this encourages root establishment in the new location.
Watch for wilting or yellowing leaves in the first week, which is normal stress from transplant shock. If the leaves turn crispy or brown, you've either underwatered or overwatered. Lily of the valley is hardy once established, but the first month is critical. Avoid fertilizing for at least 6 weeks—new roots need time to adapt before taking up nutrients.
Tips & tricks for perfect lily of the valley relocation
Between us, relocating lily of the valley clumps successfully comes down to patience and precision. Here's what I've learned from years of gardening mishaps—and how to avoid them.
Timing Secret: The 24-hour pre-watering in Step 2 is non-negotiable. I learned this the hard way after tearing delicate roots trying to dig in dry soil. Watering loosens the soil naturally, making Step 3's extraction effortless. If you're working in clay soil, add an extra 12 hours of watering—it makes all the difference when lifting that stubborn clump.
Tool Technique: Never use a dull spade in Step 3—it's the fastest way to shred rhizomes. I keep a small file in my gardening toolkit to sharpen blades before each use. For stubborn roots, switch to your garden fork after the initial cut; its tines help pry without tearing. And here's a pro move: wrap your spade handle with tape for better grip when lifting heavy clumps.
Root Rescue Strategy: When dividing in Step 3, look for the thickest rhizomes—they're the most resilient. If you accidentally sever a section, don't toss it! Place the damaged piece in a shallow tray of water (not deep) for 24 hours. Many will regrow into healthy new plants. I've revived what seemed like dead sections this way—it's like plant CPR.
Aftercare Wisdom: That 2-week partial shade period in Step 5 is crucial, but don't overthink it. A simple shade cloth or even moving potted plants nearby works perfectly. The real secret? Monitor soil moisture with your finger—not just the calendar. Stick your finger 2 inches deep; if it feels dry, water. This prevents both underwatering and root rot, which are the two biggest killers of newly transplanted divisions.
Pro Tips for Dig Up Lily Of The Valley
- Between us, relocating lily of the valley clumps successfully comes down to patience and precision.
- Timing Secret: The 24-hour pre-watering in Step 2 is non-negotiable.
- Tool Technique: Never use a dull spade in Step 3—it's the fastest way to shred rhizomes.
Frequently asked questions
Got questions about digging up lily of the valley? You're not alone!
Here are the most common concerns—plus expert answers to keep your plants (and your sanity) intact.
When is the best time to dig up lily of the valley?
Dig in early spring (March–April) or early fall (September–October) when the plant is dormant but roots are still active. Avoid summer heat or winter frost—both stress the plant and reduce survival rates. Pro tip: Overcast days minimize transplant shock!
How do I dig up lily of the valley without damaging the roots?
Use a sharp spade or garden fork to loosen soil around the edges first. Gently lift the entire clump (roots and all) in one piece—never pull. If roots break, trim ragged edges with clean shears. Warning: Wear gloves! The plant’s sap can irritate skin.
Can I divide lily of the valley while digging it up?
Divide only if the clump is 3+ years old and has multiple stems. Separate with your hands or a knife, ensuring each section has 3–5 healthy buds. Replant divisions immediately or store in a cool, shaded spot with moist soil until spring.
What should I do if my lily of the valley dies after transplanting?
Don’t panic! Check for these fixes:
- Root rot: Ensure soil drains well (amend with perlite if needed).
- Overwatering: Water only when the top inch of soil is dry.
- Sunburn: Move to partial shade if leaves yellow.
Are there alternatives to digging up lily of the valley?
If you love the look but hate the digging, try these low-maintenance swaps:
- Pacific Coast Iris (fragrant, shade-tolerant, spreads easily).
- Solomon’s Seal (arching stems, deer-resistant).
- Hosta (foliage-focused, thrives in shade).
Wrapping up and next steps
Digging up lily of the valley doesn’t have to be stressful—with the right tools, patience, and care, you can relocate or divide your plants without harming their delicate roots.
Now that you’re armed with knowledge, grab your gloves and get digging! Once your lilies are safely replanted, give them time to settle in—soon, you’ll be rewarded with fragrant blooms and lush foliage. Happy gardening!