
Propagation
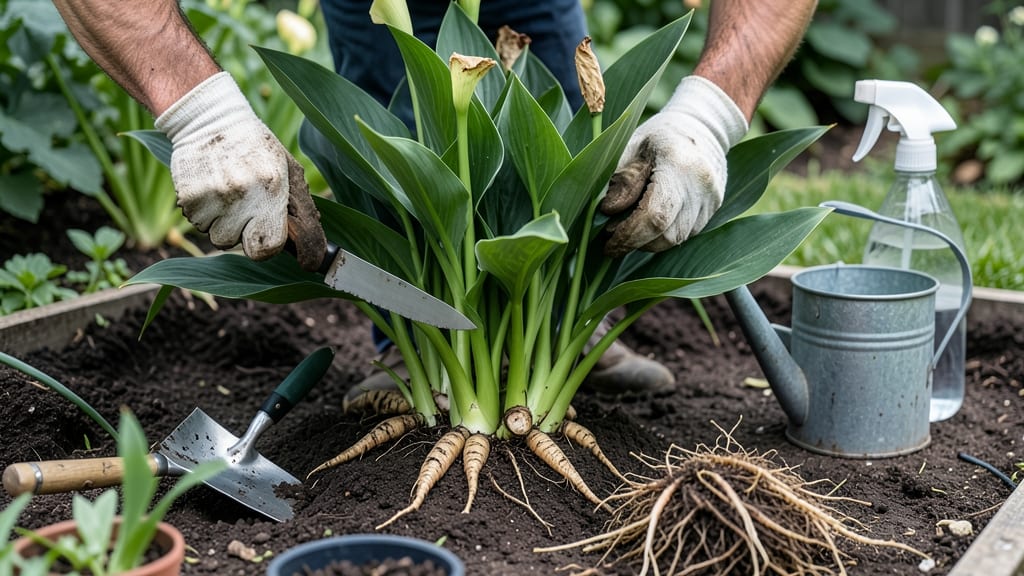
Your calla lilies are begging for a refresh—and this is how you give it. 🌱 Dividing their bulbs isn’t just about expanding your garden; it’s the secret to revitalizing tired plants that refuse to bloom like they used to.
I’ve turned my once-lazy clumps into showstopping patches by following these exact steps, and you can too.
The best time to tackle this is early spring (before new growth appears) or fall (after foliage dies back). You’ll need a sharp knife, gloves, and a sunny spot to replant. The process takes less than 30 minutes—no fancy tools, just patience and a steady hand.
Mistake? I once dug too deep and nicked a bulb. Lesson learned: work gently but confidently.
What you’ll end up with is healthier, more vigorous plants that bloom brighter and last longer. The original clump gets a second chance at life, while your new divisions fill gaps in the garden or become gifts for fellow plant lovers.
No more struggling with floppy stems or sparse flowers—just lush, productive calla lilies everywhere.
Works for both in-ground and container callas, and the timing adapts to your climate. Whether you’re dealing with a single pot or a full border, this method scales perfectly. Let’s get those bulbs dividing—and watch your garden transform before your eyes.
📚 In This Guide
- What you need
- Instructions
- Tips and common mistakes
- Wrapping up and next steps
What you need
- ● Healthy calla lily bulbs: Choose firm, plump bulbs (about 2–3 inches in diameter) with no signs of rot or soft spots.
- ● Sharp, sterilized knife or pruning shears: A clean, disinfected blade (use rubbing alcohol or bleach solution) prevents disease spread.
- ○ Gloves (optional but recommended): Protects hands from sap and sharp edges—latex or garden gloves work well.
- ● Potting mix: Well-draining, peat-based or cactus/succulent mix (avoid heavy garden soil).
- ● Containers: Small pots (4–6 inches deep) or trays for divided bulbs and rooting.
- ○ Fungicide (optional but helpful): A mild solution (like copper fungicide) to treat cuts and prevent rot.
- ● Watering can or spray bottle: For gentle hydration post-division.
- ● Rooting hormone: Speeds up growth for divided sections (follow package instructions).
- ● Plastic wrap or humidity dome: Creates a mini greenhouse to retain moisture while roots establish.
- ● Label markers: To track divided bulbs by variety or division date.
- ● Disinfectant spray (e.g., hydrogen peroxide): For sanitizing tools between cuts.
Tips & tricks for perfect calla lily division
These simple strategies will help you avoid common mistakes and grow thriving new plants from your divisions.
Timing is Everything: The 24-hour drying period in Step 3 is crucial—don't rush it! This time allows any cuts to form a protective callus, preventing rot when you replant. If you're short on time, you can reduce this to 12 hours in cool, dry conditions, but I've seen better survival rates with the full 24 hours. Place your bulbs on a wire rack in a breezy spot to ensure good airflow.
Division Quality Matters: When separating bulbs in Step 2, focus on keeping divisions with at least 2-3 tubers—these will produce stronger plants. I've learned the hard way that single-tuber divisions often fail to establish properly. If you have very small tubers, it's better to discard them than waste energy trying to grow them. Look for firm, plump tubers with no soft spots or hollow centers.
Optional Fungicide Boost: The 10-minute fungicide soak in Step 3 is completely optional but highly recommended if you're in a humid climate or have had issues with bulb rot in the past. I use a mild solution of 1 part hydrogen peroxide to 9 parts water for this step—it's effective and gentle. This extra precaution can mean the difference between thriving plants and disappointing failures, especially for beginners.
Planting Depth Secret: The 6-inch planting depth in Step 4 might seem shallow, but it's perfect for calla lilies. Planting too deep can cause the tubers to rot, while planting too shallow exposes them to temperature fluctuations. I like to use a small stick as a depth guide when planting multiple divisions to ensure consistency. The exposed 1-2 inches of tuber will help regulate moisture levels during establishment.
Pro Tips for Divide Calla Lily Bulbs
- These simple strategies will help you avoid common mistakes and grow thriving new plants from your divisions.
- Timing is Everything: The 24-hour drying period in Step 3 is crucial—don't rush it!
- Division Quality Matters: When separating bulbs in Step 2, focus on keeping divisions with at least 2-3 tubers—these will produce stronger plants.
Frequently asked questions
Got questions about dividing calla lily bulbs? You’re not alone! Here are some of the most common queries—and their straightforward answers—to help you propagate with confidence.
When is the best time to divide calla lily bulbs?
The ideal window is late winter to early spring, just before new growth emerges. This timing ensures the bulbs have energy reserves to support rooting. If you miss this, you can divide in early fall, but avoid summer heat stress.
What if my calla lily bulbs are small or soft?
Small or mushy bulbs are not ideal for dividing—they lack the energy to establish new roots. Wait until they’re firm and at least 2 inches wide. If they’re soft, focus on reviving the parent plant first (check drainage and watering).
Can I divide calla lilies in pots instead of the ground?
Potted callas thrive when divided—just use well-draining containers (like terracotta) and a light, sandy mix. Repot divided bulbs with 1/3 buried and keep them in bright, indirect light until spring. Dormant bulbs can even overwinter indoors!
Why did my divided calla lilies die after replanting?
Common culprits: overwatering (bulbs rot), poor drainage, or stress from heat/cold. Let soil dry slightly between waterings, and avoid dividing in extreme temps. If bulbs shrivel, they may need a cool, dry rest period before regrowing.
How many bulbs should I get from one mature calla lily?
A healthy, established calla can yield 3–5 offsets per bulb when divided properly. Smaller bulbs (under 1 inch) may take 1–2 years to bloom, while larger ones (2+ inches) often flower the first season. Prioritize keeping at least 1–2 strong bulbs per division.
Wrapping up and next steps
Dividing calla lily bulbs is a rewarding way to expand your garden while keeping your plants thriving! By following these precise steps—timing, tools, and careful handling—you’ll ensure healthy new growth and vibrant blooms. 🌱✨
Now that you’re equipped with the know-how, roll up your sleeves and give it a try! Start with just a few bulbs to build confidence, and soon you’ll be sharing stunning calla lilies with fellow gardening enthusiasts. Happy propagating! 🌸