
Tools
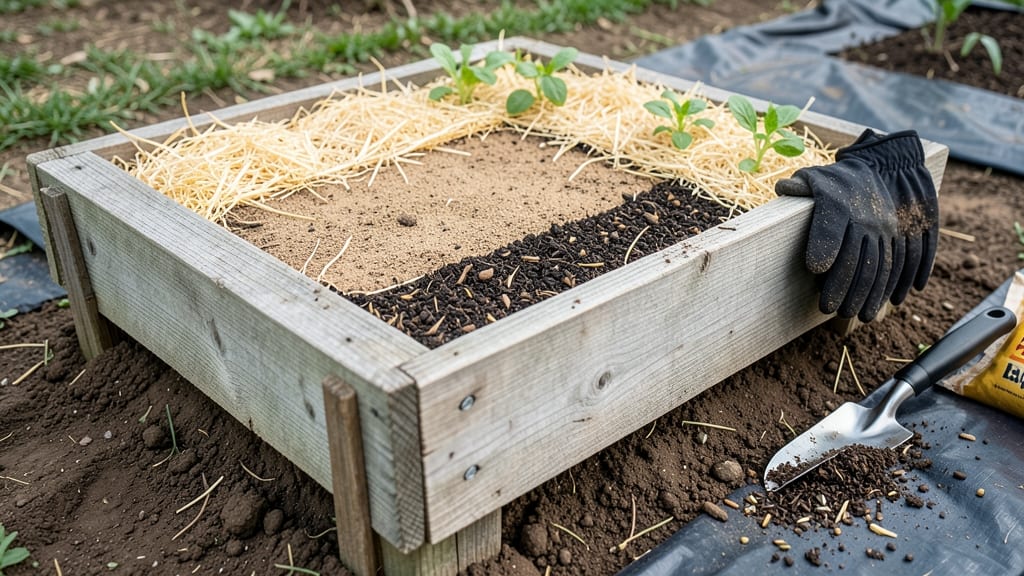
Twelve inches of soil can transform a patch of dirt into a thriving garden. 🌱 I've filled countless raised beds, and this layered approach ensures your plants grow strong while saving you money and effort. The secret lies in balancing drainage, nutrients, and space—no fancy equipment needed, just smart layering.
Start with a sturdy base: cardboard or landscape fabric to block weeds and improve drainage. Add a 2-inch layer of coarse material like twigs or straw, followed by 4 inches of compost or well-rotted manure. This combo retains moisture while preventing compaction—critical for root health in shallow beds.
Top it off with 6 inches of high-quality topsoil mixed with a handful of perlite or sand for aeration. Your plants will thank you with lush growth and fewer pests. This setup works for vegetables, herbs, and even small shrubs, making it perfect for urban gardens or small spaces.
Pro tip: Avoid filling the bed all at once—layer as you plant to keep costs low and soil fresh. And skip the cheap, clay-heavy soil; your plants deserve better. Now grab your shovel and let's get growing!
📚 In This Guide
- What you need
- Instructions
- Tips and common mistakes
- Wrapping up and next steps
What you need
- ● Raised garden bed frame: Pre-built or DIY (12" height, dimensions of your choice—e.g., 4'x8').
- ● Cardboard or landscape fabric: 1–2 sheets (to block weeds and grass).
- ● Coarse wood chips or straw: 2–3 inches (for drainage and decomposition).
- ● Compost: 2–3 inches (homemade or store-bought, well-aged).
- ● Topsoil: 4–6 inches (high-quality, garden-specific blend).
- ○ Organic matter (optional but recommended): Leaf mold or peat moss: 1–2 inches (for moisture retention).
- ● Worm castings: ½ cup per square foot (boosts nutrients).
- ● Tools: Garden gloves (1 pair).
- ● Shovel or spade (for layering).
- ● Rake (for smoothing layers).
- ● Wheelbarrow (to haul materials).
- ● Slow-release fertilizer: 1–2 cups (e.g., bone meal or fish emulsion).
- ● Perlite or vermiculite: ½ cup (improves aeration).
- ● Mulch: Straw or shredded leaves (1–2 inches, post-planting).
- ● pH testing kit: To check soil acidity (ideal: 6.0–7.0 for most veggies).
- ● Drip irrigation kit: For consistent watering (saves time!).
Step-by-step instructions for building a thriving 12-Inch raised bed
Here's my foolproof method for creating a fertile, well-draining foundation that keeps plants happy season after season.
🪴 Step 1: Start with a Sturdy Foundation Layer
Begin by adding a 2-3 inch layer of coarse material at the bottom of your raised bed. I use a mix of carbon-rich materials like untreated wood chips, straw, or shredded newspaper to improve drainage and prevent compaction. This layer also helps prevent weeds from creeping up from below.
Break up any clumps with your hands—you want this layer to be loose and airy. The goal is to create space for roots to breathe while preventing soil from washing through. If your bed has drainage holes, this layer will catch any excess water that might leak out.
🌱 Step 2: Build the Nutrient-Rich Middle Layer
Next, add a 4-inch layer of compost—this is where the magic happens. Use a mix of well-aged compost and organic matter like leaf mold or rotted manure. I like to blend in a handful of worm castings for extra microbial activity. This layer provides essential nutrients while improving soil structure.
Spread it evenly across the bed, then lightly fluff with your hands or a garden fork. Avoid compacting it too much—you want to maintain good aeration for root development. This middle layer will feed your plants for months, reducing the need for frequent fertilizing.
🌿 Step 3: Add the Topsoil Layer for Plant Growth
For the final 4-5 inch layer, use a high-quality garden soil or potting mix. I prefer a blend that includes perlite or vermiculite to keep it light and well-draining. This top layer is where your plants will grow, so choose a mix that’s rich in organic matter but not too dense.
Smooth the surface with a rake or your hands, creating a level planting area. Press down lightly to eliminate air pockets, but don’t compact it—you want roots to be able to push through easily. This layer should feel like a damp sponge, holding moisture without becoming soggy.
⏰ Step 4: Test and Adjust Before Planting
Before adding any plants, check the moisture level by pressing your finger 1-2 inches into the soil. It should feel moist but not wet—like a wrung-out sponge. If it’s too dry, water gently until moisture reaches down to your middle layer. If it’s too wet, add a thin layer of compost or perlite to improve drainage.
I also like to wait a few days before planting to let the layers settle naturally. This prevents soil from compacting around new roots. Once everything’s balanced, you’re ready to plant—your bed is now a nutrient-rich, well-draining haven for vegetables, flowers, or herbs.
Tips & tricks for perfectly layered raised garden beds
These simple strategies will help you create the ideal growing environment that keeps your plants thriving all season long.
Layer Depth Precision: Stick to the exact measurements in each step—those 2-3 inches of coarse material aren't just arbitrary. This bottom layer prevents soil from washing through drainage holes while maintaining critical air space for roots. I've seen beds fail when people skip this layer or make it too thin—roots need that breathing room! The 4-inch compost layer is equally important; it's the heart of your bed's fertility, so don't skimp here.
Material Selection Matters: When choosing your coarse materials for Step 1, avoid anything treated with chemicals—it can leach into your soil. Untreated wood chips, straw, or shredded newspaper (non-glossy) work perfectly. For your 4-inch compost layer, use well-aged compost only—fresh compost can burn tender plant roots. I always double-check my compost pile's temperature before using it; if it's still hot, it's not ready yet.
Fluffing Technique: That light fluffing in Steps 1 and 2 isn't just for show—it creates critical air pockets that prevent compaction. Use your hands or a garden fork to gently aerate each layer. Think of it like fluffing a pillow: you want it to be soft and inviting for those roots. After adding your topsoil, give it one final light press to eliminate air pockets without compacting—this is where most people go wrong and create a hardpan.
Seasonal Adjustments: In winter months, you might want to add an extra inch of mulch on top of your finished bed to protect plants from freezing temperatures. For summer planting, consider adding a thin layer of sand (about ½ inch) to your topsoil mix if your area has heavy clay soil—this improves drainage during hot, dry periods when watering becomes critical.
Pro Tips for Fill A 12 Inch Raised Garden Bed
- These simple strategies will help you create the ideal growing environment that keeps your plants thriving all season long.
- Layer Depth Precision: Stick to the exact measurements in each step—those 2-3 inches of coarse material aren't just arbitrary.
- Material Selection Matters: When choosing your coarse materials for Step 1, avoid anything treated with chemicals—it can leach into your soil.
Frequently asked questions
Got questions about filling your 12-inch raised garden bed? You’re not alone! Here are answers to the most common concerns—so you can get growing with confidence.
What’s the best soil mix for a 12-inch raised bed?
A balanced blend of 60% topsoil, 30% compost, and 10% perlite or coarse sand works best. This combo improves drainage, aeration, and nutrient retention. Avoid pure garden soil—it compacts easily and lacks organic matter. For heavy clay soil, add more perlite or vermiculite to loosen the mix.
Can I fill the bed all at once, or should I layer it?
Layering is key! Start with 2–3 inches of coarse material (gravel or wood chips) at the bottom for drainage, then add 6 inches of compost, followed by 3–4 inches of topsoil. Top with 1–2 inches of finished soil mix. Layering prevents compaction and ensures roots have room to grow downward while accessing nutrients.
What if I don’t have compost? Are there alternatives?
No compost? No problem! Use well-rotted manure (cow, horse, or chicken), leaf mold, or peat moss mixed with coconut coir. Avoid fresh manure—it can burn plants. For a quick fix, blend topsoil with peat moss and a handful of worm castings (available at garden centers) to boost fertility.
Why is my raised bed sinking after filling it?
Sinking often happens if the bed isn’t sturdy or the soil settles unevenly. Reinforce the frame with corner brackets or screws if it’s wooden. For soft spots, add cardboard or landscape fabric between layers to prevent future compaction. Water the bed gently after filling to help the soil settle evenly, then top off with extra mix if needed.
When is the best time to fill a raised bed?
Fill your bed 4–6 weeks before planting to let the soil “settle” and microbes break down organic matter. In cold climates, fill in early spring (before the last frost) or late fall for winter crops. Avoid filling in extreme heat—it can dry out the soil too quickly. If you’re planting immediately, mix in slow-release fertilizer for a nutrient boost.
Wrapping up and next steps
Filling your 12-inch raised garden bed with the right soil layers is the secret to thriving plants and bountiful harvests! 🌱 By combining carbon-rich materials (like wood chips or straw) with nitrogen-rich amendments (such as compost or manure), you’ve created a nutrient-packed foundation that supports root growth and retains moisture—perfect for year-round gardening.
Whether you’re a beginner or a seasoned green thumb, this layered approach ensures your bed stays healthy and productive.
Now that your bed is ready, it’s time to plant with confidence! Start with easy-to-grow veggies like lettuce, herbs, or radishes to test your soil’s success. Happy gardening—your future harvests will thank you! 🌿✨