
Fertilization
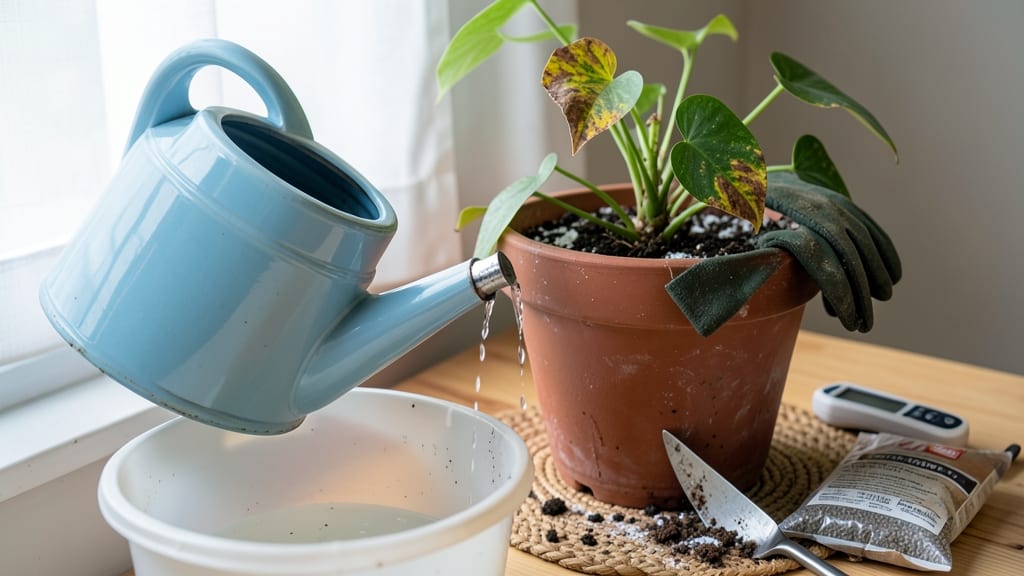
How to fix over-fertilized plants—crispy leaf edges and stunted growth mean one thing: too much fertilizer. 🌱 The good news? Fixing it is easier than you think, and I’ve saved more than a few sad-looking plants with these simple steps. Over-fertilizing creates a salt buildup that burns roots, but flushing the soil and adjusting your routine can bring them back to life in just a few days.
The first step is to stop fertilizing immediately—no more "just a little" until the soil recovers. Then, water deeply to flush out the excess salts, repeating every few days until the runoff looks clear.
For container plants, soak the pot in a bucket of water for 10-15 minutes to speed up the process. This isn’t complicated, but it does require patience and consistency to avoid shocking the roots further.
Once the soil is flushed, focus on gentle care: use half the recommended fertilizer dose moving forward, and opt for organic options that release nutrients slowly. You’ll notice new growth within a week, and those crispy edges will soften as the plant recovers.
The key is balance—soil tests (or at-home kits) can help you avoid this mess in the future.
This method works for houseplants, vegetables, and flowering annuals alike. The secret? Acting fast and giving your plants the time they need to heal. With a little TLC, your over-fertilized plants can bounce back—and you’ll learn how to keep them thriving without overdoing it.
📚 In This Guide
- What you need
- Instructions
- Tips and common mistakes
- Wrapping up and next steps
What you need
- ● Water: At least 2–3 gallons per 12-inch pot (or 1 gallon per square foot for garden beds). Use room-temperature, filtered, or rainwater if possible—avoid tap water with high chlorine or minerals.
- ● Watering can or hose: With a gentle spray or adjustable nozzle (e.g., 1–2 gallon capacity for small pots, 5+ gallons for large containers or garden beds).
- ○ pH test kit (optional but helpful): To check water pH (aim for 5.5–6.5 for most plants). A digital or liquid test kit works best.
- ● Organic matter (for soil recovery): Compost or worm castings (1–2 cups per 12-inch pot or spread evenly over garden beds).
- ● Coconut coir or peat moss (for amending heavy clay or compacted soil).
- ● Gloves and old towels: To protect your hands and clean up spills (especially if dealing with sticky fertilizer residue!).
- ● Trowel or garden fork: For gently loosening soil to help water penetrate deeper.
- ● EC (Electrical Conductivity) meter: Measures salt levels in soil (ideal for hydroponics or frequent fertilizers).
- ● Slow-release organic fertilizer: Like fish emulsion or kelp meal (1 tbsp per gallon of water) to reintroduce nutrients slowly after flushing.
- ● Mulch (straw, wood chips, or pine needles): To retain moisture and prevent future salt buildup.
Step-by-Step instructions for reviving over-fertilized plants
Here's how I rescue plants when fertilizer burns take hold—no stress, just action.
💧 Step 1: Water Deeply to Dilute Salt Buildup
Give the plant a thorough watering until water runs freely from the drainage holes. This flushes out excess salts that have accumulated in the soil. I like to use room-temperature water to avoid shocking the roots further. You'll know you've done enough when the water coming out the bottom looks clear, not white or cloudy from dissolved salts.
Don't stop here—repeat this process every 2-3 days for the next week. The goal is to keep the salts moving out of the root zone. If your plant is in a pot, place it in a sink or shallow tray to catch the runoff. This ensures you're not wasting water or leaving toxic buildup in your saucer.
✂️ Step 2: Prune Damaged Foliage and Roots
Inspect the plant for yellowed or browned leaves—these are the first signs of fertilizer burn. Use clean, sharp pruning shears to trim away any leaves that are more than 50% damaged. Cut just above a healthy leaf node to encourage new growth. I always sterilize my shears with rubbing alcohol between cuts to prevent spreading any potential infections.
If your plant is in a pot, gently remove it from the container and inspect the roots. Rinse the roots under running water to wash away any salt residue. Trim any blackened or mushy roots with sterilized scissors. Healthy roots should be firm and white or light tan. This step might seem drastic, but it's crucial for your plant's recovery.
🪴 Step 3: Repot or Refresh the Soil
If the soil looks crusted or white with salt deposits, it's time to repot. Use a clean container and fresh, high-quality potting mix. Avoid fertilizers or soil amendments for at least 4-6 weeks—your plant needs time to recover without additional stress. I like to add a handful of perlite or vermiculite to the new mix to improve drainage and prevent future salt buildup.
When repotting, place the plant at the same depth it was growing before. Water lightly after repotting to help settle the soil around the roots. Keep the new pot in a location with indirect light for the first week. This gives your plant time to adjust without the added stress of intense sunlight. You'll see new growth within 2-4 weeks if the damage wasn't severe.
☀️ Step 4: Monitor and Adjust Care
Watch your plant closely for signs of recovery. New leaves should emerge in 2-4 weeks, and they'll be a vibrant green color. If you notice any further yellowing or wilting, increase the frequency of your watering flushes. Avoid fertilizing until you see at least 3-4 inches of new growth—this ensures your plant is ready to handle nutrients again.
Here's the thing—over-fertilized plants are often a sign of overzealous care. I've learned to play it safe with half the recommended fertilizer dose. If your plant is a frequent offender, consider using a slow-release fertilizer or organic options that break down more gently. Your plant will thank you with lush, healthy growth.
Tips & tricks for reviving over-fertilized plants
Took me a while to figure these out, so here goes—these simple tweaks make all the difference when your plants are suffering from salt shock.
Watering Wisdom: When you're flushing salts in Step 1, use a slow, steady stream rather than pouring water all at once. This helps the water penetrate deeply and carry dissolved salts out of the root zone more effectively. I've found that using a watering can with a narrow spout works best for this—it gives you better control over the flow.
Pruning Precision: In Step 2, don't be afraid to be aggressive with damaged leaves. Remember, the goal is to remove only leaves that are more than 50% damaged—this encourages the plant to focus its energy on new, healthy growth. I always sterilize my shears between cuts, even when working on multiple plants, to prevent cross-contamination.
Soil Refresh Strategy: When you're repotting in Step 3, consider mixing in a bit of worm castings or compost into your fresh potting mix. This adds beneficial microbes that help break down any remaining salts and improve soil structure. Just be sure to use a high-quality potting mix—regular garden soil can introduce more salts and pathogens.
Recovery Monitoring: During the 2-4 week recovery period in Step 4, keep a small notebook by your plant. Record observations like leaf color, wilting, and new growth—this helps you track progress and identify when your plant is truly ready for fertilizer again. I've seen plants that appeared recovered but needed another week or two of careful monitoring.
Pro Tips for Fix Over Fertilized Plants
- Took me a while to figure these out, so here goes—these simple tweaks make all the difference when your plants are suffering from salt shock.
- Watering Wisdom: When you're flushing salts in Step 1, use a slow, steady stream rather than pouring water all at once.
- Pruning Precision: In Step 2, don't be afraid to be aggressive with damaged leaves.
Frequently asked questions
Got questions about reviving over-fertilized plants? You’re not alone—this happens to even the greenest thumbs! Below, we’ve rounded up the most common concerns and quick fixes to get your plants back on track.
How do I know if my plant is over-fertilized?
Watch for crispy brown leaf edges, yellowing leaves, or white crusty residue on the soil. Roots may appear burned or mushy if you check them gently. Over-fertilized plants often show signs within days to weeks, depending on the fertilizer type and concentration.
How long does it take for plants to recover after flushing?
Recovery time varies by plant type and severity. Mild cases may bounce back in 1–2 weeks, while severely damaged plants could take 4–6 weeks or longer. Keep an eye on soil moisture and avoid fertilizing until new growth appears—patience is key!
Can I use tap water to flush fertilizer out?
Yes, but check your water’s hardness first. Hard water (high in minerals) can worsen salt buildup. If unsure, use rainwater, distilled water, or filtered water for best results. For tap water users, flush 2–3 times more than usual to dilute excess salts.
What if my plant’s leaves are already crispy or falling off?
Don’t panic! Trim dead or dying leaves with clean scissors to redirect energy to healthy growth. For severe root damage, repot the plant in fresh, sterilized potting mix and water lightly until new roots form. Avoid fertilizing until you see new leaf growth (usually 2–4 weeks).
Are there any fertilizers that are less likely to over-fertilize?
Opt for slow-release fertilizers (like organic pellets) or liquid fertilizers diluted to half-strength. Fish emulsion or compost tea are gentler alternatives, as they break down slowly. Always follow label instructions and test soil pH regularly to prevent buildup.
Wrapping up and next steps
Over-fertilizing can feel like a setback, but with the right care, your plants can bounce back stronger than ever! 🌱 The key is acting fast—flush away excess salts, adjust your feeding routine, and monitor your plants closely. Don’t let a little overdoing derail your green thumb journey!
Now that you’ve got the tools and know-how, take action today. Start with one plant and observe the changes—soon, your entire garden will thank you! For even more tips, check out our guide on balancing plant nutrition.