
Pests
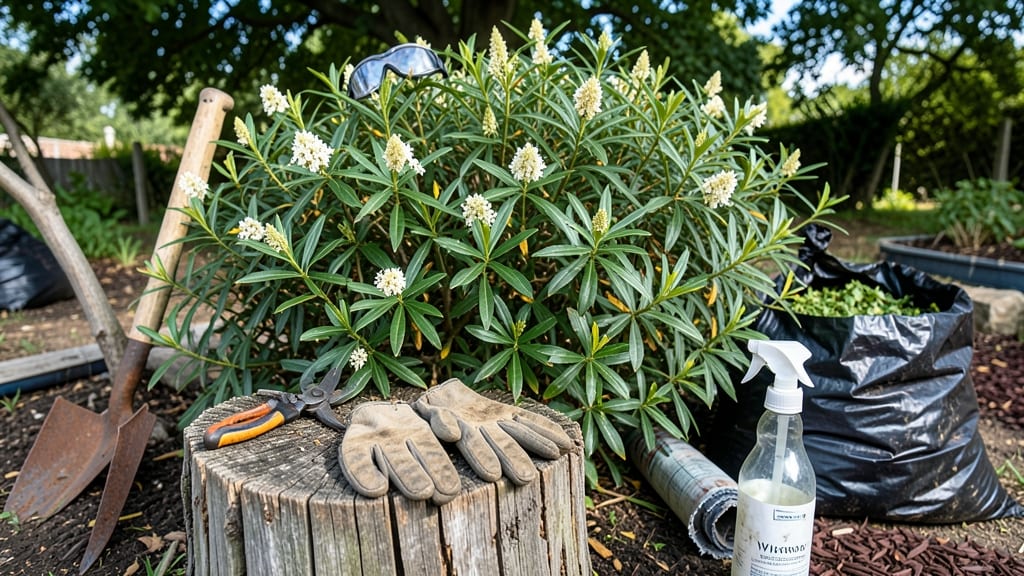
How to get rid of privet—it’s the garden’s most stubborn invader, and its thick roots don’t go down without a fight. 🌿 I’ve learned the hard way—digging too late just lets it regrow. The boil-and-pour barrier method actually works, but timing and technique matter more than brute force.
You’ll need a sharp shovel, a pot of boiling water, and a gallon of vinegar or salt for the mix. No fancy tools—just what’s in your shed. The key is hitting the roots right after cutting, before they can heal.
This isn’t a quick fix, but it’s the only way to stop privet from creeping back.
By late summer, your yard will feel lighter without that dense, unruly hedge. The barrier method kills roots on contact, so no more surprise shoots popping up next spring. Just be ready for some elbow grease—this takes patience, not magic.
Works best in dry conditions, but even in damp climates, the heat does the job. For large patches, repeat every few weeks until the ground stays clear. No chemicals, no regrowth—just a cleaner landscape.
📚 In This Guide
- What you need
- Instructions
- Tips and common mistakes
- Wrapping up and next steps
What you need
Before you dive into your privet eradication mission, gather these materials and tools to tackle the job like a pro! Whether you're using a boil-and-pour method or another approach, having the right gear ensures efficiency and safety. Here’s your
Step-by-Step instructions for eliminating privet with a boil-and-pour barrier
This method works where others fail—by starving roots and blocking regrowth.
🌱 Step 1: Identify and Mark the Privet Boundary
Walk the perimeter of the privet hedge and mark where you’ll dig the barrier trench with spray paint or flags. The trench should be 6-8 inches deep and 12-18 inches wide—deep enough to cut through the main root system. I like to draw a line with a garden hose first so I don’t miss any roots.
Digging too shallow lets roots escape, and they’ll just grow back. If the privet is thick, mark two parallel trenches, 18 inches apart, to trap roots between them. This forces the plants to exhaust their energy trying to cross the barrier instead of growing new shoots.
✂️ Step 2: Cut and Remove All Above-Ground Growth
Use loppers or a hedge trimmer to cut the privet back to 2-3 inches above the ground. Bag the clippings immediately—don’t leave them near the stump, or you’ll just regrow a new hedge. I like to do this in late winter or early spring when the plant’s energy is still dormant.
For stubborn stumps, I wrap them with black plastic sheeting and secure it tightly with wire. This smothers any remaining buds and prevents regrowth. Check weekly for new shoots—if you see any, cut them off immediately before they take root.
💧 Step 3: Dig the Barrier Trench and Pour Boiling Water
Dig the trench along your marked line, removing all soil and roots. For every 2 feet of trench, pour 1 gallon of boiling water directly into the hole. The heat kills the roots on contact, but it also sterilizes the soil to prevent regrowth. I use an old kettle or a propane boiler for large areas—just be careful not to burn yourself.
After pouring, refill the trench with clean gravel or coarse sand (not soil). This prevents new roots from crossing the barrier while still allowing water drainage. The gravel also conducts heat, keeping the area sterile longer. If you’re dealing with a large hedge, repeat this process every 3-4 feet to create a continuous barrier.
☀️ Step 4: Monitor and Maintain the Barrier
Check the area weekly for the first month, then monthly for 6-12 months. If you spot any new shoots, cut them off at the base and pour a cup of boiling water directly on the stump. Privet is persistent, so don’t let even a small sprout go unnoticed—it’ll root quickly.
Over time, the barrier will break down, so plan to renew it every 2-3 years if you’re dealing with aggressive growth. I like to mulch the cleared area with wood chips to suppress any remaining roots and keep the space weed-free. With patience, this method guarantees privet won’t return.
Tips & tricks for permanent privet eradication
This method isn't just about cutting back privet—it's about starving those stubborn roots for good. Here's how to make sure your effort pays off long-term.
Precision in Step 1: When marking your trench line, I can't stress enough how important it is to be thorough. Use a garden hose to draw the line first—this helps you visualize where roots might wander beyond your marked path. For thick hedges, those two parallel trenches 18 inches apart create a root trap that forces the plant to expend all its energy trying to cross, rather than growing new shoots. Think of it like building a moat around a castle—you want that privet completely cut off from fresh soil.
Timing is Everything in Step 2: Late winter or early spring is the absolute best time to tackle this project. That's when privet's energy is still dormant, making it much easier to cut back completely. If you see any new shoots popping up during your weekly checks, don't wait—cut them off immediately at the base and treat the stump with boiling water. I've seen privet regrow from just a tiny sprout if left unchecked, so stay vigilant. The first month is critical for spotting any survivors.
Boiling Water Safety: When pouring that gallon of boiling water every two feet, safety first! I always use a propane boiler for large areas because it gives me better control than a kettle. Keep a fire extinguisher nearby and wear gloves—those temperatures are serious business. The water needs to be truly boiling (212°F) to kill roots completely. For stubborn root systems, you might need to repeat this treatment in the same spot after a few weeks, especially if you notice any regrowth.
Long-Term Maintenance: That 2-3 year renewal schedule might seem long, but trust me, it's worth it. I've seen people give up after just a year, only to have privet come roaring back. The key is consistency—check monthly for at least a year, then annually after that. When you do renew the barrier, take the opportunity to refresh the wood chip mulch too. This double approach suppresses any remaining root activity while keeping your cleared space looking neat.
Pro Tips for Get Rid Of Privet
- This method isn't just about cutting back privet—it's about starving those stubborn roots for good.
- Precision in Step 1: When marking your trench line, I can't stress enough how important it is to be thorough.
- Timing is Everything in Step 2: Late winter or early spring is the absolute best time to tackle this project.
Frequently asked questions
Got questions about tackling privet? We’ve got answers! Here are some of the most common concerns—and solutions—to help you banish this tough invader for good.
Is vinegar really effective for killing privet?
A 20-30% vinegar solution (or even undiluted white vinegar) works wonders when applied directly to the leaves and stems. The acetic acid disrupts the plant’s cellular structure, causing it to wilt and die within days. For best results, apply on a sunny, wind-free day to prevent dilution.
How long does it take for privet to die after treatment?
With the boil-and-pour method, you’ll see visible wilting in 3–7 days, and the plant will typically die back completely in 2–4 weeks. Stubborn roots may take longer, so repeat treatments on regrowth or use a herbicide like glyphosate for stubborn cases. Patience is key—consistency wins!
Can I just pull privet out by hand?
Pulling alone is rarely enough—privet has deep, sprawling roots that regrow aggressively. If you opt for manual removal, dig at least 6–12 inches deep to sever the root system, then smother or treat the soil to prevent regrowth. For large patches, combine pulling with vinegar or herbicide for best results.
Will killing privet harm my lawn or garden?
Not if you’re careful! Vinegar and targeted herbicides won’t harm grass or nearby plants when applied precisely to privet leaves/stems. Always avoid overspray and use a shield or cardboard barrier to protect desirable plants. For extra safety, opt for natural alternatives like boiling water or salt vinegar mixes.
What if privet keeps coming back?
Regrowth is common—privet is a tenacious survivor! If it persists, you may need to:
- Repeat treatments every 2–4 weeks until fully dead.
- Apply a pre-emergent herbicide to the soil to block new sprouts.
- Consider solarization (covering the area with clear plastic for 4–6 weeks) for stubborn roots.
Wrapping up and next steps
Kicking privet to the curb doesn’t have to feel like a losing battle—with the right boil-and-pour method, you can reclaim your yard for good! 🌱 Whether you’re tackling small patches or a full-blown invasion, consistency and patience are your best allies.
Start small, follow the steps, and soon you’ll be enjoying a privet-free landscape.
Ready to take action? Grab your supplies, roll up your sleeves, and schedule that first treatment session—your future self (and your lawn) will thank you! 🚀