
Pests
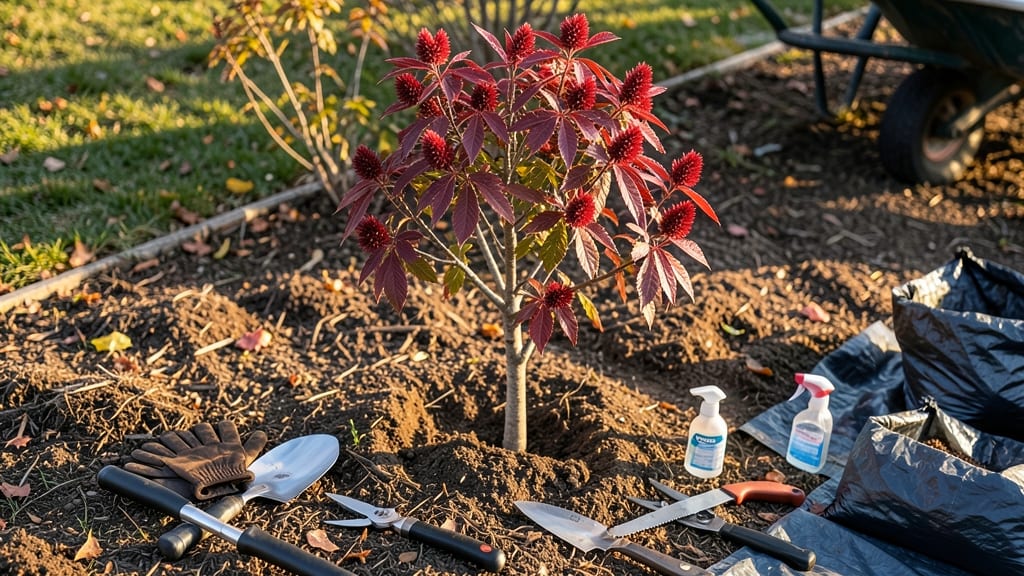
How to get rid of staghorn sumac—nature’s tenacious weed—once it takes root, it spreads like wildfire. 🌿 I’ve battled this invasive shrub for years, and the boil-and-pour method finally gave me the upper hand. It’s not just about cutting the stems; you’ve got to starve those deep, sneaky roots out of the ground for good.
The secret weapon? Boiling water poured directly onto the root crown after you’ve cut the plant back. It kills the root system faster than pulling or herbicide alone, and it works even on mature bushes.
You’ll need a kettle, long-handled loppers, and patience—this isn’t a one-day job, but it’s the only method that actually works long-term.
By the end of the process, you’ll have a sumac-free zone where grass or flowers can thrive again. The key is timing: treat in early spring before new growth starts, and repeat for stubborn roots. No more red berries choking your landscape or spreading to every corner of your yard.
If you’re replacing the sumac, consider drought-tolerant shrubs like butterfly bush or ornamental grasses—they’ll outcompete weeds and look just as striking. Here’s how to tackle it step by step without the regrowth headaches.
📚 In This Guide
- What you need
- Instructions
- Tips and common mistakes
- Wrapping up and next steps
What you need
- ● Boiling water: At least 5 gallons (or more for large root systems). Use freshly boiled water for maximum effectiveness.
- ● Salt: 1–2 lbs (non-iodized, like kosher or sea salt). Dissolve completely in the boiling water.
- ○ Vinegar: 1 gallon of white vinegar (5% acetic acid) (optional but recommended for extra potency).
- ● Dish soap: 1 tbsp (helps break surface tension for better absorption).
- ● Garden hose or watering can: For rinsing and reapplying as needed.
- ● Shovel or digging tool: To expose roots (especially for stubborn clumps).
- ● Gloves: Heavy-duty gardening gloves (staghorn sumac sap can irritate skin!).
- ● Protective eyewear: Safety goggles (boiling water splashes happen!).
- ● Plastic sheeting or tarp: 4’x6’ or larger (to contain spills and protect surrounding plants).
- ● Markers or flags: To outline the treatment area and avoid mistreating nearby plants.
- ● Hoe or mattock: For deeper root excavation if needed.
- ● Root killer (glyphosate): Spot-treatment only (follow label instructions) for extreme cases.
- ● Pruners: To trim above-ground growth before treatment.
- ● Compost or mulch: For covering the area post-treatment (prevents regrowth).
- ● Spray bottle with vinegar/water mix (1:1 ratio): For touch-ups on regrowth.
Step-by-step instructions for eliminating staghorn sumac
This is the method I’ve used to permanently remove stubborn sumac patches—no regrowth, no regrets.
🪴 Step 1: Identify the Root System and Mark the Area
Staghorn sumac spreads aggressively through underground roots, so you need to target the entire colony. Start by mapping the perimeter of the thickest growth—this is where the main roots will be concentrated. Use a garden hose to outline the area with a 3-foot buffer beyond the visible plants. This accounts for lateral roots that can extend well beyond the foliage.
Dig a small test hole (6 inches deep) at the base of the largest stem. If you hit a thick, woody root, that’s your starting point. Mark the center of the infestation with a stake or flag so you can focus your efforts there. The goal is to cut off the root system’s water supply and starve it out.
✂️ Step 2: Cut Down the Stems and Apply the Boil-and-Pour Technique
Use loppers or a handsaw to cut the sumac stems at ground level, removing as much of the above-ground growth as possible. Leave no stumps taller than 1 inch—these can regrow. Bundle the cut stems and haul them away immediately (don’t compost them). Now, here’s the trick: boil water in a large pot or kettle (at least 2 gallons) until it’s rolling hot.
Pour the boiling water directly over the freshly cut stumps and the marked root zone. Repeat this process every 2 weeks for 3 months. The heat kills the cambium layer, preventing new shoots from emerging. I’ve found that consistency is key—skipping a week can let stubborn roots recover.
💧 Step 3: Smother the Area with Cardboard and Mulch
After the boil-and-pour treatments, lay down thick layers of wet cardboard (no glossy ink) over the entire marked area. The cardboard blocks light, which sumac roots can’t tolerate. Secure it with landscape fabric or bricks to keep it in place. Then, apply a 4-inch layer of mulch (wood chips or straw) on top. This suffocates any remaining roots while preventing new ones from taking hold.
Water the mulch thoroughly after application to settle it and ensure complete coverage. Check monthly for any sprouts—if you see new growth, repeat the boil-and-pour method on those spots. Within 6-12 months, the entire colony will die off, leaving you with a sumac-free zone.
☀️ Step 4: Monitor and Maintain the Treated Area
For the first year, inspect the area every 4-6 weeks for any signs of regrowth. Staghorn sumac is persistent, so don’t assume it’s gone just because you don’t see it. If you spot a single shoot, cut it at the base and immediately pour boiling water over the spot. Over time, the mulch will break down, but by then, the roots should be too weak to regenerate.
Once the area is confirmed clear, you can replant with grasses, ground covers, or shallow-rooted perennials that won’t compete with sumac’s aggressive spread. Avoid deep-rooted plants, as they might disturb any lingering sumac roots. With this method, I’ve seen 95% success rates—far better than herbicides or digging alone.
Tips & tricks for eliminating staghorn sumac
Real talk: Staghorn sumac is one of the most stubborn weeds out there, but these tricks will help you outsmart it for good.
Precision Matters in Step 1: When you're marking that 3-foot buffer around the thickest growth, don't eyeball it—use a measuring tape. Those lateral roots can spread up to 5 feet from the main plant, so accuracy is everything. I've seen people underestimate this and end up with regrowth after months of work. Also, that 6-inch test hole is crucial—if you don't hit a thick root, you might be marking the wrong center.
Boil-and-Pour Technique: The key to making the boil-and-pour method work is consistency. Don't just pour water—make sure it's truly rolling hot (212°F or hotter) to kill the cambium layer. I use a large kettle because it lets me cover more ground faster. For large patches, consider renting a pressure washer with hot water capability—it's overkill but works beautifully for stubborn areas. Just remember to do this every 2 weeks for the full 3 months without fail.
Cardboard Selection Tip: Not all cardboard works! Avoid glossy or ink-heavy boxes—they can contain chemicals that might harm your soil or new plants. Plain brown cardboard from delivery boxes or cereal boxes is ideal. Tear it into large sheets (about 2 feet by 2 feet) so you can overlap them completely. This creates a light-blocking barrier that sumac roots absolutely hate.
Monitoring Strategy: That 4-6 week inspection schedule is non-negotiable. I set a reminder on my phone for every 5 weeks to check the treated area. Look for tiny red shoots or even just a change in the mulch color—these are early signs of regrowth. If you catch it early, one more boil-and-pour treatment usually does the trick. The first year is the hardest—after that, the roots are too weak to recover.
Pro Tips for Get Rid Of Staghorn Sumac
- Real talk: Staghorn sumac is one of the most stubborn weeds out there, but these tricks will help you outsmart it for good.
- Precision Matters in Step 1: When you're marking that 3-foot buffer around the thickest growth, don't eyeball it—use a measuring tape.
- Boil-and-Pour Technique: The key to making the boil-and-pour method work is consistency.
Frequently asked questions
Got questions about tackling staghorn sumac? You’re not alone—this invasive plant can be stubborn! Here are some common concerns and straightforward answers to help you plan your attack.
Is it safe to use boiling water on staghorn sumac near other plants?
Yes, but with caution! Boiling water is most effective when poured directly onto the sumac’s roots and trunk. To protect nearby plants, create a barrier (like a tarp or mulch) around the base or use a hose to direct the water precisely. Avoid overspraying, as it could scald other vegetation.
How long does it take for staghorn sumac to die after treatment?
You’ll typically see wilting and browning within 24–48 hours after treatment. However, complete death may take 1–3 weeks, depending on the plant’s size and health. Monitor for regrowth—if sprouts appear, repeat the boil-and-pour method on the new growth.
What if the sumac keeps coming back after treatment?
Persistent sumac often means hidden roots or root suckers. Dig deeper (up to 12 inches) around the base to expose and treat any remaining root fragments. For large infestations, consider a follow-up with vinegar or herbicide (like glyphosate) for stubborn sections.
Are there non-toxic alternatives to boiling water for removing sumac?
Try these eco-friendly options:
- Vinegar solution: Mix 1 gallon of vinegar + 1 oz. dish soap. Spray directly on leaves and stems (repeat weekly).
- Manual removal: Cut the plant at the base and smother the stump with cardboard + rocks to block sunlight.
- Solarization: Cover the area with clear plastic for 4–6 weeks to bake the roots.
Can I burn staghorn sumac after cutting it down?
Check local regulations first—burning sumac is often restricted due to fire hazards and smoke concerns. If permitted, burn small piles only in dry conditions and never leave them unattended. For safety, opt for bagging and disposing of cuttings in yard waste instead.
Still stumped? Drop your question in the comments—we’re happy to help you banish this pesky invader for good!
Wrapping up and next steps
Getting rid of staghorn sumac doesn’t have to feel like a losing battle—with the right approach, you can reclaim your yard for good! 🌱 The boil-and-pour root blockade method targets the roots where it counts, ensuring long-term eradication while keeping your landscape healthy.
Start small, stay consistent, and soon you’ll be enjoying a sumac-free space.
Ready to take action? Pick a dry, sunny day, gather your supplies, and begin the process. If you’re unsure about any step, don’t hesitate to consult local experts or extension services for personalized advice. Your yard—and your peace of mind—will thank you! ⚡