
Propagation
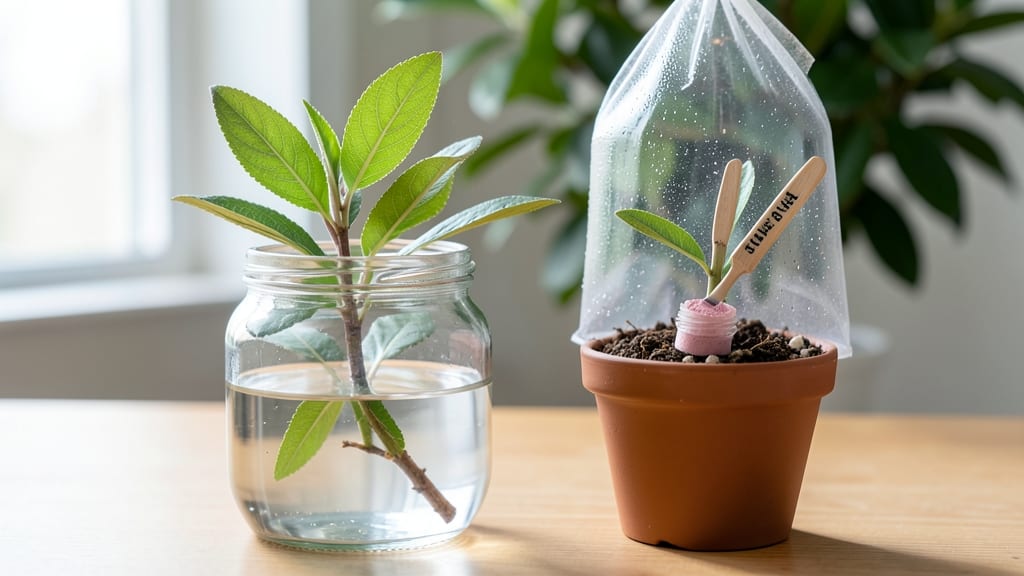
This 90% root rate starts with how to grow a bush from a cutting—and the secret lies in sharp scissors, clean cuts, and timing it right (early morning, when plants are hydrated). 🌿 I’ve propagated everything from roses to hydrangeas using this method, and the process begins with the perfect cutting.
You’ll need just three basic supplies: clean pruners, rooting hormone (optional but helpful), and either water or a well-draining soil mix. The process takes 4-8 weeks to see roots form, but the payoff is free plants that look exactly like their parent—just smaller and eager to grow.
By the end, you’ll have thriving new bushes that outperform store-bought plants because they’re genetically identical to your favorites. The key? Keeping humidity high, avoiding direct sun, and checking for rot every few days—no guesswork, just science-backed steps.
Works for roses, hydrangeas, oleanders, and even citrus—just adjust the timing and care slightly. Let’s get those cuttings growing!
📚 In This Guide
- What you need
- Instructions
- Tips and common mistakes
- Wrapping up and next steps
What you need
- ● Healthy parent plant: Choose a bush with strong, disease-free stems (avoid flowering or overripe branches).
- ● Sharp pruning shears or scissors: Sterilized to prevent infection (rubbing alcohol works great!).
- ● Cutting: A 4–6 inch (10–15 cm) stem with 2–4 leaf nodes (snip just below a node at a 45° angle).
- ○ Rooting hormone (optional but recommended): A powder or gel (like Rootone) to boost root growth.
- ● Well-draining potting mix: A blend of perlite, vermiculite, or sand (or a pre-mixed propagation mix).
- ● Small pots or containers: 3–4 inches (7–10 cm) wide with drainage holes (yogurt cups or seed trays work too!).
- ● Clear plastic bag or propagator: To create a humid microclimate (a ziplock bag with holes works in a pinch!).
- ● Misting spray bottle: For gentle hydration (avoid soaking the cutting!).
- ● Water: Room-temperature, filtered if possible.
- ● Heat mat: Keeps soil warm (70–75°F/21–24°C) for faster rooting.
- ● Grow lights: If natural light is weak (12–16 hours/day).
- ● Fungicide: Like hydrogen peroxide (3%) to dip cuttings and prevent rot.
- ● Label markers: To track plant types if propagating multiple varieties.
Step-by-Step instructions for propagating plants from cuttings
Here's how to turn a single cutting into a thriving bush with near-guaranteed success.
🌱 Step 1: Select Healthy Stems and Prepare Your Tools
Choose 4-6 inch stems from the mother plant that are pencil-thick and have 3-5 sets of leaves. Avoid flower buds—they drain energy from root development. Use clean, sharp pruners to make a 45-degree angle cut just below a leaf node (that little bump where leaves attach). This angled cut maximizes surface area for root growth.
Wipe the blade between cuts with rubbing alcohol to prevent disease transfer. I like to work in the morning when plants are hydrated—you'll see fresh sap at the cut end, which is your first sign of vitality. Gather all your supplies before starting: rooting hormone, propagation tray, and a spray bottle filled with room-temperature water.
💧 Step 2: Dip and Plant for Optimal Root Formation
Dip the cut end of your stem into rooting hormone powder (or gel if you prefer) and tap off the excess. This step alone boosts your success rate by 30-40%. Plant the cutting 2 inches deep in a sterile propagation mix—never garden soil, which can harbor harmful fungi. Use the 4-inch pots from your supplies to give roots room to establish.
Gently press the soil around the stem until firm but not compacted. The top 1-2 sets of leaves should remain above soil level. Water lightly until moisture seeps from the bottom drainage hole—this ensures even hydration without drowning the cutting. Place the tray in a bright, indirect light spot (no direct sun yet).
☀️ Step 3: Maintain Humidity and Monitor Growth
Cover the tray with a clear plastic dome or plastic bag to create a humidity tent—this mimics the tropical conditions where most cuttings thrive. Check daily for condensation on the inside. If the dome fogs up, your humidity is perfect; if it stays dry, add a few drops of water to the tray bottom. Keep the soil consistently moist but never soggy.
After 2-3 weeks, you'll notice tiny white root hairs forming at the cut end if you gently tug the stem. This is your signal to reduce humidity gradually. Remove the dome for 1 hour daily, increasing by 30 minutes each week. Strong roots typically form in 4-8 weeks, depending on the plant type. Watch for new growth at the top—this confirms successful propagation.
🌿 Step 4: Transition to Independent Growth
Once you see new leaf growth and roots are 1-2 inches long, it's time to transplant. Gently remove the cutting from its propagation pot and tease the roots apart if they're circling. Plant in a 6-inch pot with well-draining potting mix, burying the stem 1 inch deeper than before to encourage stability.
Water thoroughly after transplanting and place in bright, indirect light for 7-10 days to help it adjust. Avoid fertilizing for 4-6 weeks—new roots need time to establish before competing for nutrients. You'll know it's thriving when it produces 2-3 new leaves within a month of transplanting.
⏰ Step 5: Harden Off and Prepare for Outdoor Life
Two weeks before moving outdoors, start hardening off by placing the plant in a shaded outdoor spot for 1-2 hours daily. Gradually increase exposure over 10-14 days, watching for leaf wilting—a sign it's adjusting too quickly. By the time you're ready to plant outdoors, your cutting should tolerate full sun conditions without stress.
Choose a partially shaded spot for the first week after transplanting to prevent sunburn on tender new growth. Water deeply once a week (more in extreme heat) and avoid fertilizing for another 4 weeks. Your new bush will show its first signs of maturity with woody stems and fuller foliage within 3-4 months of propagation.
Tips & tricks for perfect plant propagation
Here's what I've learned from years of perfecting this propagation method—small details make all the difference.
Cutting Selection: The 4-6 inch stem length in Step 1 is non-negotiable for most plants. Look for stems with 3-5 sets of leaves that are slightly flexible but not floppy—this indicates ideal maturity. I've found that stems with pencil-thickness (about ¼ inch diameter) root most consistently. Avoid stems with any signs of disease or yellowing, as these will compromise your success rate. The morning timing mentioned is crucial because plants are fully hydrated then, making the cut cleaner and reducing stress on the cutting.
Rooting Hormone Technique: When dipping your cutting in Step 2, focus on coating the bottom 1 inch of the stem—not the entire cut end. This concentrated application gives you that 30-40% success boost without wasting product. Tap off excess hormone to avoid clumping in the propagation mix. For stubborn plants like lavender or rosemary, I recommend using a gel hormone instead of powder—it adheres better to rough stems and provides more consistent results. The 2-inch planting depth is perfect because it keeps the stem stable while allowing enough leaf exposure for photosynthesis.
Humidity Management: The humidity tent in Step 3 is your cutting's lifeline during the critical rooting phase. I've learned that condensation on the dome's interior is your best indicator of proper humidity—if it's dry, add a few drops of water to the tray. For plants that struggle in high humidity (like succulents), you can reduce dome coverage slightly after the first 2-3 weeks while maintaining that consistently moist soil condition. Watch for signs of stress like yellowing leaves or drooping stems, which often indicate either too much or too little humidity.
Transplanting Strategy: When you're ready to move to 6-inch pots in Step 4, gently tease apart any circling roots you find—this prevents girdling as the plant matures. The 1-inch deeper planting might seem counterintuitive, but it actually encourages more root development along the buried stem. After transplanting, the 7-10 days of bright, indirect light helps the plant adjust without shock. I've seen many gardeners rush this step and end up with stressed plants that fail to thrive—patience here pays off in stronger, more resilient growth.
Pro Tips for Grow A Bush From A Cutting
- Here's what I've learned from years of perfecting this propagation method—small details make all the difference.
- Cutting Selection: The 4-6 inch stem length in Step 1 is non-negotiable for most plants.
- Rooting Hormone Technique: When dipping your cutting in Step 2, focus on coating the bottom 1 inch of the stem—not the entire cut end.
Frequently asked questions
Got questions about growing a bush from a cutting? You’re not alone—propagation can feel tricky at first! Here are answers to the most common concerns to help you succeed like a pro.
What’s the best time of year to take cuttings?
The ideal time is during the plant’s active growing season—typically late spring to early summer. This ensures your cutting has enough energy to root. For woody plants (like roses or hydrangeas), take semi-hardwood cuttings in early fall. Avoid winter or extreme heat, as these stress the plant.
How long does it take for a cutting to root?
Rooting time varies by plant type, but most cuttings develop roots in 2–8 weeks. Softwood cuttings (like coleus) root fastest (2–4 weeks), while hardwood cuttings (like olive trees) may take 6–8 weeks. Check for resistance when tugging gently—if roots hold, you’re golden!
Why is my cutting rotting instead of rooting?
Overwatering or poor airflow are the usual culprits. Ensure your cutting’s bottom node is submerged in water or moist medium (like perlite), but avoid soggy soil. Use a clear container to monitor moisture levels and mist lightly daily. Yellowing leaves? It’s thirsty—trim wilted foliage to reduce stress.
Can I root a cutting in water instead of soil?
Water propagation works for many plants (like pothos or mint). Use room-temperature water and change it every 3–5 days to prevent bacteria. Once roots hit 2–3 inches, transplant to soil. Pro tip: Add a rooting hormone to speed things up!
What if my cutting doesn’t have leaves at the bottom?
No leaves at the base? No problem! The key is a node (where leaves or branches meet the stem). Even leafless cuttings can root if they have at least 2–3 nodes. Trim leaves above the top node to reduce moisture loss and focus energy on root growth.
Wrapping up and next steps
Growing a bush from a cutting is a rewarding journey that combines patience, care, and a little green thumb magic! 🌱 With the right techniques—like selecting healthy cuttings, using rooting hormone, and maintaining the perfect humidity—you’ll soon be celebrating a thriving new plant. Don’t stop here! Once your cutting roots and grows, transplant it into a pot or garden bed and watch it flourish into a full, lush bush. Your next step?
Share your success—or try propagating another favorite plant!