
Size
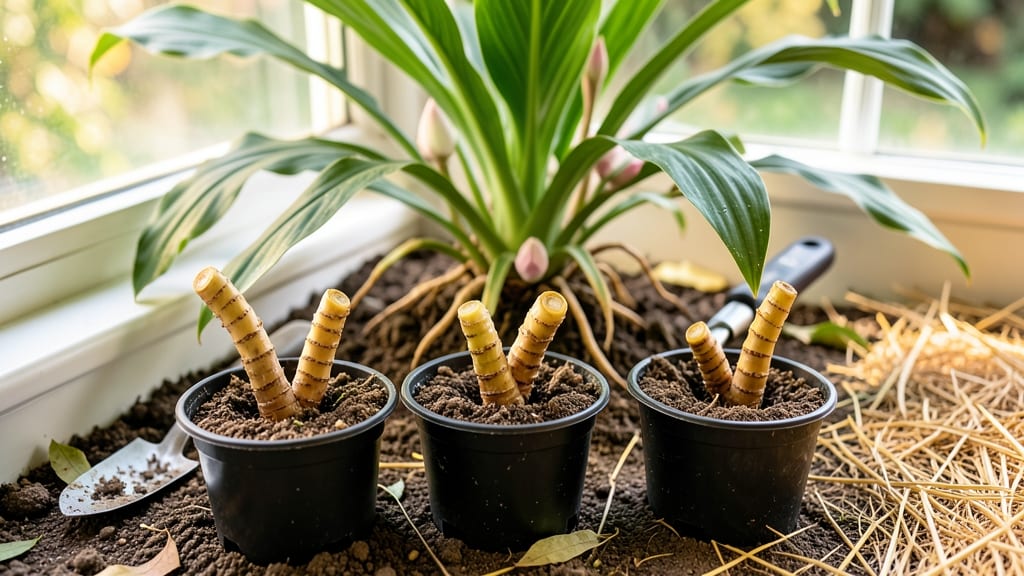
Six months from now, you could be harvesting your own curcuma ginger—the fragrant rhizomes that make golden turmeric tea and fiery curries—by learning how to grow the curcuma ginger plant. 🌱 I’ve grown this tropical plant in containers for years, and the secret isn’t complicated: it’s about warmth, patience, and knowing exactly how to plant those knobby rhizomes.
Most people struggle with two things: getting the rhizomes to sprout reliably and avoiding rot in damp soil. The fix? Plant them just below the soil line in well-draining mix, keep them warm (70-85°F), and water only when the top inch feels dry.
No fancy equipment—just a sunny spot and a little attention.
By summer, you’ll see those signature sword-shaped leaves unfurl, and by harvest time (6-8 months after planting), you’ll have prized rhizomes packed with flavor. The best part? You can propagate new plants from scraps, so one harvest becomes a garden full.
Works in pots or garden beds, even in warmer climates where it thrives year-round. Let’s get those rhizomes in the ground—your kitchen’s about to get a whole lot more vibrant.
📚 In This Guide
- What you need
- Instructions
- Tips and common mistakes
- Wrapping up and next steps
What you need
- ● Curcuma ginger rhizomes: 3–5 healthy, organic rhizomes (each with 2–3 "eyes" or buds). Avoid store-bought ginger—it’s treated to prevent sprouting!
- ● Well-draining potting mix: 5–10 gallons of a mix designed for tropical plants (e.g., 60% peat/coir, 20% perlite, 20% compost). Pro tip: Add a handful of worm castings for extra nutrients!
- ● Containers: For indoor growth: 12–18" deep pots with drainage holes (1–2 rhizomes per pot).
- ● For outdoor beds: Loose, sandy soil in a sunny, sheltered spot (6+ hours of sunlight daily).
- ● Watering can or hose: With a gentle spray nozzle (curcuma hates soggy roots!).
- ● Fertilizer: Balanced organic fertilizer (10-10-10) or compost tea (apply every 4–6 weeks).
- ● Mulch: Straw or shredded leaves to retain moisture and regulate soil temperature.
- ● Soil moisture meter: To avoid over/under-watering (curcuma prefers consistently moist but not waterlogged soil).
- ● Shade cloth (30–50% coverage): For hot climates to protect young plants from scorching.
- ● Trellis or stakes: If growing in a humid climate (helps with airflow and prevents fungal issues).
- ● Neem oil or copper fungicide: For preventative care against pests like aphids or powdery mildew.
- ● Thermometer: If growing in a cooler zone (curcuma thrives in 75–90°F; below 60°F, it may go dormant).
Step-by-step instructions for growing curcuma ginger plant
Here’s how to coax this tropical beauty into thriving growth—no greenhouse required.
🌱 Step 1: Select and Prepare Healthy Rhizomes
Curcuma rhizomes (the thick, knobby roots) are your starting point. Choose firm, plump rhizomes with visible buds or "eyes"—these are your future shoots. Avoid any that feel soft or moldy, as they won’t root. Rinse the rhizome under lukewarm water to remove dirt, then let it dry completely for 1-2 hours to prevent rot.
Using a sharp, sterilized knife, cut the rhizome into 1-inch sections, ensuring each piece has at least one bud. Let the cuts air-dry for another 30 minutes—this toughens the edges and reduces the risk of disease. I like to soak the cut pieces in diluted neem oil solution (1 tsp neem oil per quart of water) for 10 minutes before planting. This gives them a natural fungal shield.
🪴 Step 2: Plant in Well-Draining, Warm Soil
Curcuma thrives in loose, humus-rich soil with excellent drainage. Mix 2 parts potting soil with 1 part perlite or coarse sand to create a fast-draining medium. Fill a 6-inch pot (or larger, depending on rhizome size) with this blend, leaving 1 inch of space at the top. The rhizomes need warmth to root, so place the pot in a location where soil temps stay above 70°F—a sunny windowsill or under a grow light works well.
Plant the rhizome bud-side up, about 1 inch deep in the soil. Space multiple rhizomes 3-4 inches apart if using a larger container. Gently press the soil around them to secure, but don’t pack it down. Water lightly until the soil feels moist but not soggy—think of a wrung-out sponge. Overwatering at this stage is the fastest way to invite rot.
☀️ Step 3: Provide High Humidity and Bright, Indirect Light
Curcuma loves humidity—aim for 60-70% to mimic its tropical habitat. Place a humidity tray (a shallow tray filled with pebbles and water) under the pot, or mist the leaves daily with a spray bottle. You’ll know you’ve got it right when condensation forms on the leaves in the morning but disappears by midday.
Position the plant in bright, indirect light—think dappled sunlight like under a sheer curtain. Direct sun can scorch the large leaves, while too little light leads to leggy, weak stems. Rotate the pot a quarter turn weekly so the plant grows evenly. If your space lacks natural light, supplement with a grow light kept 6-12 inches above the plant for 12-14 hours daily. You’ll see new leaves emerge within 3-4 weeks—that’s your signal everything’s on track.
💧 Step 4: Water and Fertilize for Robust Growth
Wait until the top 1-2 inches of soil feel dry before watering again—this prevents waterlogged roots. Stick your finger in the soil; if it’s damp past your first knuckle, hold off. When you do water, soak the soil thoroughly until water runs out the drainage holes. Empty the saucer afterward to avoid root rot. Curcuma is drought-tolerant once established, but young plants appreciate consistent moisture.
Start fertilizing once the plant has 3-4 true leaves (not the initial sprouts). Use a balanced liquid fertilizer (like 10-10-10) diluted to half-strength, applied every 4-6 weeks. I switch to a potassium-rich fertilizer (like 0-10-10) in late summer to encourage rhizome development. Always water the plant before fertilizing to prevent root burn.
⏰ Step 5: Harvest and Divide After 6 Months
Curcuma rhizomes mature in 5-6 months, but you can harvest a small portion as early as 4 months if the rhizomes feel firm and the plant shows signs of slowing growth. Gently dig up the rhizome, brush off excess soil, and rinse it under cool water. The orange-yellow rhizomes are your harvest—these can be dried for curcumin powder or used fresh in cooking.
If you’re keeping the plant going, divide the rhizome into new sections, each with at least one bud, and replant them. This ensures you’ll have a fresh crop next season. Store any unused rhizomes in a cool, dry place (like a paper bag in the fridge) for up to 2 weeks before replanting. With proper care, your curcuma plant can produce multiple harvests per year—just keep those rhizomes happy and warm!
Tips & tricks for growing curcuma ginger plant
These practical insights will help you avoid common pitfalls and maximize your tropical harvest's success.
Rhizome Selection and Preparation: When choosing your curcuma rhizomes, look for those with multiple buds—each bud has the potential to grow into a separate plant. The 1-2 hour drying time after rinsing is crucial; this step prevents fungal infections that could kill your plant before it even sprouts. For an extra layer of protection, the 10-minute neem oil soak creates a natural antifungal barrier that's especially helpful in humid conditions.
Soil Temperature Matters: Maintaining soil temperatures above 70°F is non-negotiable for root development. If your home tends to be cooler, consider using a heat mat underneath the pot during the initial rooting phase. I've found that placing the pot on a windowsill with southern exposure helps maintain that critical warmth, especially when nighttime temperatures drop below 65°F.
Lighting Strategy: The 12-14 hours of daily light requirement can be challenging in winter months. If natural light isn't sufficient, a simple LED grow light kept 6-12 inches above the plant will work wonders. Position the light so it covers the entire canopy evenly—uneven light exposure will cause the plant to grow lopsided. I rotate my grow light setup weekly to ensure all sides receive equal illumination.
Fertilization Timing: Waiting until the plant has 3-4 true leaves before fertilizing prevents overloading a young plant that's still establishing its root system. The half-strength application is particularly important—concentrated fertilizers can burn tender new roots. I've found that applying fertilizer in the morning allows the plant to absorb nutrients throughout the day rather than sitting in the soil overnight.
Pro Tips for Grow Curcuma Ginger Plant
- These practical insights will help you avoid common pitfalls and maximize your tropical harvest's success.
- Rhizome Selection and Preparation: When choosing your curcuma rhizomes, look for those with multiple buds—each bud has the potential to grow into a separate plant.
- Soil Temperature Matters: Maintaining soil temperatures above 70°F is non-negotiable for root development.
Frequently asked questions
Got questions about growing your own curcuma ginger?
Here are answers to the most common ones to help you avoid pitfalls and grow like a pro!
How long does it take for curcuma ginger to grow?
Curcuma ginger (or turmeric) typically takes 6–12 months to mature, depending on your climate. In tropical or warm regions, you may harvest as early as 6 months, while cooler areas might need closer to a year. Patience pays off—look for bright orange rhizomes to confirm readiness!
Can I grow curcuma ginger in cold climates?
Yes, but with adjustments! Curcuma ginger thrives in warmth (70–90°F), so grow it in containers and bring them indoors during frost. Alternatively, plant in spring and mulch heavily to retain heat. A greenhouse or indoor grow light can also work—just mimic tropical conditions!
What if my curcuma ginger leaves turn yellow?
Yellowing leaves usually signal overwatering, poor drainage, or nutrient deficiency. Let the soil dry slightly between waterings (keep it moist but not soggy) and ensure pots have drainage holes. Add a balanced fertilizer (like 10-10-10) every 4–6 weeks to boost health. Pro tip: Check for pests like spider mites too!
Can I use regular ginger rhizomes to grow curcuma ginger?
No—curcuma ginger (turmeric) and regular ginger are different plants! For turmeric, buy certified organic turmeric rhizomes (often labeled "fresh turmeric root") from nurseries or online. Regular ginger rhizomes won’t produce turmeric’s signature orange rhizomes or health benefits.
When is the best time to harvest curcuma ginger?
Harvest when the leaves turn yellow and die back, usually in late fall or winter (after 6–10 months). Dig carefully with a fork to avoid damaging the rhizomes. Don’t wait too long—over-mature rhizomes can become woody. Rinse, dry, and store in a cool, dark place for up to 6 months!
What can I do with curcuma ginger if I don’t want to eat it?
Beyond cooking, curcuma ginger is a powerhouse for health and beauty! Use it to make:
- Golden milk (turmeric latte) for anti-inflammatory benefits.
- Natural dye for fabrics or Easter eggs (bright yellow!).
- Topical paste for skin brightening or pain relief (mix with coconut oil).
- Compost—its spent rhizomes break down well in gardens.
Wrapping up and next steps
Growing your own curcuma ginger plant is a rewarding journey that connects you to nature’s bounty—whether for vibrant turmeric roots, medicinal benefits, or simply the joy of nurturing a tropical treasure. 🌱 By following the right steps—from selecting healthy rhizomes to mastering soil, sunlight, and patience—you’ll unlock a harvest in as little as 6 months.
Remember, even small mistakes can be corrected with care, so don’t hesitate to experiment and learn along the way!
Now that you’re armed with knowledge, take the next step: grab those rhizomes, prep your space, and start planting!
Share your progress with fellow gardeners or even gift your harvest to friends—because growing curcuma ginger isn’t just about the plant; it’s about community, health, and the simple magic of growth. Happy gardening! 🌿✨