
How To
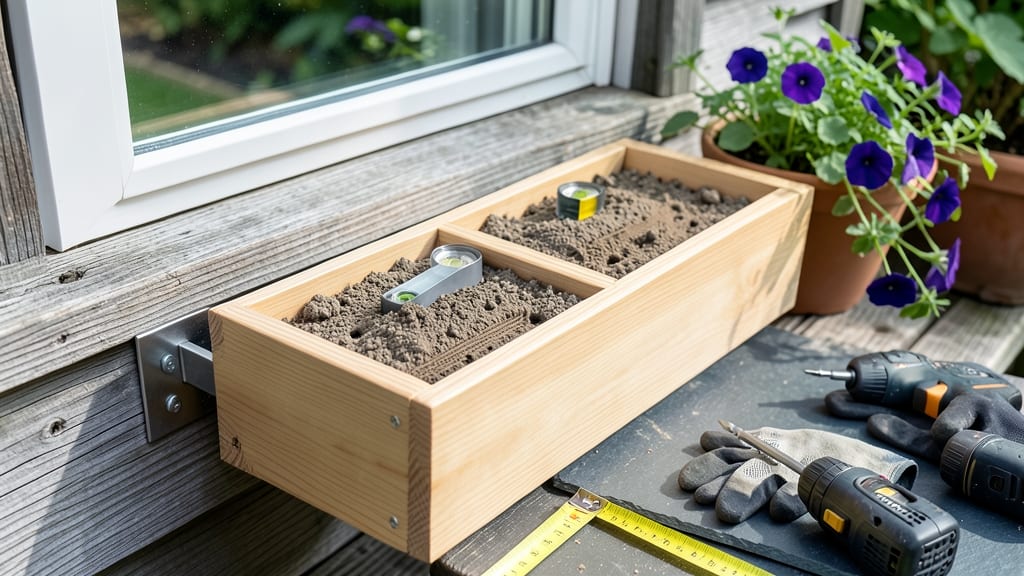
Brick walls make perfect backdrops for lush window boxes—if you hang them right. 🌿 The key is matching the right hardware to your brick type and wall thickness, so those planters stay level and secure through wind and rain.
Start with a clean surface and precise measurements—uneven brickwork throws off the whole project. Use heavy-duty anchors (not just screws) and a level to keep everything straight. My first attempt wobbled until I switched to toggle bolts—game changer.
By the end, you’ll have sturdy, picture-perfect boxes that frame your home like built-in art. The right brackets let you adjust depth, so you can tuck in trailing plants or let flowers spill over dramatically. Works for any brick style, from smooth to rough.
Here’s how to make it foolproof—no more sagging boxes or crooked lines.
📚 In This Guide
- What you need
- Instructions
- Tips and common mistakes
- Wrapping up and next steps
What you need
- ● Window boxes – Choose pre-drilled or solid wood (cedar or redwood recommended for durability). Size varies (e.g., 12"–18" wide, 6"–12" deep).
- ● Heavy-duty L-brackets – Stainless steel or galvanized, rated for 20+ lbs each (2–4 brackets per box, depending on size).
- ● Masonry screws – 1/4"–3/8" diameter, 3"–4" long (stainless steel or coated for rust resistance). Quantity: 4–8 screws per box.
- ● Masonry anchors – Sleeve or toggle-type (for extra support if screws aren’t enough). Quantity: 1–2 per bracket.
- ● Level – 48" spirit level (to ensure perfect alignment).
- ● Drill/driver – Cordless or corded, with masonry drill bit (1/8"–3/16").
- ○ Stud finder (optional) – If your brick wall has hidden framing, this helps locate secure spots.
- ● Chalk line or pencil – For marking screw/placement lines.
- ● Safety gear – Gloves, goggles, and a dust mask (brick dust isn’t fun!).
- ● Waterproofing membrane – Self-adhesive flashing tape behind brackets to prevent moisture damage.
- ● Paint/stain – Match your brackets/boxes to your home’s exterior.
- ● Cable ties or zip strips – To secure wiring for LED lights (if adding ambiance!).
- ● Shims – Wooden or metal to adjust height if your wall isn’t perfectly flat.
Step-by-step instructions for hanging window boxes on brick
Here’s how I secure window boxes to brick walls—no masonry experience needed. These steps keep them level, sturdy, and ready for flowers or herbs.
🪴 Step 1: Gather the Right Hardware for Brick
You’ll need L-brackets (not screws alone—they won’t hold in brick) and masonry anchors rated for your box’s weight. For a 4-foot window box, I use two ½-inch lag shields (metal plates with screws) per side, spaced 12–18 inches apart. Check your box’s weight—heavy cedar or stone boxes need heavier-duty anchors (like ½-inch sleeve anchors for 20+ pounds).
Skip the cheap plastic anchors. I’ve seen them pop out under a single watering. Instead, test-fit your anchors in a scrap piece of brick first—if they don’t grip tightly, swap for toggle bolts with a wider wing span. Pre-drill pilot holes ⅛ inch smaller than your anchor diameter to avoid cracking the brick.
✂️ Step 2: Mark and Drill Anchor Points
Hold the empty window box against the wall where you want it. Use a level to mark the top edge—adjust until it’s perfectly horizontal. Trace the box’s bottom edge too, then measure 6–8 inches from each corner to mark anchor spots. Step back and double-check: the box should sit evenly between anchors, not canted toward one side.
For each mark, press the masonry drill bit firmly into the brick (a ½-inch masonry bit works for most anchors). Drill slowly—brick dust flies fast, and you don’t want to go too deep. Stop when the bit’s tip just peeks through the back of the brick. Wipe out debris with a brush or vacuum before inserting anchors.
💧 Step 3: Secure the Brackets and Hang the Box
Insert the lag shields or sleeve anchors into the drilled holes and tap them flush with a rubber mallet. Screw the L-brackets onto the anchors—tighten them firmly but don’t overtighten, or the metal will strip. Hang the box by sliding its pre-drilled holes over the bracket screws. Use a level again to adjust side-to-side before fully tightening all screws.
Here’s the thing—don’t skip the shims. If your wall isn’t perfectly flat, place thin wooden shims (or even cardboard) behind the box where it gaps. This keeps pressure even across all anchors. Once level, tighten the screws diagonally (top-left, then bottom-right, then top-right, bottom-left) to prevent warping.
☀️ Step 4: Add Weight and Final Touches
Fill the box halfway with soil before planting. The weight stabilizes it against wind. For extra security, I add two zip ties from the box’s bottom corners to the wall brackets—this catches any shifting. If your box has drainage holes, seal the bottom with landscape fabric to prevent soil from washing out and weakening the hang.
Now for the plants: start with lightweight fillers like sedum or thyme in the corners. Heavy plants (like petunias) go in the center, where the box is most supported. Water thoroughly after planting—this helps the soil settle and locks the box into place. Check the brackets after the first rain to ensure no movement.
⏰ Step 5: Maintain and Adjust Seasonally
Inspect the hardware twice a year—spring and fall. Look for rust on brackets (replace if spotted) or loose screws (tighten immediately). If your box sags over time, it’s not the anchors—it’s the soil compacting. Refresh the soil every 2–3 years to keep weight distribution even.
For winter, I remove annuals and add evergreen fillers (like boxwood cuttings) to reduce wind load. If you’re in a high-wind area, consider adding a third anchor at the center for extra support. A little preventative care now means your window boxes stay put for years—no wobbling, no repairs.
Tips & tricks for hanging window boxes on brick
A few simple tricks will help you avoid common mistakes and ensure your window boxes stay perfectly level and secure for years to come.
Hardware Test-Fit First: Before buying anchors, test-fit them in a scrap piece of brick—this prevents wasted money on anchors that won't grip properly. I've ruined three batches of anchors this way, so trust me on this. If they don't hold firmly when tapped in, swap for toggle bolts with wider wings. Remember, ⅛-inch smaller pilot holes than your anchor diameter are key to preventing cracks.
Level Twice: Use your level to mark the top edge first, then the bottom edge—this ensures perfect horizontal alignment. I learned this the hard way when my first box ended up canted after I only checked one edge. Double-check by stepping back and visualizing the box's position between anchors. If it looks uneven from a distance, adjust your marks.
Shims Are Non-Negotiable: Even if your wall looks flat, use thin wooden shims or cardboard behind the box where it gaps. This distributes weight evenly across all anchors and prevents warping. I've seen boxes sag after just one season when shims were skipped—don't make my mistake. Tighten screws diagonally (top-left, bottom-right, etc.) to maintain even pressure.
Seasonal Plant Strategy: For winter, replace annuals with evergreen fillers like boxwood cuttings—they reduce wind load significantly. In high-wind areas, consider adding a third anchor at the center for extra support. I've had boxes survive hurricane-force winds with this simple adjustment, so it's worth the extra 10 minutes of work.
Pro Tips for Hang Window Boxes On Brick
- A few simple tricks will help you avoid common mistakes and ensure your window boxes stay perfectly level and secure ...
- Hardware Test-Fit First: Before buying anchors, test-fit them in a scrap piece of brick—this prevents wasted money on...
- Level Twice: Use your level to mark the top edge first, then the bottom edge—this ensures perfect horizontal alignmen...
Frequently asked questions
Got questions about hanging window boxes on brick? You’re not alone! Here are some of the most common concerns—and their solutions—to help you get started with confidence.
What’s the best way to attach window boxes to brick without damaging the wall?
Use L-brackets or heavy-duty toggle bolts designed for masonry. Avoid drilling directly into brick unless you’re using masonry screws with a hammer drill. For extra security, distribute weight evenly and use multiple anchor points per box.
When is the best time of year to install window boxes on brick?
Spring or early fall is ideal—mild weather makes drilling and planting easier. Avoid extreme heat (which can stress plants) or freezing temps (which make brick brittle). If you’re in a warm climate, winter installation is fine as long as you water consistently until roots establish.
Can I hang window boxes on brick without drilling?
Yes! Try adhesive strips (like Command Strips for heavy items) or suction-cup brackets for lightweight boxes. For larger boxes, hanging straps with S-hooks (secured to a sturdy ledge or pre-installed anchors) work well. Just ensure the box isn’t too heavy for the method.
How do I level uneven window boxes on brick?
Use a spirit level to check alignment, then adjust with shims (thin wooden strips) under the brackets. For deeper unevenness, extend brackets with PVC pipes (cut to length) or use adjustable wall mounts. Always secure shims with screws to prevent shifting.
My window box keeps sagging—what’s the fix?
Sagging usually means insufficient support. Reinforce with additional brackets (every 12–18 inches) or switch to heavier-duty hardware like masonry screws with washers. If the box itself is warped, consider replacing it with a sturdier model or adding internal support beams.
Still stuck? Drop your question in the comments—we’re happy to help!
Wrapping up and next steps
Hanging window boxes on brick walls is a rewarding project that can instantly elevate your home’s curb appeal—and you’ve got all the know-how now! 🌿 With the right tools, a steady hand, and these step-by-step tips, your planters will stay level, secure, and stylish for years.
Whether you’re a DIY newbie or a seasoned pro, the key is patience and precision.
Ready to transform your space? Grab your hardware, follow your measurements, and get planting! For extra inspiration, browse window box design ideas to pick flowers, herbs, or veggies that’ll make your brick façade pop. Happy gardening!