
Tools
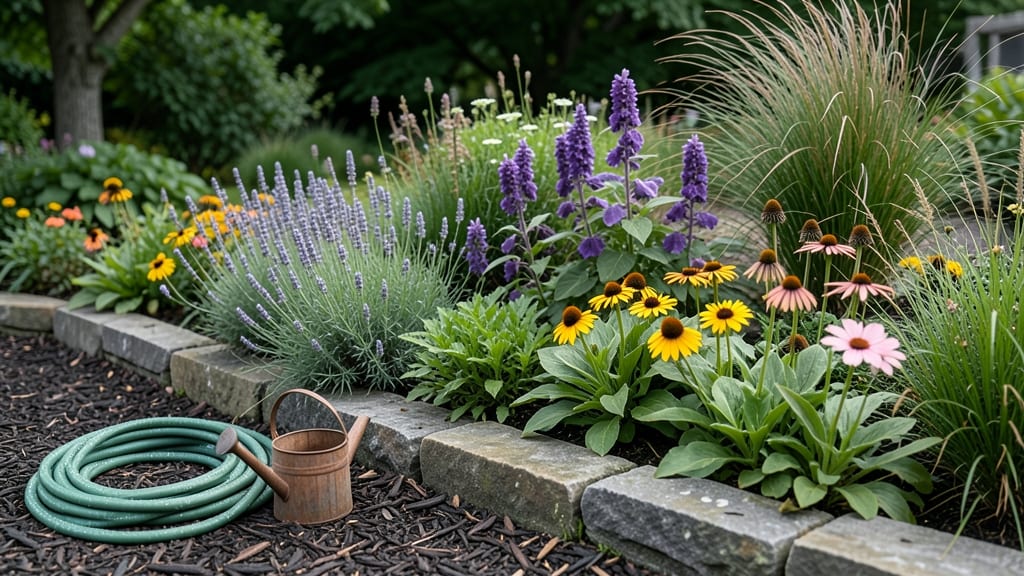
That first glimpse of a beautiful garden bursting with life changes everything. ✨ The secret isn't buying expensive plants—it's layering colors, textures, and seasonal interest so your space feels alive year-round, not just in spring.
I've designed gardens where every corner has something to offer, from fragrant climbers to evergreen shrubs that hold their shape through winter. Start with a simple color palette—3 main hues plus one accent—and repeat them through flowers, foliage, and even hardscaping (think gravel or pavers in your chosen shade).
My cottage garden uses blues and creams with pops of lavender, while a modern design might rely on bold greens and terracotta. The key is contrasting heights: tall grasses, mid-level shrubs, and low-spreading perennials create depth instantly.
You'll end up with a garden that feels like a curated art piece, not just a collection of plants. The first year might need adjustments, but once you get the layers right, maintenance becomes easier—less deadheading, fewer gaps, and more "wow" factor.
Even small spaces can work with vertical elements like trellises or hanging baskets. The best part? This approach works for any style—cottage, modern, or tropical—because it's about principles, not rules. Let's make your outdoor space the envy of the neighborhood without breaking the bank.
📚 In This Guide
- What you need
- Instructions
- Tips and common mistakes
- Wrapping up and next steps
What you need
- ● Soil & Amendments: High-quality topsoil (2–3 cubic yards, depending on garden size)
- ● Compost (1–2 bags or a wheelbarrow’s worth for nutrient-rich soil)
- ● Perlite or vermiculite (1–2 bags for drainage)
- ● Plants: Perennials (3–5 varieties for structure, e.g., coneflowers, hostas, or daylilies)
- ● Shrubs (2–4 dwarf or medium-sized for height layers)
- ● Annuals (5–10 fast-growing plants for color, like petunias or impatiens)
- ● Ground covers (e.g., creeping thyme or ajuga for texture)
- ● Bulbs (tulips, daffodils, or alliums for spring blooms)
- ● Hardware & Structures: Garden stakes or trellises (for climbing plants like clematis or roses)
- ● Mulch (shredded bark or pine straw, 2–3 bags)
- ● Basic Tools: Garden trowel (for planting)
- ● Hand pruners (sharp and clean)
- ● Garden gloves (for comfort)
- ● Wheelbarrow or garden cart (for hauling materials)
- ● Watering hose with nozzle or drip irrigation kit
- ● Decorative stones or stepping stones (for pathways or borders)
- ● Garden lights or solar-powered stakes (for evening ambiance)
- ● Birdhouses or feeders (to attract pollinators and wildlife)
- ● Fertilizer (slow-release or organic, like fish emulsion)
- ● Garden kneeler or pad (for comfort during planting)
- ● Paint or stain (for wooden structures like trellises or arbors)
Step-by-Step instructions for creating a layered garden design
Here's how I transform any outdoor space into a lush, ever-changing garden that thrives through seasons.
🌿 Step 1: Plan Your Height Layers for Visual Impact
Start by sketching three distinct layers: tall structures (6-12 feet), mid-height plants (3-6 feet), and low ground covers (under 3 feet). I always place my tallest elements—like ornamental grasses or small trees—at the back or center to create a natural focal point. This prevents the garden from looking flat and ensures every season has something to showcase.
For year-round interest, I select plants with staggered bloom times. For example, I pair early spring bulbs with summer perennials and late-season shrubs. The key is to have at least one plant in bloom during every month. Use a 12-inch spacing rule between plants of similar height to allow airflow and prevent disease.
🪴 Step 2: Prepare Soil and Choose the Right Plants
Test your soil first—most gardens need a mix of compost (25%) and native soil (75%) to improve drainage and fertility. I dig down 12 inches deep to aerate the soil before planting, especially if the area has heavy clay or compacted soil. Amend with organic matter like aged manure or leaf mold to create a loose, crumbly texture that roots love.
Select plants based on their mature size and sunlight needs. Group plants with similar water requirements together to simplify maintenance. For example, I place drought-tolerant succulents and lavender together in sunny spots, while moisture-loving ferns and hostas get grouped in shadier areas. This ensures no plant gets over- or under-watered.
☀️ Step 3: Arrange Plants for Seasonal Color Transitions
Begin with your tallest plants first, placing them 12-18 inches from the back edge of the garden bed. Next, add mid-height plants like shrubs or perennials, spacing them 18-24 inches apart to allow room for growth. Finally, fill the front with low-growing annuals or ground covers, leaving 6-12 inches between them for easy weeding.
I always include at least one "thriller" plant—a dramatic focal point like a tree or large shrub—to anchor the design. Then, I add "fillers" like flowering perennials and "spillers" like trailing plants to soften edges. For example, a hydrangea bush (thriller) paired with coneflowers (filler) and creeping thyme (spiller) creates a balanced, textured look.
✂️ Step 4: Mulch and Maintain for Long-Term Beauty
Apply a 3-inch layer of mulch around plants to retain moisture, suppress weeds, and regulate soil temperature. I use shredded bark or wood chips because they break down slowly and improve soil structure over time. Keep mulch 2-3 inches away from plant stems to prevent rot and pests.
Water deeply once a week (or more in extreme heat) to encourage deep root growth. I check soil moisture by sticking my finger 2 inches down—if it feels dry, it's time to water. Fertilize lightly in spring with a balanced, slow-release fertilizer to support steady growth without burning plants.
🌱 Step 5: Add Finishing Touches for Year-Round Interest
Incorporate seasonal accents like spring bulbs (tulips, daffodils), summer annuals (petunias, marigolds), and fall foliage (maple leaves, ornamental grasses). I also add evergreen plants like boxwoods or hemlock to provide structure and color when other plants go dormant. These elements ensure your garden stays vibrant even in winter.
Finally, add hardscape features like stepping stones, a small water feature, or decorative rocks to tie the space together. These elements create visual interest and define pathways. For example, a curved stone path guides the eye through the garden while adding texture and contrast to the soft plant layers.
Tips & tricks for perfecting your layered garden design
Creating a garden that thrives year-round takes thoughtful planning—and these insights will help you avoid common pitfalls while elevating your design to the next level.
Foundation First: Before planting anything, take time to sketch your garden layout using stakes and twine to visualize the flow. This simple step prevents costly mistakes later—like planting too close to walkways or overlooking sun exposure. I recommend mapping out your 2-3 complementary materials (like stone and mulch) first, as these elements anchor the design. Pro tip: Place your small water feature at the garden’s focal point to create natural movement and draw the eye.
Seasonal Layering Strategy: The key to year-round color lies in strategic layering. In Step 2, when selecting plants, prioritize evergreens for structure and seasonal bloomers for color shifts. For example, pair spring bulbs with summer perennials and fall foliage plants—this ensures continuous interest. Don’t forget to include winter interest plants like ornamental grasses or berry-producing shrubs, which provide texture and form when flowers fade. I like to create a simple chart mapping each plant’s peak season to visualize coverage gaps.
Texture and Contrast Secrets: In Step 3, when adding foliage, think beyond just color—texture creates depth. Mix fine textures like ferns with bold ones such as hostas to create visual contrast. Unexpected shapes—like rounded boxwoods or spiky yuccas—break up uniformity and add architectural interest. For scent, I always plant fragrant herbs (like lavender or rosemary) near seating areas, as their aroma enhances the garden experience. Remember, contrast isn’t just about leaves—pair smooth bark with fuzzy foliage or glossy leaves with matte ones for a sophisticated look.
Lighting Design Tips: When implementing Step 5’s lighting plan, consider the "rule of thirds" for placement. Position pathway lights along walkways to guide visitors, while uplights should highlight key plants from below. For a magical effect, add string lights at varying heights—some near seating areas, others higher to mimic fireflies. Test your lighting in the evening to ensure it enhances (rather than competes with) the garden’s natural beauty. I recommend using warm-white LEDs for cozy ambiance and cool-white for highlighting textures.
Pro Tips for Make A Beautiful Garden
- Creating a garden that thrives year-round takes thoughtful planning—and these insights will help you avoid common pitfalls while elevating your design to the next level.
- Foundation First: Before planting anything, take time to sketch your garden layout using stakes and twine to visualize the flow.
- Seasonal Layering Strategy: The key to year-round color lies in strategic layering.
Frequently asked questions
Got questions about creating your dream garden? Here are some of the most common ones—and their answers—to help you get started with confidence!
What’s the best time of year to start a garden?
The ideal time depends on your climate, but spring (after the last frost) and early fall are the most popular. In warmer regions, winter planting is also great for cool-season veggies and perennials. Start with soil prep now—even if you’re not planting yet!
How much does a beautiful garden cost?
Costs vary widely! A small, low-maintenance garden with perennials and mulch can start at $100–$300. Larger projects with hardscaping, irrigation, and rare plants may run $1,000+. Prioritize plants, soil, and hardscaping materials for the best long-term value.
Can I make a stunning garden on a budget?
Focus on free or low-cost plants (seeds, cuttings, or local swaps), repurpose materials (pallets, rocks, or bricks), and use mulch to suppress weeds. Native plants and perennials also save money by returning year after year.
How do I keep pests and weeds from ruining my garden?
Prevention is key! Use organic mulch to block weeds, companion planting to deter pests, and introduce beneficial insects like ladybugs. Hand-pull weeds early, and avoid overwatering. Neem oil or diatomaceous earth can also help without harsh chemicals.
What if my yard has poor soil or shade?
Don’t worry—many plants thrive in shade (hostas, ferns, or astilbes) or poor soil (heucheras, sedums, or ornamental grasses). Amend soil with compost, and choose container gardening for flexibility. Even a small raised bed can transform a tricky space!
How do I layer plants for a full, lush look?
Start with a tall backdrop (trees or shrubs), mid-height plants (bushes or perennials), and ground covers (like creeping thyme). Add vertical elements (trellises, climbers) and textural contrast (grasses, ferns) for depth. Sketch a simple layout first!
Wrapping up and next steps
Creating a beautiful garden is all about blending creativity with thoughtful design—layering plants, colors, and textures for year-round charm. 🌸 Whether you’re a seasoned gardener or just starting, the key is to start small, plan strategically, and enjoy the process.
Your garden will evolve with time, offering fresh inspiration and serene moments.
Now that you’re armed with tips and techniques, take the first step today! Sketch your dream garden, gather a few plants, or even just pull out those weeds—every little action brings you closer to your vision. Happy gardening! 🌿