
How To
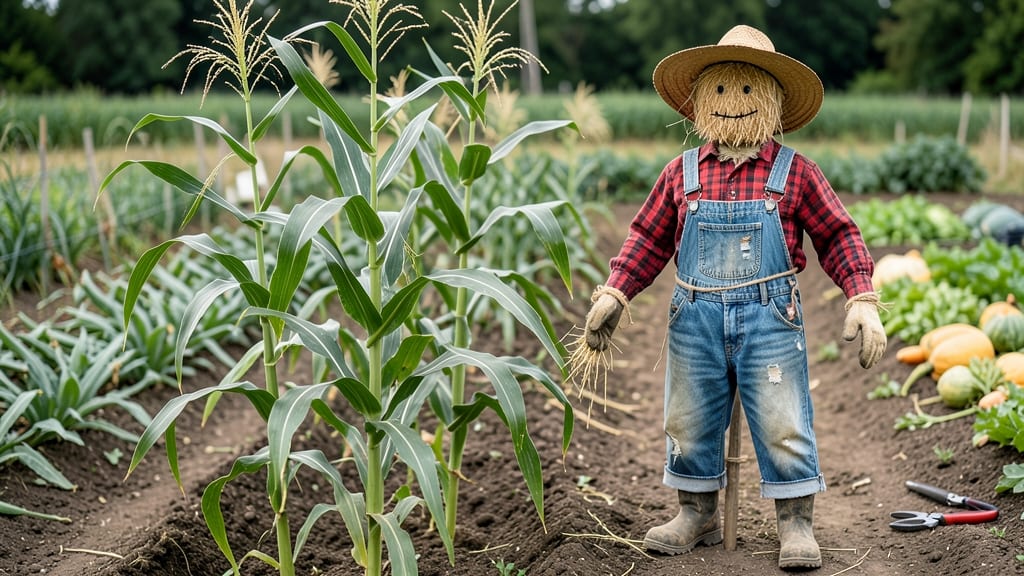
This homemade scarecrow saved my struggling tomato plants last summer. 🌱 The best part? It took less than an hour to throw together with stuff I already had lying around—no sewing skills required.
You’ll need old clothes, straw or hay, a sturdy stick or broomstick, and some basic tools like a hammer or rope. The key is making it look just threatening enough to deter birds and rabbits without scaring your neighbors.
My first attempt was a little too lopsided, but it worked perfectly. Once you’ve got it standing tall, place it near your most vulnerable crops—especially young seedlings or tender fruits. A few extra touches like reflective tape or aluminum pie pans can make it even more effective.
Maintenance is easy: just fluff it up occasionally and swap out any damaged parts. And if you’re worried about aesthetics, you can always dress it up with a hat or colorful fabric for a more charming look.
📚 In This Guide
- What you need
- Instructions
- Tips and common mistakes
- Wrapping up and next steps
What you need
- ● Stuffing: Old pillow(s) – 2-3 medium-sized (or shredded foam, straw, or even crumpled newspaper for a budget-friendly option)
- ● Burlap sack or large pillowcase – 1 (for the body)
- ● Fabric & Clothing: Old clothes – 1-2 sets (jeans, flannel, overalls, or a dress—think thrift store finds or your own cast-offs!)
- ● Scarf, bandana, or piece of fabric – 1 (for the head or face covering)
- ● Extras for Structure: Sturdy sticks or PVC pipes – 2-3 (for arms, ~3-4 feet long)
- ● Twine, rope, or bungee cords – 1 roll (to secure everything)
- ● Scissors – 1 pair (for trimming fabric or twine)
- ● Measuring tape or ruler – 1 (to ensure proportions)
- ○ Hot glue gun & glue sticks – 1 (optional but handy for quick fixes)
- ● Straw hat or wide-brimmed hat – 1 (for that classic scarecrow vibe)
- ● Paint & brushes – set (to add freckles, a smile, or weathered details)
- ● Old boots or shoes – 1 pair (for a full-body look)
- ● Fake beard or wig – 1 (because why not go all out?)
- ● Small garden tools (like a rake or pitchfork) – 1-2 (for a "hardworking" touch)
Step-by-Step instructions for building a rustic scarecrow
Here's my favorite no-sew method—simple enough for a weekend project, sturdy enough to last all season.
🪴 Step 1: Gather Your Found Materials
Start by collecting old clothes from your closet—think flannel shirts, jeans, or even an old sweater. I like to use items with some weight to them, like denim or wool, so they hold their shape better in the wind. For the body, you'll need a sturdy base like a broomstick or wooden dowel, about 4 feet long, to serve as the spine. This doesn't need to be perfect—rustic is the goal.
Gather natural fillers like straw, dried corn husks, or even crumpled newspaper to stuff the clothes and give your scarecrow volume. The more you pack in, the more lifelike it'll look. I always keep an old pair of shoes or boots handy to use as feet—it adds that extra touch of realism without much effort.
🌱 Step 2: Assemble the Body and Arms
Begin by wrapping the clothes around your broomstick or dowel. Start with a long-sleeve shirt or jacket and tie it loosely around the stick, leaving room to add more layers. The key here is to create a tapered shape—wider at the top and narrower at the bottom—so it looks more natural. I like to use a belt or rope to secure the layers around the stick, tying it every 12 inches or so to keep everything in place.
For arms, cut two 2-foot lengths of sturdy branches or broomsticks. Attach them to the sides of your scarecrow's body using more rope or twine, positioning them at about shoulder height. Leave some wiggle room so the arms can move slightly in the wind—it makes your scarecrow look more dynamic. You can even add a few extra layers of fabric at the arm joints to give them a more defined shape.
💧 Step 3: Stuff and Shape the Head
Create the head by stuffing a hat, bandana, or even an old sock with straw or dried husks. The goal is to give it a rounded, slightly lopsided look—perfectly symmetrical scarecrows always look a little too perfect. Secure the stuffing with a few stitches or by tying the fabric tightly around the base. For extra character, add a few more layers of fabric or even a scarf wrapped around the neck.
Attach the head to the top of the body by tying it securely to the broomstick. If you want to add a face, use fabric markers or paint to draw simple features—just a few lines for eyes and a smile work wonders. I like to keep it minimal so it doesn’t look too creepy, but you can get as creative as you want. Balance the head so it sits upright but can still sway a little in the breeze.
⏰ Step 4: Anchor Your Scarecrow Securely
Find a spot in your garden where your scarecrow will be most effective—near rows of vegetables or along the edges of your property. Use a 4-foot wooden stake or a heavy rock to weigh down the base and keep it upright. Drive the stake into the ground at an angle, then lean the scarecrow against it, securing it with more rope or twine. The goal is to make it sturdy enough to withstand light winds without toppling.
For extra stability, especially in windy areas, bury the stake deeper or tie the scarecrow to a nearby fence post. I always give mine a little wiggle test before calling it done—if it moves too much, add another layer of rope or a heavier base. The last thing you want is your scarecrow ending up as a pile of clothes in the first strong gust.
☀️ Step 5: Add Final Touches for Longevity
To protect your scarecrow from rain and sun, consider adding a few extra layers of waterproof fabric or even a clear plastic bag tied loosely around the head and upper body. This keeps the stuffing dry without making it look too plastic. I also like to spray the fabric with a light coat of outdoor sealant to help it last longer—just a few quick spritzes will do the trick.
Finally, give your scarecrow a little personality. Add a few extra details like a straw hat, a pair of sunglasses, or even a sign around its neck. The more unique it looks, the more effective it’ll be at scaring off pests. Step back and admire your work—you’ve just created a functional, rustic piece for your garden that’s as practical as it is charming.
Tips & tricks for perfect homemade scarecrow assembly
Here's what I've learned from years of building these garden guardians—simple tricks that turn a basic project into something truly charming.
The Weight Factor: The key to a sturdy scarecrow is using items with natural weight—denim, wool, or even slightly dampened fabric. In Step 1, avoid lightweight materials like cotton T-shirts that might billow too much in the wind. I've found that adding a belt or rope around the waist (Step 2) creates that classic tapered shape while adding structural integrity, especially when you tie it every 12 inches as instructed.
Stuffing Strategy: When packing your straw or dried husks in Step 3, don't overstuff the head—it needs to maintain that slightly lopsided, human-like shape. I learned this the hard way when my first attempt looked like a hay bale with arms! For the body, use a mix of fillers: straw for volume and newspaper for structure. This combination keeps the shape while adding that rustic texture we love.
Wind Resistance: The 4-foot stake in Step 4 is your best friend for stability, but placement matters. Drive it at a slight angle (about 30 degrees) so the scarecrow leans back naturally against the stake. For extra security, I always add a second tie point higher up—right where the arms meet the body. This prevents that dreaded toppling moment when the wind picks up. And that wiggle test? Do it before you leave the garden—trust me, you'll thank me later.
Seasonal Protection: For scarecrows meant to last through multiple seasons, I've developed a two-part protection system in Step 5. First, use a clear plastic bag (like a sandwich bag) around the head—it keeps the stuffing dry without looking unnatural. Then, spray the entire scarecrow with a 50/50 mix of water and white vinegar before the first rain. This natural solution repels water while keeping the fabric soft. Reapply every few weeks, and your scarecrow will stay looking fresh all season long.
Pro Tips for Make A Homemade Scarecrow
- Here's what I've learned from years of building these garden guardians—simple tricks that turn a basic project into something truly charming.
- The Weight Factor: The key to a sturdy scarecrow is using items with natural weight—denim, wool, or even slightly dampened fabric.
- Stuffing Strategy: When packing your straw or dried husks in Step 3, don't overstuff the head—it needs to maintain that slightly lopsided, human-like shape.
Frequently asked questions
Got questions about crafting your perfect scarecrow? Here are some of the most common ones—plus quick, no-fuss answers to keep your project on track!
What’s the best time of year to put up a scarecrow?
Spring and early summer are ideal! Plant your scarecrow before pests like birds or rabbits become a nuisance (usually when seedlings are 2–4 inches tall). A late-season scarecrow can still work, but it may not be as effective against mature pests. Pro tip: Add it to your garden rotation—rotate placement yearly to prevent pests from getting too familiar with the same spot!
Do I have to sew my scarecrow? Can I skip it?
This guide uses no-sew methods—just stuff old clothes with straw, hay, or even plastic bottles for weight. For extra durability, tie layers with twine or bungee cords. No sewing skills? No problem! Even a simple bundle of clothes on a stick can scare off critters if placed strategically.
What if my scarecrow falls over or looks messy?
Scarecrows need stability! Bury a sturdy stake (like a broomstick or PVC pipe) 1–2 feet deep for support, or tie it to a post. For a "messy" look, fluff the clothes unevenly—birds and rabbits hate unpredictable shapes! Need a quick fix? Add rocks or sandbags to the base for balance.
Will a scarecrow really keep pests away, or is it just for decoration?
It’s a mixed bag! Scarecrows work best in small gardens (under 1/4 acre) and need movement—add a solar-powered fan or gently shake it weekly. For bigger areas, combine it with other methods like netting or companion planting (e.g., marigolds). Think of it as a deterrent, not a guarantee!
Where can I find cheap or free materials?
Raids are your best friend! Check thrift stores, garage sales, or even your closet for old jeans, flannel shirts, or hats. Ask neighbors for hay bales (often free after harvest) or use dried cornstalks. Bonus: Repurpose broken tools or ladders as frames—creativity = savings!
| Quick Fix? | Solution |
|---|---|
| Scarecrow sagging? | Add a second stake or tie it to a fence post. |
| Clothes falling off? | Wrap twine around the stuffing or use rubber bands. |
| Pests ignoring it? | Move it weekly or add reflective tape for extra "scare" power. |
Wrapping up and next steps
Creating a homemade scarecrow is a fun, budget-friendly way to add rustic charm to your garden—no sewing skills required! 🌾 With just a few supplies and a little creativity, you’ve got a functional (and adorable) garden guardian in no time.
Whether you’re protecting your veggies or embracing farmhouse aesthetics, this project is the perfect mix of practicality and whimsy.
Ready to take it further? Try customizing your scarecrow with painted faces, quirky hats, or even a tiny sign for extra personality! Share your masterpiece with us—we’d love to see your unique twist. 📸✨