
Tools
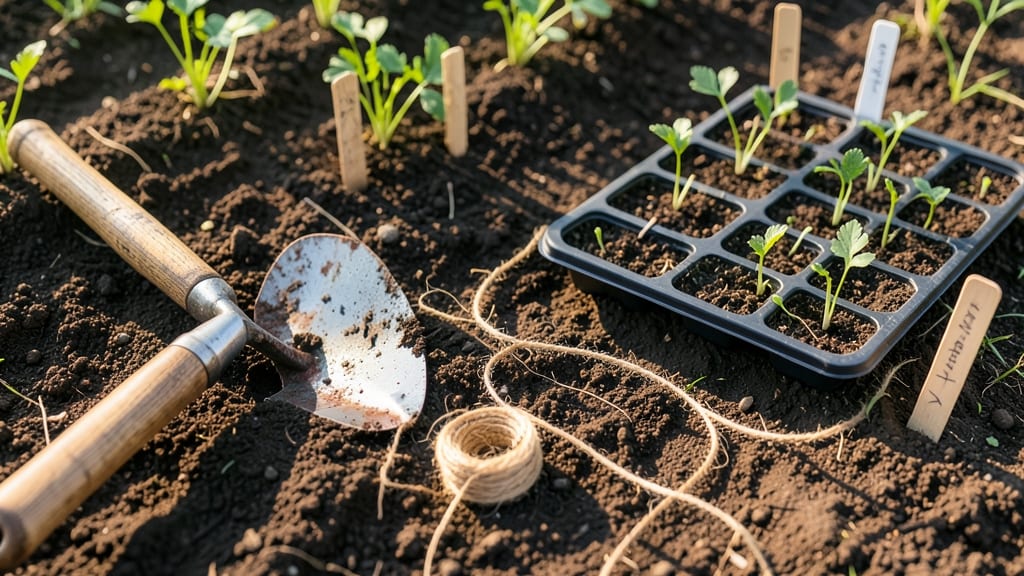
No tools? No problem. ✨ Hand-drawn garden rows create perfectly straight lines without fancy equipment—just a few simple tricks and a steady hand. I used this method last spring to transform a lumpy backyard into neat, even rows for tomatoes and beans, and the results were shockingly professional.
Start with a 3-foot wooden stake or even a sturdy stick to mark your first line. Drive it into the ground at one corner, then use a 20-foot string stretched tight for your guide.
For uneven soil, adjust the string height with small rocks or sticks to create a level reference. Most crops need 18-24 inches between rows—measure carefully to avoid crowding.
Once your first row is marked, use a garden rake to create a shallow trench along the string. Walk slowly, keeping the rake blade parallel to the string for perfect alignment.
Repeat for each row, and you’ll end up with straight, even lines that make planting and weeding a breeze—no measuring tape required.
For tricky spots, like slopes or windy days, anchor your string with stakes every 5 feet to prevent shifting. And if you’re working alone, try a foldable metal tape measure as a backup—it’s faster than freehanding for longer rows.
The key is patience; even rows take time, but the payoff is a garden that looks (and grows) like it belongs in a catalog.
📚 In This Guide
- What you need
- Instructions
- Tips and common mistakes
- Wrapping up and next steps
What you need
- ● String or twine – 10–20 feet (depending on row length; opt for heavy-duty or polyester for durability).
- ● Stakes or dowels – 4–6 wooden, bamboo, or metal stakes (6–12 inches long, ¼-inch thick for stability).
- ● Measuring tape or ruler – 10–25 feet (for precision spacing between rows).
- ● Shovel or spade – Medium-sized (for marking and adjusting soil if needed).
- ○ Garden hose or water source – Optional but handy for wetting soil before marking (helps visibility).
- ○ Chalk or garden marker – For labeling rows (optional but useful for tracking plant types).
- ● Level or carpenter’s level – Ensures stakes are perfectly vertical for flawless straight lines.
- ● Knee pad or gardening stool – Because comfort matters when you’re squatting for hours!
- ● Garden line laser (DIY hack) – Use a small laser pointer taped to a stake for ultra-precise alignment.
- ● Gloves – Protect your hands from sticks, thorns, or rough soil.
- ● Spray bottle with water – Dampens soil to highlight your marked lines clearly.
- ● Clear, level ground (or a slight slope you can account for).
- ● Marked starting point (e.g., a corner of your garden bed).
- ● Knowledge of your row spacing needs (e.g., 12–36 inches apart for most veggies).
- ● Patience and a steady hand—this method relies on your eye for detail! 😉
Step-by-Step instructions for creating handmade garden rows
Here's how I create perfectly straight, weed-suppressing rows without a single tool—just your feet and a little patience.
👣 Step 1: Mark Your Starting Point with a Single Step
Begin at one corner of your planting area and place your foot exactly where you want the first row to start. Press firmly to create a shallow but visible impression in the soil—this becomes your anchor point. I like to use my heel for deeper marks in hard soil or my toe for lighter pressure in loose dirt.
This initial step sets the baseline for your entire row. If you're working with a partner, have them stand at the opposite corner while you mark the start—this creates a natural tension line for perfectly straight alignment. The key is consistency: use the same foot and pressure every time you mark.
🌿 Step 2: Establish the Row Width with Two Parallel Footprints
From your starting mark, step forward 12-18 inches (standard spacing for most vegetables) and place your second footprint. This creates your row width—adjust the distance based on what you're planting (closer for radishes, wider for corn). I tap my foot lightly to create a second shallow line parallel to the first.
Walk back to your starting point and repeat this process, stepping forward and marking another pair of footprints. The goal is to create a series of parallel lines that will guide your planting. For extra precision, I use my outer foot edge to create a straight line—this naturally follows the angle of my leg when walking.
⏰ Step 3: Extend the Row by Walking the Length
Stand with your feet on the first pair of marks and walk forward, keeping your heels aligned with the original footprints. Your next step should land exactly on the second pair of marks. This creates a straight extension of your row—like walking a tightrope between two points.
Continue this process until you reach the end of your planting area. The rhythm of your steps will naturally create a perfectly straight line. If you notice a slight deviation, backtrack one step and realign before continuing. Most people find this easier if they focus on keeping their shoulders square to the row rather than watching their feet.
🪴 Step 4: Deepen the Furrows for Planting
Once you've established the full length of your row, return to the starting point and use your foot to deepen the line between the parallel marks. Press firmly to create a 1-2 inch deep furrow—this will hold your seeds or transplants in place and help with water drainage. I like to use the ball of my foot for this, as it creates a clean, straight edge.
Run your fingers along the furrow to check for consistency. The bottom should be smooth and even—no deep holes or shallow spots. If you're working in rocky soil, I recommend using a small stick or even a pencil to smooth out any rough spots after marking. This ensures your seeds or plants sit at a consistent depth.
☀️ Step 5: Verify Straightness with the Shadow Test
Step back about 10 feet from your completed row and observe it from a distance. On sunny days, the shadow of your row will reveal any imperfections—if the line looks wavy or uneven, you'll need to adjust. I often find that the middle of long rows tends to drift, so I double-check this section first.
For extra precision, have a helper stand at one end of the row while you stand at the other. Hold a small stick or even a piece of string taut between you—if the row deviates more than ½ inch from this line, you'll need to remark that section. This final check ensures your rows are straight enough for proper cultivation and harvesting.
Tips & tricks for perfect handmade garden rows
A few clever techniques will help you create flawless garden rows that stay straight and true without any tools. Here's what I've learned after years of testing this method in different soil types and garden sizes.
Foot Pressure Consistency: The secret to perfectly straight rows lies in maintaining uniform foot pressure throughout. In Step 1, when you mark your starting point, press with the same force you'll use in Step 4 when deepening the furrows. I've found that using my heel for the initial mark and then switching to the ball of my foot for the furrow creates a natural progression that keeps the lines aligned. If you notice your rows starting to wander, it's usually because your pressure varied—try stepping more deliberately and focusing on keeping your weight evenly distributed.
Visual Alignment Tricks: For Step 3 when extending the row length, imagine you're walking along a tightrope between two points. The key is to keep your shoulders square to the row rather than watching your feet. I've discovered that most people naturally drift when they focus on their foot placement—by locking in your upper body alignment first, your feet will follow automatically. This works especially well when working with a partner, as mentioned in Step 1, where you can create that natural tension line between you.
Soil Type Adaptations: The instructions mention adjusting for hard vs. loose soil, but here's the next level: rocky soil requires special attention in Step 4. After pressing your furrow with your foot, run a stick or pencil along the bottom to smooth out any rocks or uneven spots. I've ruined several rows by missing this step in rocky garden beds—those little stones can throw off your planting depth and create gaps where weeds will sneak in. For particularly stubborn rocks, I'll use the flat side of a small trowel to gently press them into the soil below the furrow line.
Precision Verification: When performing the shadow test in Step 5, I've found that the middle of long rows often drifts because our natural walking rhythm tends to curve slightly. To compensate, I'll mark the midpoint of my planned row first, then work outward in both directions. This creates a natural anchor point that prevents the characteristic "banana curve" I've seen in many handmade rows. For extra-long rows (over 20 feet), I'll even mark a third anchor point at the ⅓ mark to maintain perfect alignment throughout.
Pro Tips for Make Garden Rows By Hand
- A few clever techniques will help you create flawless garden rows that stay straight and true without any tools.
- Foot Pressure Consistency: The secret to perfectly straight rows lies in maintaining uniform foot pressure throughout.
- Visual Alignment Tricks: For Step 3 when extending the row length, imagine you're walking along a tightrope between two points.
Frequently asked questions
Got questions about hand-drawn garden rows? You’re not alone—many gardeners want to know the best ways to create neat, even rows without fancy tools. Here are answers to the most common queries to help you get started with confidence!
What’s the easiest way to keep rows perfectly straight without a rake or string?
Use a long, straight board (like a 2x4 or even a sturdy stick) as a guide. Drag it through the soil while pressing down lightly to mark your row. For extra precision, snap a taut string between stakes and follow it with the board. Pro tip: Wet the soil slightly first—it’s easier to drag and leaves cleaner lines!
Is there a best time of year to hand-draw garden rows?
The ideal time is early spring or fall when the soil is moist but not muddy. Avoid drawing rows in dry, hard soil (it’ll crack unevenly) or saturated ground (it’ll clump and stick). If you must prep in summer, water the area the night before for smoother results.
Can I make rows by hand in rocky or uneven soil?
Yes! For rocky soil, focus on creating shallow furrows (just 1–2 inches deep) rather than deep trenches. Use a broadfork or digging stick to loosen soil first, then drag your board lightly. On slopes, work across the incline (not up/down) to prevent erosion and keep rows level.
What if my rows turn out crooked or uneven?
No worries—hand-drawn rows don’t need to be perfect! If they’re slightly off, adjust your planting pattern to follow the natural shape. For straighter rows next time, try this trick: Walk backward while dragging the board to keep your body aligned with the row. A little practice goes a long way!
Are there any tools I can use to make hand-drawing rows easier?
While the goal is to go tool-free, a few low-tech helpers can assist:
- Garden hose: Drag it through the soil to create a temporary guide, then fill the line with water.
- Stakes + string: Hammer in stakes at your desired spacing and stretch string between them for a visual line.
- Wooden dowels: Push them into the soil at intervals, then connect them with string for a sturdier guide.
Wrapping up and next steps
Creating straight, even garden rows by hand is simpler than you think—and it’s a skill that’ll elevate your gardening game!
With just a few tools and a little practice, you can achieve professional-looking rows without spending a dime on fancy equipment. Remember: patience and precision pay off, and soon, your garden will be the envy of the neighborhood.
Ready to take it further? Start small—practice on a single bed before tackling your entire garden. Once you’ve mastered the technique, experiment with raised beds, spirals, or even decorative patterns to add flair to your space. Happy gardening! 🌱✨