
How To
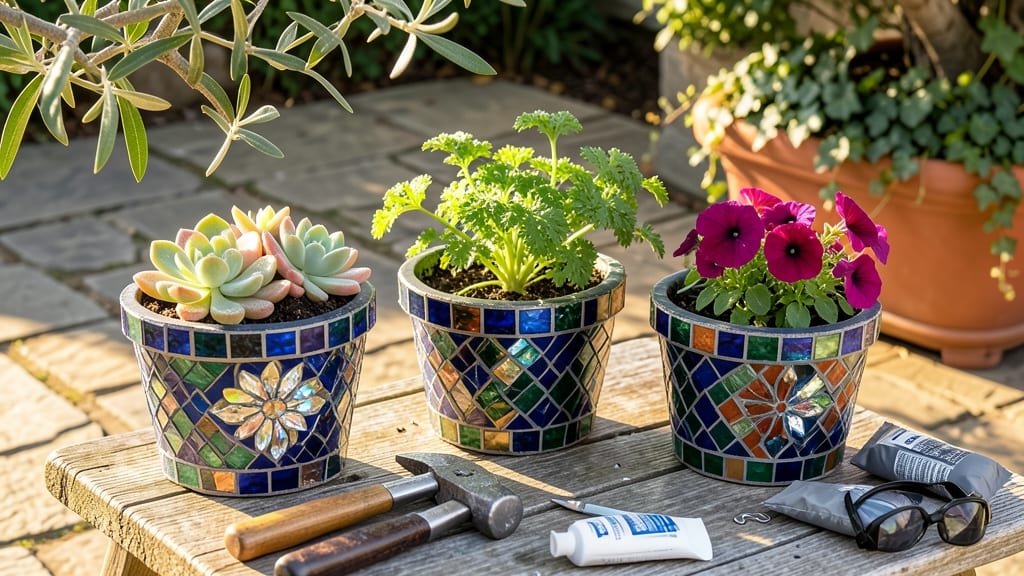
How to make mosaic plant pots from old terracotta pots is the perfect way to breathe new life into your garden. 🌿 I started with a simple pot and a handful of broken tiles—now I have containers that double as conversation starters and garden centerpieces. The process is simpler than you’d think, and the results add a personal, artistic touch to any outdoor space.
You’ll need just a few supplies: terracotta pots (any size), broken tiles or ceramic pieces in colors you love, a hammer for shaping, tile adhesive, and grout.
The beauty of this project is its flexibility—whether you’re using vintage tiles from a thrift store or salvaged pieces from your own home, the possibilities are endless. Start with a small pot to practice your design before tackling larger containers.
Once you’ve got your materials ready, the magic happens in the arranging. Play with patterns—think geometric shapes, organic swirls, or even a mosaic that mimics your garden’s natural colors.
Seal everything with grout for a polished finish, and in just a few hours, you’ll have plant pots that are as unique as your green thumb. The best part? Your garden will thank you with healthier plants in stylish homes.
This project works year-round, whether you’re prepping for spring planting or adding winter interest with evergreens. Plus, it’s a great way to upcycle materials and reduce waste. Grab your tools, and let’s turn those plain pots into something extraordinary—your garden will never look the same again.
📚 In This Guide
- What you need
- Instructions
- Tips and common mistakes
- Wrapping up and next steps
What you need
- ● Base Pot: 1 ceramic, terracotta, or plastic plant pot (6–12 inches in diameter, depending on your design scale).
- ○ Optional: A smaller pot for nesting if you want a layered look.
- ● Mosaic Tiles: Assorted ceramic, glass, or porcelain tiles (cut into small pieces, ~1–2 inches per tile). Aim for 10–20 tiles depending on pot size and complexity.
- ● 1–2 plain tiles (for filling gaps or as accents).
- ● Adhesive: 1 tube of tile adhesive (waterproof, like Liquid Nails or Mod Podge Outdoor).
- ○ Optional: Epoxy resin for extra durability (mix and apply carefully!).
- ● Grout: 1 small bag of sanded grout (neutral color like gray or beige).
- ● 1 grout float and 1 rubber grout sponge.
- ● Safety & Prep: 1 pair of safety goggles and 1 dust mask (for cutting tiles).
- ● Tile nippers or a wet saw (for cutting tiles to size).
- ● Sandpaper (120–220 grit) (to rough up the pot’s surface for better adhesion).
- ● Acetone or rubbing alcohol (to clean the pot and tiles before adhering).
- ● Painter’s tape (to create clean edges or patterns).
- ● Decorative Elements: Sea glass, beads, or small mirrors for texture.
- ● Paint pens or acrylic paint (for touch-ups or custom designs).
- ● Sealing: 1 clear outdoor sealant spray (to protect your masterpiece from weather).
- ● Comfort: Knee pad or small stool (for easy access while working).
Step-by-Step instructions for creating mosaic plant pots
Turn ordinary pots into stunning garden art with these simple, creative steps.
🌱 Step 1: Gather Materials and Prep Your Base Pots
Start with 4 clean ceramic or terracotta pots—smooth surfaces work best for tile adhesion. I like to sand the exterior lightly with 120-grit sandpaper to rough up the surface, which helps the adhesive grip better. Wipe away any dust with a damp cloth before moving forward.
Check each pot for cracks or rough edges. If you find any, smooth them with sandpaper or a file. The goal is a clean, even surface where your mosaic pieces will stick securely. I always test-fit the largest tiles first to ensure they won’t overhang the pot’s edges.
🪴 Step 2: Apply Adhesive and Arrange Your Tiles
Use a notched trowel to spread a thin layer of mosaic adhesive onto the pot’s surface. Work in small sections—about 6x6 inches at a time
Arrange your tiles in a pattern before gluing them down. For beginners, I recommend starting with a simple geometric design or alternating colors in rows. Press each tile firmly into the adhesive, twisting slightly to ensure full contact. Leave 1/8-inch gaps between tiles for grout later—use small spacers if needed. Once all tiles are placed, let the adhesive cure for 24 hours in a dry, dust-free area. I usually prop the pots against a wall to keep them steady. After curing, mix unsanded grout according to package instructions—it should have the consistency of peanut butter. Spread it diagonally across the tiles with a rubber float. Work the grout into the gaps with a grout float, pressing firmly to fill all spaces. Wipe away excess grout with a damp sponge, then rinse the sponge frequently to avoid spreading dirty water across clean tiles. Let the grout dry for 15-30 minutes, then buff the surface with a dry cloth for a polished finish. After the grout is fully dry (24 hours), apply a sealer spray to protect your mosaic from moisture and stains. Hold the can 12 inches away and apply two even coats, letting each dry completely between applications. This step is especially important for terracotta pots, which absorb water. Let the pots cure for 48 hours before planting. Water your plants gently at the base to avoid dislodging tiles. Over time, you might notice grout lines darkening—simply scrub with a stiff brush and mild soap to refresh the look. Your mosaic pots are now ready to add vibrant color to your garden!✂️ Step 3: Let the Adhesive Set and Apply Grout
💧 Step 4: Seal and Care for Your Mosaic Pots
Tips & tricks for perfect mosaic plant pots
Transforming plain pots into vibrant garden art is easier than you think—these insider tips will help you avoid common pitfalls and create stunning results.
Surface Prep Secret: In Step 1, don't skip the sanding! Lightly roughing up the pot's surface with 120-grit sandpaper creates microscopic grooves that help the mosaic adhesive grip like glue. I learned this the hard way—my first attempt without sanding had tiles popping off after just a few waterings. A damp cloth afterward removes all dust, so you're left with a clean canvas for your design.
Adhesive Application Technique: When working with mosaic adhesive in Step 2, spread it in small 6x6-inch sections only—this prevents it from drying out before you place your tiles. Here's what nobody tells you: use a notched trowel with teeth slightly smaller than your smallest tile size. The ridges create perfect adhesive "dots" that hold each tile securely. Keep that damp cloth nearby to wipe away any squeezed-out adhesive immediately, or it'll create messy edges later.
Tile Placement Pro Tip: For Step 2's pattern arrangement, I recommend laying out your tiles on a scrap piece of cardboard first. This lets you experiment with different designs without wasting adhesive. Press each tile firmly into place and twist slightly—this ensures full contact with the adhesive. Pro tip: use small plastic spacers (available at craft stores) to maintain those critical 1/8-inch gaps for grout. Without them, your grout lines will look uneven.
Grout Application Wisdom: In Step 3, after your 24-hour adhesive cure, mix your unsanded grout to peanut butter consistency—thicker than you think! Spread it diagonally across the tiles using a rubber float, working it into the gaps with firm pressure. The key here is patience: let the grout dry for the full 15-30 minutes before buffing. Rushing this step leads to streaky, uneven results that ruin the professional look. A damp sponge works wonders for cleanup, but change the water frequently to avoid spreading dirty grout water across clean tiles.
Pro Tips for Make Mosaic Plant Pots
- Transforming plain pots into vibrant garden art is easier than you think—these insider tips will help you avoid common pitfalls and create stunning results.
- Surface Prep Secret: In Step 1, don't skip the sanding!
- Adhesive Application Technique: When working with mosaic adhesive in Step 2, spread it in small 6x6-inch sections only—this prevents it from drying out before you place your tiles.
Frequently asked questions
Got questions about crafting your own mosaic plant pots? You’re not alone—this creative project sparks curiosity! Below, we’ve rounded up the most common queries to help you tackle any challenges with confidence.
What’s the best adhesive for outdoor mosaic pots?
For outdoor use, opt for a waterproof, UV-resistant adhesive like _E6000_ or PL Premium. These sealants prevent mold and keep tiles secure in rain or humidity. Avoid regular craft glue—it won’t hold up long-term!
Can I use broken tiles or ceramics for my mosaic?
Broken tiles, dishes, or even bottle caps
work beautifully—just clean and smooth rough edges with sandpaper. Mix textures for a boho-chic look, but avoid sharp fragments that could harm roots. Pro tip: Fire tiles in the oven (200°F for 30 mins) to sterilize them!
How long should I wait before planting in my mosaic pot?
Let the adhesive cure 24–48 hours before adding soil. If you’re using a porous pot (like terracotta), seal it first with hydrocal or concrete sealant to prevent leaks. Patience pays off—rushing risks tiles popping off as roots grow.
What’s the easiest way to remove air bubbles under tiles?
Use a plastic squeeze bottle with water to gently glide tiles into place, popping bubbles as you go. For stubborn bubbles, lift the tile slightly and reapply a thin bead of adhesive. A rolling pin (lightly!) can also help press tiles flush.
Can I make mosaic pots without grout?
Yes! Skip grout by using waterproof silicone caulk in your chosen color for a seamless finish. Alternatively, leave small gaps and fill them with pebbles or sand for a natural look. Just ensure all edges are sealed to keep moisture out.
Why did my mosaic tiles come loose after a few weeks?
Loose tiles often mean insufficient adhesive or exposure to moisture. Double-check your bond: apply a thin, even layer of adhesive, press firmly, and let it cure fully. For repairs, use tile epoxy—it’s stronger than standard glue.
Wrapping up and next steps
Creating your own mosaic plant pots is a rewarding way to add a splash of color and creativity to your garden! With just a few basic materials and a little patience, you can transform ordinary pots into stunning works of art.
Whether you're a beginner or a seasoned DIYer, this project is perfect for unleashing your inner artist and giving your plants a one-of-a-kind home.
Now that you’ve got the know-how, grab those tiles, glue, and grout—it’s time to get crafting! Start small with a single pot, and soon, your garden will be bursting with personality. Happy mosaicking! 🌈✨