
Container Gardens
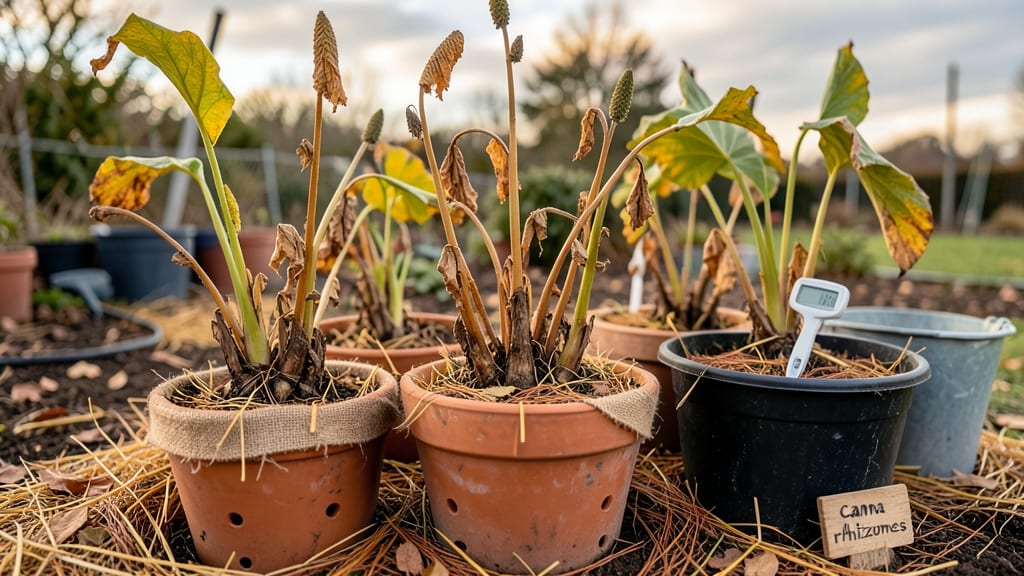
Overwintering cannas in pots without cutting feels like cheating winter. 🌱 I’ve saved my prized cannas for five seasons now by keeping them whole—no chopping, no stress, just a cozy winter nap that wakes up ready to bloom again. The secret?
A snug home, the right insulation, and timing that beats the frost. You’ll need a sturdy pot (at least 12 inches deep), 3-4 inches of mulch, and a spot where temps stay between 30-40°F.
Before frost hits, move pots to a sheltered area, wrap the base in bubble wrap, and top with straw or leaves. The goal is to mimic the ground’s natural freeze-thaw cycle without shocking the rhizomes.
By spring, you’ll see fresh shoots pushing through soil that’s still rich from last season’s growth. No cutting means no recovery time—just bold, early blooms and rhizomes that multiply year after year. The payoff? A head start on summer color without the usual winter casualties.
This works for zones 7-10, but even colder climates can adapt with extra insulation. Here’s how to do it right—no pruners required.
📚 In This Guide
- What you need
- Instructions
- Tips and common mistakes
- Wrapping up and next steps
What you need
- ● Large, sturdy pots (12–18 inches in diameter) with drainage holes—one per canna clump (or larger pots for multiple rhizomes).
- ● High-quality potting mix (well-draining, peat-free, and amended with perlite or vermiculite—10–15 gallons per pot).
- ● Organic mulch (straw, shredded leaves, or pine needles—3–4 inches thick to insulate roots).
- ○ Grow lights or LED bulbs (optional but helpful for low-light spaces—12–14 hours of light daily).
- ● Thermometer/hygrometer (to monitor temps—ideal range: 50–60°F (10–15°C)).
- ● Watering can with a fine rose (for gentle hydration—avoid soggy soil!).
- ● Plastic wrap or clear plastic sheet (to create a mini greenhouse effect—if temps dip below 40°F/4°C).
- ● Rooting hormone (if you’re dividing rhizomes mid-winter).
- ● Slow-release fertilizer (balanced 10-10-10 or low-nitrogen option for dormancy).
- ● Pot feet or casters (to move pots easily if space is tight).
- ● Heating mat (for extra warmth in freezing basements—set to 55°F/13°C max).
- ● Humidity tray (pebbles + water to boost moisture in dry indoor air).
Step-by-step instructions for overwintering cannas in pots
Here’s how I’ve kept my cannas thriving through winter—no cutting required.
🪴 Step 1: Choose the Right Containers and Drainage
Cannas need room to grow, so select pots that are at least 12-14 inches deep and wide enough to accommodate the plant’s mature size. I use terra cotta pots because they breathe better than plastic, helping roots stay dry and preventing rot. Make sure each pot has drainage holes—cannas hate soggy roots, and winter moisture can be especially damaging.
If your pots lack drainage, drill holes in the bottom or place them on saucers filled with gravel. Before planting, I add a layer of 2-3 inches of gravel or broken pottery at the bottom to improve drainage further. This ensures excess water flows away from the roots, which is critical when winter slows evaporation.
☀️ Step 2: Prepare the Soil for Winter Dormancy
Use a well-draining potting mix—cannas need air around their roots to survive winter. I blend 50% potting soil with 30% perlite or coarse sand and 20% compost to provide nutrients without compacting. Avoid garden soil, which can compact and trap moisture, leading to root rot.
Fill the pot almost to the top with this mix, leaving just 1 inch of space at the rim. Gently firm the soil around the canna’s roots to eliminate air pockets, but don’t pack it down too tightly. This setup mimics their natural dormancy conditions while keeping roots aerated and protected.
🌿 Step 3: Position Pots for Winter Protection
Move your canna pots to a location that receives bright, indirect light—think near an east-facing window or under a grow light. Avoid dark corners, as cannas need light to stay alive but not full sun, which can stress them in winter. I place mine on a raised surface, like a plant stand, to keep them off cold, damp floors.
If temperatures drop below 40°F, add a layer of mulch or straw around the pot to insulate the roots. You can also wrap the pot in burlap or a thick blanket, leaving the top exposed for light. This mimics the natural insulation they’d get in the ground, helping them stay dormant without cutting back.
💧 Step 4: Adjust Watering for Winter Survival
Water your cannas sparingly during winter—only when the top 1-2 inches of soil feel dry. Overwatering is the biggest mistake I see, as it leads to root rot. I check moisture by sticking my finger into the soil; if it’s damp, I wait. If it’s dry, I water deeply but stop once water drains from the bottom.
Reduced watering mimics their natural dormancy cycle. You’ll notice the leaves may yellow or die back, but don’t panic—this is normal. The plant is conserving energy for spring. Just keep the soil lightly moist, and the roots will stay healthy until warmer weather returns.
⏰ Step 5: Monitor and Prepare for Spring
Every few weeks, inspect your cannas for signs of life, like new shoots or buds. If you see growth, it’s time to start watering more regularly and moving them back into brighter light. I also check for pests, like spider mites, which love dry winter air—spray with water or neem oil if you spot any.
By late winter or early spring, when temperatures consistently stay above 50°F, you can move the pots back outside to a sheltered spot. Gradually reintroduce them to full sun over 1-2 weeks to avoid shocking the plants. With this method, my cannas come back stronger every year—no cutting required!
Tips & tricks for overwintering cannas in pots
Keeping cannas alive through winter takes patience—and these little details make all the difference.
Container Material Matters: Terra cotta pots are my go-to because they wick away moisture, which is crucial during winter's damp conditions. If you're using plastic, add extra perlite to the soil mix to prevent waterlogging. I've learned the hard way that soggy roots mean certain death for cannas—trust me, the drainage layer at the bottom (2-3 inches of gravel) is non-negotiable.
Soil Mix Secrets: That 50/30/20 blend of potting soil, perlite, and compost isn't just arbitrary—it's about balance. The perlite prevents compaction, while the compost provides just enough nutrients to keep roots alive without encouraging growth. Pro tip: Sift your potting soil before mixing to remove any large clumps that could block drainage.
Light Positioning Strategy: East-facing windows are ideal because they provide gentle morning light without the harsh afternoon sun that can stress wintering plants. If natural light is limited, supplement with a grow light for 6-8 hours daily. I position my pots on plant stands to keep them off cold floors, which helps maintain more consistent soil temperatures.
Pest Prevention: Spider mites become more active in dry winter air, so I inspect my cannas every few weeks. A quick spray with water or neem oil is all it takes to keep them at bay. The key is catching them early—once they've established colonies, they're much harder to eliminate. I also avoid overwatering, which creates the perfect humid environment for these pests.
Pro Tips for Overwinter Cannas In Pots Without Cutting
- Keeping cannas alive through winter takes patience—and these little details make all the difference.
- Container Material Matters: Terra cotta pots are my go-to because they wick away moisture, which is crucial during winter's damp conditions.
- Soil Mix Secrets: That 50/30/20 blend of potting soil, perlite, and compost isn't just arbitrary—it's about balance.
Frequently asked questions
about overwintering cannas in pots without cutting—because even the best gardeners need a little extra guidance!Can cannas survive freezing temperatures in pots?
While cannas are tropical plants, they can tolerate brief cold snaps (down to 20°F/-7°C) if protected properly. However, prolonged freezing will damage the tubers. Use mulch, frost blankets, or move pots to a sheltered spot to extend their life. For extreme winters, indoor overwintering is the safest bet!
How do I know when it’s time to start overwintering?
Watch for the first hard frost (when temps dip below 32°F/0°C) or when foliage turns yellow/brown. If your cannas are still green but nights are chilly, start prepping by reducing water and moving pots to a sheltered spot. Early action prevents stress and improves survival rates!
What’s the best indoor location for overwintering cannas?
Choose a cool, dark spot (like a basement or garage) with temps between 40–50°F/4–10°C. Avoid heat sources (like furnaces) or direct sunlight, which can cause premature sprouting. A damp (not soggy) corner with good airflow mimics their natural dormancy conditions.
What if my canna leaves stay green but won’t go dormant?
Green leaves mean the plant isn’t fully dormant—common if temps are mild or watering is inconsistent. Try reducing water further and moving pots to a cooler spot. If leaves stay green into winter, they may need a "dry rest" (let soil dry completely) to trigger dormancy.
Can I overwinter cannas in the ground instead of pots?
Yes! If you’re in a mild climate (Zone 8+), mulch heavily with straw or leaves (12+ inches) and protect with frost blankets. In colder zones, dig up tubers and pot them for indoor storage—ground-frozen cannas rarely survive. Always lift tubers if frost is forecasted!
Wrapping up and next steps
Overwintering cannas in pots without cutting is totally doable with the right prep—no green thumb required! 🌱 By choosing cold-hardy varieties, insulating roots, and protecting them from harsh weather, you’ll wake up to vibrant blooms again next spring. Your effort now means fewer headaches later!
Ready to put these tips into action?
Start by auditing your canna collection—identify which varieties can handle cooler temps, then gather supplies like mulch, frost cloth, or a cozy garage spot. Next, pick a method that fits your climate and garden style, and give your cannas the winter care they deserve. Happy growing!