
Planting
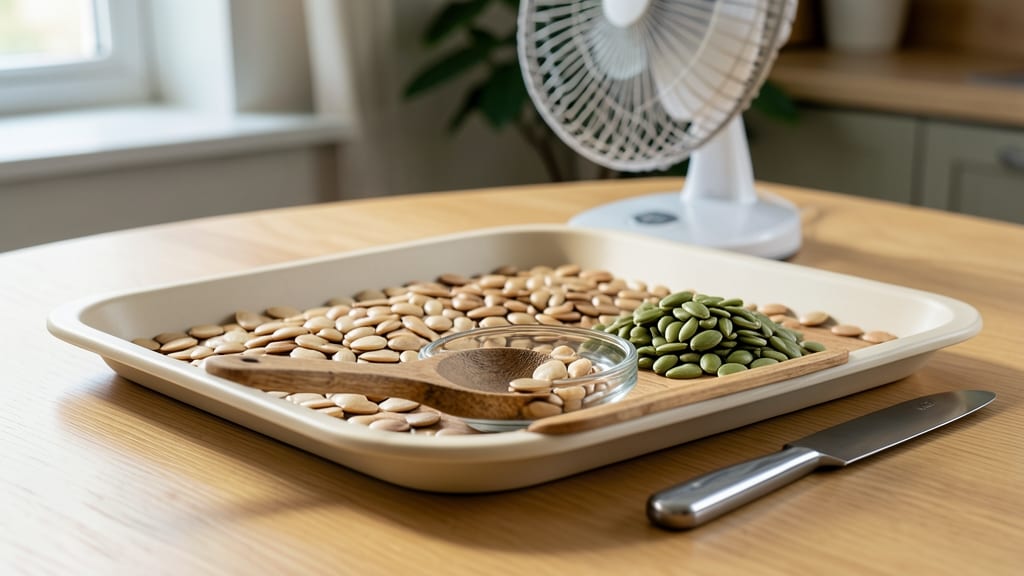
How to dry out pumpkin seeds to plant properly makes all the difference between a thriving garden and wasted effort. ✨ After harvesting, those plump seeds need just the right conditions to stay viable—too wet and they rot, too dry and they lose their spark. I’ve learned that sun-curing for 24 hours is the simplest, most reliable method, and it works even for beginners. The process is straightforward: spread seeds in a single layer on a tray or screen, then let them bask in indirect sunlight. You’ll know they’re ready when they’re completely dry to the touch but still firm—no moisture left to invite mold. This method preserves germination rates while keeping the process natural and chemical-free. Once dry, store seeds in a cool, dark place in a sealed container. Properly dried seeds stay good for years, so you’ll always have a backup supply for next season’s planting. The key is patience—rushing the drying process leads to shriveled seeds that struggle to sprout. For extra peace of mind, test a few seeds by placing them in damp paper towels. If they sprout within a week, your drying method worked perfectly. This simple check ensures you’re starting with the best possible seeds for your garden.
📚 In This Guide
- What you need
- Instructions
- Tips and common mistakes
- Wrapping up and next steps
What you need
- ● Fresh pumpkin seeds – Harvested from a ripe, organic pumpkin (aim for 20–30 seeds if testing viability or 50+ seeds for bulk drying).
- ● Paper towels or clean kitchen towels – 2–3 sheets (unbleached, if possible, to avoid chemical residue).
- ● Baking sheet or shallow tray – Use a cookie sheet or ceramic tray (avoid metal if drying in direct sunlight for long periods).
- ● Fine-mesh strainer or colander – For rinsing seeds thoroughly.
- ● Paper plates or parchment paper – 2–3 sheets (to prevent seeds from sticking).
- ○ Small bowl or container – For soaking seeds (optional but helpful for cleaning).
- ● Air-dry space – A well-ventilated area with indirect sunlight (like a windowsill or balcony) for initial drying.
- ● Sunny outdoor spot – A flat, clean surface (like a picnic table or deck) for final sun-curing (if using the sun method).
- ● Dehydrator – Set to 120–135°F (49–57°C) for faster, even drying (3–6 hours).
- ● Food dehydrator trays – If using a dehydrator, 1–2 trays with mesh screens for airflow.
- ● Hair dryer (cool setting) – For speeding up drying in humid climates (use sparingly!).
- ● Small fan – To circulate air if drying indoors (prevents mold risk).
- ● Air-tight containers or resealable bags – For long-term seed storage (glass jars or mylar bags with oxygen absorbers are ideal).
- ● Labeling materials – Masking tape + marker to label seeds by variety/date.
Step-by-Step instructions for drying pumpkin seeds for planting
Sun-drying pumpkin seeds is the fastest way to ensure viability—here's how to do it right in 24 hours.
🌱 Step 1: Extract and Rinse the Seeds
Cut open a fresh pumpkin and scoop out the stringy pulp with the seeds still attached. Place the pulp in a bowl of cool water and swirl gently to separate the seeds from the fibers. Let them soak for 5-10 minutes—this loosens any remaining pulp.
Drain the water and rinse the seeds under running water, rubbing them between your fingers to remove all debris. Spread them on a clean kitchen towel and pat dry with another towel. You want them damp but not wet—any moisture left will slow drying and invite mold. I like to work in batches of 2-3 cups at a time so the seeds don't dry unevenly.
☀️ Step 2: Arrange Seeds for Even Sun Exposure
Choose a spot that gets full sun for at least 6 hours daily—a clean baking sheet, window screen, or even a piece of cardboard works. Spread the seeds in a single layer, spacing them about ½ inch apart so air circulates freely. If you're using a screen, lay it flat on a table or hang it vertically with clothespins.
Here's the thing—if seeds overlap, they'll trap moisture and stay damp too long. You'll know they're arranged properly when you can see every seed clearly from above. A light breeze helps, so an open porch or balcony is ideal. If you're indoors, place them near a sunny window and use a small fan to mimic airflow.
💧 Step 3: Monitor and Rotate for Consistent Drying
Check the seeds every 2-3 hours during peak sun. They're ready when the outer shells turn hard and papery, and the seeds themselves feel dry to the touch. This usually takes 6-8 hours in full sun, but humidity can stretch it to 12 hours. If rain is forecast, bring them indoors to finish drying.
Rotate the tray or screen every 2 hours so all seeds get even exposure. You'll see the edges dry first—watch for that. If you notice any seeds starting to darken or smell musty, remove them immediately and discard. Properly dried seeds will have a matte, slightly dull finish and rattle when shaken in their container.
⏰ Step 4: Test and Store for Planting
Once fully dry, give the seeds a quick viability test: place 10 seeds in a small glass of water. Good seeds sink within 10 minutes; floaters are nonviable. If 80% sink, your batch is ready for storage. If fewer than half sink, repeat the drying process for another 2-4 hours.
Store the dried seeds in an airtight container—glass jars with tight lids work best—in a cool, dark place. Label with the variety and date. When stored properly, pumpkin seeds stay viable for 3-5 years. Next spring, you'll have healthy seedlings without waiting for pumpkins to ripen naturally.
Tips & tricks for perfect sun-dried pumpkin seeds
Here's what I've learned after drying pumpkin seeds for years—these small tweaks make all the difference between seeds that store well and ones that spoil.
The Airflow Secret: In Step 2, that ½-inch spacing between seeds isn't just about looks—it's about airflow. I use a window screen because it creates perfect spacing automatically. If you're using a baking sheet, poke holes in the bottom with a fork to let moisture escape. The goal is to prevent any trapped humidity that could cause mold.
Weather Watch: The 12-24 hour timeframe assumes sunny, dry conditions. If you're in a humid climate or it's raining, don't fight it—use the dehydrator method instead. I've ruined batches by insisting on sun-drying during damp mornings. The 125°F dehydrator setting is your friend when Mother Nature isn't cooperating.
Storage Wisdom: That paper envelope isn't just for looks—the breathable material prevents condensation buildup, which is the #1 reason seeds lose viability. I add a tiny packet of silica gel (the kind in shoe boxes) to my storage containers for extra moisture protection. Labeling with the date is crucial too—seeds dried in fall might need planting sooner than those dried in summer.
Quick Test: That "sharp click" test in Step 4 is my favorite trick. It's foolproof for dehydrator drying. For sun-drying, I add a visual check: when the shells turn from shiny to matte, they're ready. This happens right around the 18-20 hour mark in good weather.
Pro Tips for Dry Out Pumpkin Seeds To Plant
- Here's what I've learned after drying pumpkin seeds for years—these small tweaks make all the difference between seeds that store well and ones that spoil.
- The Airflow Secret: In Step 2, that ½-inch spacing between seeds isn't just about looks—it's about airflow.
- Weather Watch: The 12-24 hour timeframe assumes sunny, dry conditions.
Frequently asked questions
Got questions about drying pumpkin seeds for planting? You’re not alone! Here are some of the most common concerns—and their answers—to help you succeed.
How long does it take to dry pumpkin seeds for planting?
With proper sun-drying, pumpkin seeds typically take 12–24 hours to reach the ideal moisture level (around 10–15%). If your climate is humid or rainy, opt for a food dehydrator (4–6 hours at 115°F) or an oven (2–3 hours at 170°F). Always check for crispiness—they should snap when bent, not bend.
Can I plant pumpkin seeds straight from the pumpkin without drying them?
While you can plant fresh pumpkin seeds, drying them first boosts germination rates by preventing mold and rot. Undried seeds may sprout slower or fail entirely, especially in damp soil. If you’re in a hurry, scrub and soak them in water for 24 hours first, then plant—but drying is still the gold standard for reliability.
What’s the best way to test if pumpkin seeds are dry enough to plant?
Perform the “snap test”: Hold a seed between your fingers and gently bend it. If it snaps cleanly, it’s ready. If it bends like taffy, dry it longer. For extra precision, use a moisture meter (ideal range: 10–15% moisture). Pro tip: Store dried seeds in a cool, dark place (like a jar with rice) to maintain viability for years!
What if my dried pumpkin seeds still won’t sprout?
Try these fixes:
- Soak overnight in water to rehydrate the seed coat.
- Check for mold—discard any fuzzy or discolored seeds.
- Test a few seeds in a damp paper towel (place in a bag for 5–7 days). If they sprout, your soil or timing may be the issue.
- Ensure seeds are fresh (store-bought seeds >1 year old often fail).
Can I use pumpkin seeds from a store-bought pie or canned pumpkin?
Store-bought seeds (like from pie filling) are often treated with preservatives or salt, which can inhibit germination. Canned pumpkin seeds are not viable—the cooking process kills them. Stick to fresh, organic pumpkins (like butternut or sugar pumpkins) for the best results. Save seeds from your homegrown pumpkins for guaranteed success!
Wrapping up and next steps
Drying pumpkin seeds properly is the first step to ensuring strong, healthy plants that thrive in your garden. With just a few simple tools and a little patience, you can transform leftover seeds into viable planting material in as little as 24 hours!
Whether you’re growing pumpkins for harvest or just love the process, mastering this technique opens the door to a rewarding gardening journey. 🌱
Now that you’re ready to dry and plant, why not take the next step? Research the best planting times for your region, prepare your soil, and get ready to watch your seeds sprout into lush vines. Happy gardening! 🌞