
Size
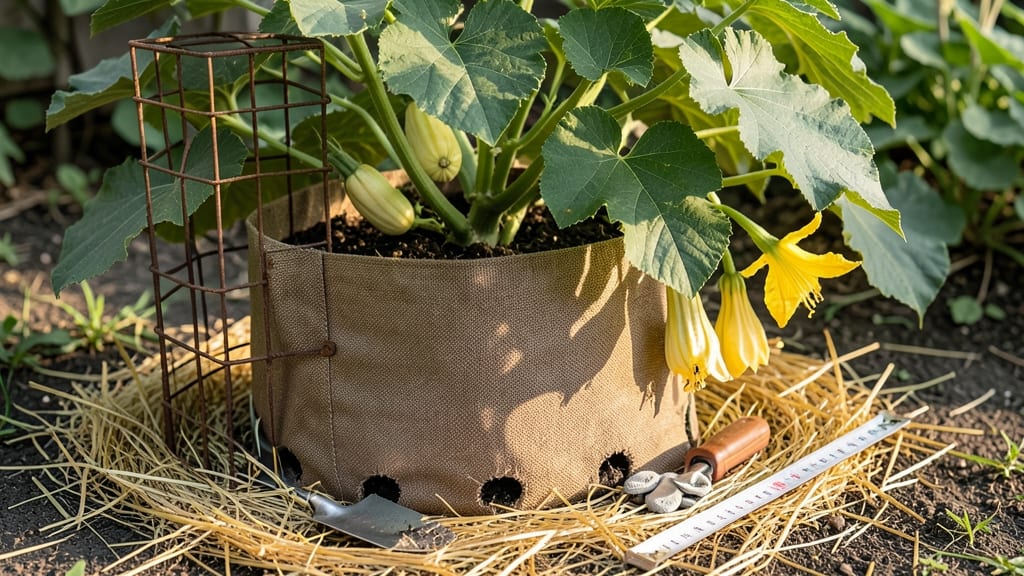
How to grow butternut squash in a small space feels impossible—until you see the vines climbing. 🌱 I used to think squash needed acres, but a simple trellis transformed my balcony into a productive harvest zone. The secret? Training those sprawling vines vertically instead of letting them sprawl. You only need 3 key things: a sturdy trellis (or strong fence), well-draining soil with compost, and morning sun for at least 6 hours. Most people overlook the soil prep—amend with aged compost to prevent rot, since squash roots are sensitive. The vines will climb like crazy once they get started. By midsummer, you'll be harvesting 2-3 squash per plant—each one sweeter and more tender than store-bought. The vertical method also keeps pests like squash bugs off the ground where they lurk. Plus, your neighbors will think you have a secret garden plot. Works for containers, small yards, or even a sunny windowsill with the right setup. Here's how to make it work without sacrificing space or yield.
📚 In This Guide
- What you need
- Instructions
- Tips and common mistakes
- Wrapping up and next steps
What you need
- ● Butternut squash seeds: 3–5 seeds (choose a compact variety like 'Waltham Butternut' or 'Small Sugar' for small spaces).
- ● Containers or raised beds: 1–2 5-gallon buckets (with drainage holes) or
- ● 1 large fabric grow bag (10–15 gallons) or
- ● 1 raised bed (at least 12" deep, 3' x 3' minimum).
- ● Potting mix: 1 bag of high-quality, well-draining soil (mix in compost for nutrients).
- ● Vertical trellis or support: 1 tomato cage (or DIY wire frame) or
- ● 1 A-frame trellis (6–8 ft tall) or
- ● 1 wall-mounted trellis (for balconies).
- ● Fertilizer: Balanced 10-10-10 or organic options like compost tea or worm castings.
- ● Watering can or hose: With a gentle spray nozzle (butternut squash hates soggy roots!).
- ● Pruning shears: For trimming vines and managing growth.
- ● Mulch: Straw or shredded leaves (to retain moisture and suppress weeds).
- ● Row covers: Lightweight fabric to protect young plants from pests.
- ● Drip irrigation kit: For hands-off watering in containers.
- ● Plant ties: Soft fabric strips to secure vines to trellises.
- ● Garden twine: For DIY trellis repairs or extra support.
- ● Soil moisture meter: To check hydration levels (especially in containers).
Step-by-step instructions for growing butternut squash vertically in small spaces
Here's how to turn limited space into a bountiful harvest using simple trellising techniques.
🌱 Step 1: Choose the Right Variety and Prepare Your Trellis
Start with a compact butternut variety like 'Waltham' or 'Sweet Meat'—these grow well vertically and produce smaller fruits that fit in tight spaces. Build or purchase a 4-6 foot tall trellis using sturdy materials like bamboo stakes or metal cages. I like to use 3-inch diameter PVC pipes cut into 6-foot sections and wrapped with chicken wire for extra support.
Position your trellis in full sun (at least 6-8 hours daily) and ensure the base is anchored securely—these vines get heavy as they grow. The trellis should be wide enough to support 4-6 plants spaced 12-18 inches apart at the base. If using a cage, make sure the openings are at least 2 inches wide to prevent vines from escaping.
🌿 Step 2: Plant Seeds at the Right Depth and Time
Sow seeds 1 inch deep in well-draining soil mixed with compost (I use 2-3 gallons of compost per plant). Butternut squash thrives in warm soil, so wait until after the last frost when soil temperatures reach at least 60°F. You'll know it's time when nearby plants like beans or cucumbers are already sprouting.
Plant 2-3 seeds per spot (they germinate unevenly) and thin to the strongest seedling once they have 2-3 true leaves. Water gently after planting to settle the soil, but avoid soaking—you want the seeds to stay moist but not waterlogged. Place a small stake or label near each planting to track growth without disturbing the roots.
✂️ Step 3: Train Vines Up the Trellis as They Grow
When vines reach 6-8 inches tall, gently guide the main stem upward and secure it to the trellis with soft plant ties or strips of old fabric. Avoid wire or anything that can cut into the tender stems. You'll see the vines grow aggressively—3-4 inches per day in ideal conditions—so check them every 2-3 days and adjust ties as needed.
Prune side shoots (suckers) that form below the main vine to direct energy upward. Leave 1-2 strong side shoots on the main vine to produce fruits—these will grow horizontally along the trellis. Remove any male flowers (they have long stems and no fruit) to save energy for female flowers (they have tiny squash at the base).
💧 Step 4: Water and Fertilize for Maximum Yield
Water deeply 2-3 times per week, aiming for 1-2 inches of water each time. Butternut squash has shallow roots, so keep the soil evenly moist (not soggy) until fruits form. You'll know you're doing it right when the soil feels damp 2 inches down—stick your finger in to check. Mulch around the base with 2-3 inches of straw to retain moisture and suppress weeds.
Fertilize lightly every 3-4 weeks with a balanced 10-10-10 fertilizer (use 1 tablespoon per plant). Too much nitrogen makes vines grow fast but produces small, tough fruits. Switch to a low-nitrogen, high-phosphorus fertilizer (like 5-10-10) when flowers appear to encourage fruit development. Watch for yellowing leaves—this usually means overwatering or too much fertilizer.
🌿 Step 5: Harvest and Maintain Through the Season
Butternut squash is ready to harvest when the skin turns hard and dull tan, and the stem near the fruit dries out. Gently twist the fruit to separate it from the vine—don’t cut it, or the wound won’t heal properly. Expect 4-6 fruits per plant if you’ve trained the vines correctly. Store harvested squash in a cool, dry place (50-55°F) where they’ll keep for 2-3 months.
After harvest, remove old vines and compost them (unless disease was present). Clean the trellis and store it for next year. If you’re in a warm climate, you can plant a second crop in late summer—just repeat the process with fresh seeds and a renewed trellis. The key to small-space success? Patience and pruning—keep those vines climbing, and the rewards will be worth it.
Tips & tricks for vertical butternut squash growth
Here's what I've learned after testing different trellis setups and growing conditions—these tricks make all the difference for compact butternut squash.
Trellis Stability: The 4-6 foot trellis needs extra reinforcement when vines reach 3-4 feet tall. I add a crossbeam halfway up to prevent swaying, especially in windy conditions. Use zip ties or soft plant ties to secure the crossbeam—this keeps your plants from toppling over when fruits start forming.
Seed Starting Hack: When planting your 2-3 seeds per spot, I recommend using biodegradable pots instead of planting directly in the ground. This gives you cleaner transplants and prevents disturbing roots when you thin to the strongest seedling. Simply press the pot into the soil and let the roots grow through the bottom.
Watering Wisdom: The 2-3 times per week watering schedule works best with morning watering—this gives the vines plenty of moisture for their rapid 3-4 inch daily growth. I use a soaker hose to deliver water directly to the roots while keeping the leaves dry, which prevents fungal diseases that can ruin your harvest.
Harvesting Timing: For that perfect hard, dull tan skin, I check my squash every 3-4 days starting in late summer. The stem drying out is your best indicator—if it snaps easily when you gently twist, that squash is ready. Don't wait too long or the vines will start to die back, leaving you with fewer fruits.
Pro Tips for Grow Butternut Squash In Small Space
- Here's what I've learned after testing different trellis setups and growing conditions—these tricks make all the difference for compact butternut squash.
- Trellis Stability: The 4-6 foot trellis needs extra reinforcement when vines reach 3-4 feet tall.
- Seed Starting Hack: When planting your 2-3 seeds per spot, I recommend using biodegradable pots instead of planting directly in the ground.
Frequently asked questions
Got questions about growing butternut squash in tight spaces?
You’re not alone! Here are answers to the most common concerns—from timing to troubleshooting—to help you crush your small-space harvest.
Can I grow butternut squash in containers?
Use a 5-gallon bucket or fabric grow bag (at least 12–18 inches deep) with drainage holes. Choose compact varieties like ‘Waltham’ or ‘Sugar Loaf’ and plant one seed per container. Just ensure they get 6+ hours of sunlight daily and keep soil moist but not soggy.
How long does it take for butternut squash to mature in small spaces?
Butternut squash typically takes 80–100 days to mature, regardless of space. However, container-grown squash may ripen slightly faster (around 70–90 days) due to better airflow and temperature control. Check for readiness when the rind turns hard and seeds darken—then harvest before frost!
What pests should I watch for, and how do I prevent them?
Squash bugs, cucumber beetles, and powdery mildew are common foes. Prevent them early with:
- Row covers (lightweight fabric) to block pests.
- Neem oil or insecticidal soap for mildew.
- Handpick squash bugs (look for flat, gray-green adults).
- Rotate crops yearly to break pest cycles.
Can I grow butternut squash indoors under grow lights?
It’s possible but challenging. Butternut squash needs 12+ hours of light daily and warmth (70–90°F). If you try it, use a large container (10+ gallons), a full-spectrum LED grow light, and supplement with CO₂ for better yields. Outdoor growing is still easier!
What can I plant after butternut squash in a small space?
Butternut squash are heavy feeders, so follow up with light-rooted crops like:
- Leafy greens (kale, spinach, lettuce)
- Herbs (basil, cilantro, parsley)
- Radishes or green onions (fast-growing)
- Beans or peas (nitrogen-fixers to refresh soil)
Wait until you’ve removed all squash vines and debris to avoid disease carryover.
Pro Tip: Struggling with slow growth?
Butternut squash love warm soil (70°F+)—use black plastic mulch or a cold frame to speed up germination. If your space is shady, opt for ‘Honey Nut’ (more tolerant of partial shade) or supplement with a reflective grow light.
Wrapping up and next steps
Growing butternut squash in small spaces isn’t just possible—it’s empowering! With the right techniques, like vertical trellises and container gardening, you can enjoy a bountiful harvest even in tight quarters.
Start small, experiment with what works best for your space, and soon you’ll be savoring homegrown squash all season long.
Ready to take the next step? Plant your seeds today and watch your tiny garden transform into a squash haven! 🌱✨