
Size
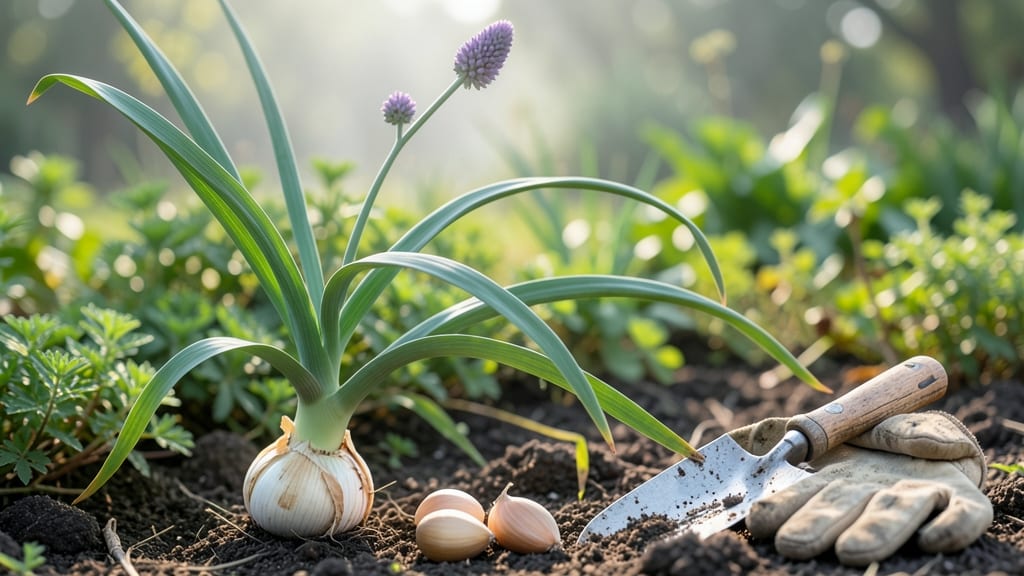
One clove, endless harvests—this is how you turn a single garlic bulb into a year-round kitchen staple. 🌱 I used to think garlic needed whole heads to grow, but solo planting changed everything: smaller space, faster regrowth, and no wasted cloves.
Start with a plump, firm clove from a hardneck variety (they're more reliable). Plant it 2 inches deep, pointy end up, in well-draining soil mixed with compost. The secret? Consistent moisture—not soggy, just damp like a wrung-out sponge. Most people overwater, which rots the clove before it sprouts.
By late fall, you'll see green shoots poking through, and by next summer, you'll harvest full-sized bulbs from that single clove. The best part? Each harvest bulb can be replanted, giving you continuous garlic with minimal effort. Even my black thumb got this right.
Works in containers, raised beds, or small garden patches—perfect for urban growers or anyone tired of store-bought garlic. Here's how to avoid the three mistakes that kill solo garlic before it starts.
📚 In This Guide
- What you need
- Instructions
- Tips and common mistakes
- Wrapping up and next steps
What you need
- ● Garlic cloves: 1–2 large, healthy cloves (preferably from a hardneck or softneck variety). Pro tip: Choose plump cloves with firm, unbroken skin!
- ● Growing container or garden bed: Container: A 6–8" deep pot (minimum 6" diameter) with drainage holes. Example: Terracotta pot, fabric grow bag, or recycled bucket.
- ● Garden bed: Well-draining soil in a sunny spot (6+ hours of sunlight daily). Soil pH: Aim for 6.0–7.0 (slightly acidic to neutral).
- ● Potting mix or garden soil: 1–2 gallons of loose, nutrient-rich soil (add compost or aged manure for extra fertility).
- ● Watering can or spray bottle: For gentle hydration (avoid soggy soil!).
- ○ Fertilizer (optional but helpful): Balanced organic fertilizer (e.g., 5-5-5 or 10-10-10) or compost tea.
- ● Slow-release granules (follow package instructions).
- ● Trowel or small hand shovel: For planting and soil prep.
- ● Measuring tape or ruler: To ensure proper spacing (2–3" deep, 4–6" apart).
- ● Mulch (straw, leaves, or grass clippings): 1–2 inches to retain moisture and regulate temperature.
- ○ Plant labels (optional): Mark variety and planting date.
- ● Harvest knife or pruners: For cutting green garlic or mature bulbs.
Step-by-step instructions for growing solo garlic cloves
Here's the foolproof method I've used for years to grow full-sized bulbs from single cloves.
🌱 Step 1: Select and Prepare Your Garlic Cloves
Choose hardneck garlic varieties—they produce the most robust single-clove growth. Break apart a bulb and select the largest, plump cloves from the center (they've stored the most energy). Let them dry on a paper towel for 24-48 hours at room temperature to form a protective skin—this prevents rot when planted.
Don't skip the drying step. I've planted fresh cloves straight from the store, and they always rot within weeks. The skin acts like a natural barrier against soil-borne pathogens. Once dry, peel away just the papery outer layers—keep the purple or white skin intact—and plant within 2 weeks for best results.
🪴 Step 2: Plant in Well-Draining Soil
Use a 6-inch deep container or garden bed with loose, well-draining soil (garlic hates soggy roots). Amend heavy clay with 2 inches of compost and a handful of gravel to improve drainage. Plant the clove 2 inches deep, pointy end up, with the skin facing outward—this prevents the bulb from splitting as it grows.
Space cloves 4-6 inches apart in rows 12 inches apart to allow airflow. If planting in containers, use one clove per 6-inch pot. Water gently after planting to settle the soil, but don't overdo it—garlic needs moderate moisture, not saturation. The soil should feel like a wrung-out sponge when checked.
☀️ Step 3: Provide Sun and Seasonal Care
Garlic thrives in full sun (6+ hours daily) but tolerates partial shade in hot climates. In zones 5-8, plant in fall (6-8 weeks before first frost) so bulbs mature over winter. In zones 9-10, plant in winter (December-February) for spring harvests. Mulch with 2-3 inches of straw after planting to insulate roots and retain moisture.
Fertilize once in early spring with a low-nitrogen, high-phosphorus formula (like 5-10-10) to encourage bulb development. Avoid high-nitrogen feeds—those produce leafy growth at the expense of bulb size. You'll know you're on track when green shoots emerge in 2-4 weeks and leaves reach 12-18 inches tall by summer.
⏰ Step 4: Harvest and Cure for Storage
Harvest when lower leaves turn brown but upper leaves remain green (usually late spring to early summer). Use a fork to loosen soil around the bulb, then gently pull—never dig or you'll damage the bulb. Brush off excess dirt but leave the skin intact to prevent drying too quickly.
Cure bulbs in a dry, shaded, well-ventilated area (like a garage or porch) for 2-3 weeks. Hang them in small bundles or lay them on a screen. Once the skins are completely dry and papery, braid the stems or store whole in a mesh bag in a cool, dark place. Properly cured garlic keeps for 6-12 months—far longer than store-bought.
🌿 Step 5: Save Seeds for Next Year
After harvesting, select the largest, healthiest bulbs to replant. Break them apart in late summer and dry the cloves again before storing in a cool, dark place until fall planting. I label each year's cloves with the variety and planting date—next year's harvest will be even bigger if you use your own seed stock.
Here's the thing—garlic improves with each generation when grown from saved cloves. The bulbs get larger, the flavor deeper, and you'll develop a year-round supply without buying seeds annually. Just remember: hardneck varieties are best for solo clove planting—softneck types (like the kind sold in supermarkets) rarely produce full bulbs from single cloves.
Tips & tricks for perfect solo garlic growth
These pro insights will help you turn that single clove into a bounty of homegrown garlic—without the common pitfalls.
Selection Matters: The center cloves from a hardneck bulb are your best bet—they've stored the most energy for growth. I always test a few cloves first by breaking apart a bulb and comparing sizes. The ones that feel heaviest for their size are the winners. Remember, you're not just planting garlic, you're planting potential—so choose wisely!
Drying is Non-Negotiable: That 24-48 hour drying period on a paper towel isn't optional—it's your first line of defense against rot. I've seen fresh cloves planted straight from the store turn to mush within weeks. The skin forms a natural barrier that prevents soil-borne pathogens. Pro tip: Use a fan on low to speed up drying if you're short on time, but don't skip this crucial step entirely.
Planting Orientation: The pointy end should always face upward—this is where the bulb will form. I've made the mistake of planting them upside down, and while they still grow, the bulbs end up misshapen. Also, keep that skin facing outward—it helps prevent the bulb from splitting as it grows. Think of it like planting a seed: the pointy end is nature's built-in compass.
Container Hack: If you're growing in pots, use the 6-inch depth rule but add drainage holes if your container doesn't have them. I've had success with terracotta pots because they wick away excess moisture. For extra insurance against soggy roots, add a layer of pebbles at the bottom before adding soil. This mimics the well-draining conditions garlic loves in the ground.
Pro Tips for Grow Solo Garlic
- These pro insights will help you turn that single clove into a bounty of homegrown garlic—without the common pitfalls.
- Selection Matters: The center cloves from a hardneck bulb are your best bet—they've stored the most energy for growth.
- Drying is Non-Negotiable: That 24-48 hour drying period on a paper towel isn't optional—it's your first line of defense against rot.
Frequently asked questions
Got questions about growing solo garlic? You’re not alone!
Here are answers to the most common queries—from timing to troubleshooting—to help you grow confidently with just one clove.
Can I grow garlic from a single clove year-round?
Solo garlic thrives best in cool seasons (fall or early spring), but with the right care, you can try it in mild winters or warm climates. Plant in well-draining soil, keep it moist, and protect it from extreme heat or frost. For year-round success, opt for hardneck varieties (like Rocambole) in cooler zones or softneck types (like Silverskin) in warmer areas.
How long does it take for a single clove to produce a full garlic bulb?
Patience is key! A solo clove typically takes 8–12 months to mature into a full bulb, depending on your climate. In cooler regions, plant in fall (October–November) for a summer harvest. In warmer zones, plant in winter or early spring (February–March) to avoid heat stress. Check for readiness when lower leaves turn brown and the bulb feels firm when gently squeezed.
What if my solo garlic sprouts but doesn’t form a bulb?
Don’t worry—this happens! If your garlic grows leaves but no bulb, it’s often due to heat stress, poor soil, or overcrowding. Try these fixes:
- Adjust planting time: Avoid planting in hot summers (ideal temps: 60–70°F).
- Improve soil: Amend with compost for nutrients and ensure 6+ inches of loose soil.
- Thin plants: Space cloves 4–6 inches apart to prevent competition.
Can I replant garlic from a store-bought bulb?
Yes! Store-bought garlic can grow, but it’s often treated to prevent sprouting. Try this: Soak the cloves in water for 24 hours to break dormancy, then plant them in well-draining soil. Organic or untreated garlic has the best success rate. Pro tip: Save your best homegrown cloves next year for guaranteed sprouts!
What pests or diseases should I watch for with solo garlic?
Solo garlic is generally low-maintenance, but keep an eye out for:
- Garlic rust (orange spots on leaves): Remove infected plants and improve airflow.
- Root maggots (wilting plants): Use row covers or rotate crops.
- Aphids or thrips: Spray with neem oil or introduce ladybugs.
Wrapping up and next steps
Growing solo garlic from just one clove is a rewarding journey that yields fresh, flavorful harvests with minimal effort!
By following these simple steps—selecting plump cloves, planting at the right time, and nurturing with patience—you’ll soon enjoy homegrown garlic year-round. Don’t let small beginnings hold you back; every clove has the potential to become a thriving plant!
Ready to expand your garden? Try growing a few more cloves next season or experiment with different varieties. Your kitchen—and taste buds—will thank you! 🌱✨