
Picking
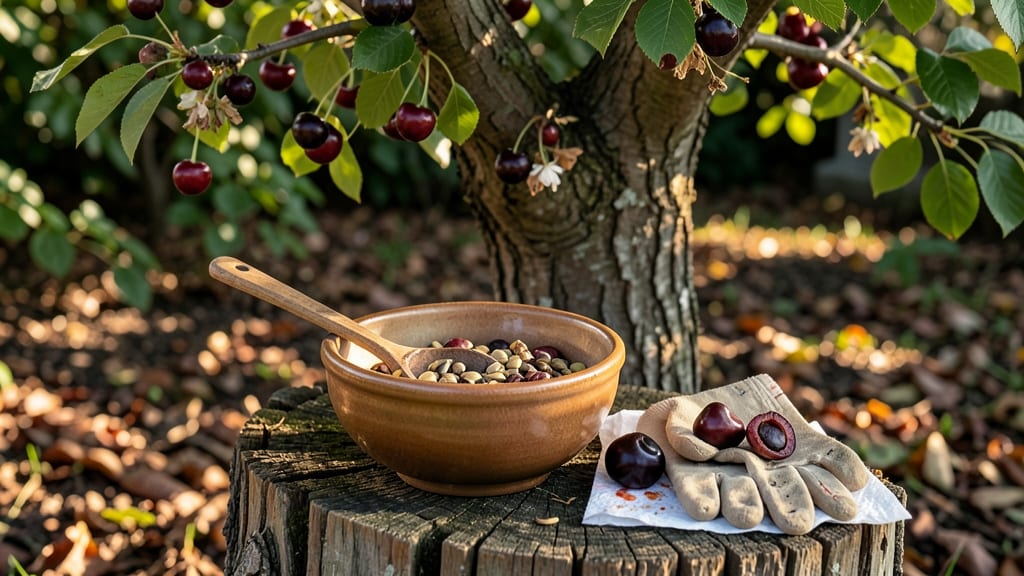
How to harvest cherry seeds reveals a gardening goldmine—those tiny pits hide seeds ready for next season’s tree. 🌱 I’ve turned grocery-store cherries into thriving saplings by mastering this quick extraction method, and you can too without fancy tools or horticultural degrees.
Timing matters: harvest seeds only from fully ripe fruit (deep color, soft flesh) to ensure viability. After removing the pit, crack it open with pliers—don’t crush the seed inside. Rinse gently to remove pulp, then let seeds air-dry on paper towels for 3-5 days in a warm, dry spot.
Most cherry seeds need 90-120 days of cold stratification to break dormancy, mimicking winter. Store dried seeds in a sealed bag in the fridge, then plant in early spring. Patience pays off—germination can take 4-6 weeks, but the results are worth it.
Watch for mold during drying and avoid overwatering after planting. Sweet cherries (like Bing) produce true-to-type trees, while sour cherries may surprise you. Start small—just a few seeds can grow into a lifetime of shade and fruit.
📚 In This Guide
- What you need
- Instructions
- Tips and common mistakes
- Wrapping up and next steps
What you need
- ● Ripe cherries: 1–2 cups (fresh, organic if possible to avoid pesticides). Sweet or tart varieties work best!
- ● Sharp knife or pruning shears: For cutting cherries open (a small paring knife works for precision).
- ● Small bowl or container: To hold the cherry pits/seeds (glass or ceramic is ideal).
- ● Paper towels or clean cloth: For drying seeds (avoid cotton—it can mold).
- ○ Fine-mesh strainer or sieve: (Optional but helpful) To separate seeds from pulp.
- ● Plastic bag or airtight container: For storing seeds until germination.
- ● Label & marker: To tag seeds with the variety and date (trust us, this helps!).
- ● Rubbing alcohol (70% or higher): For sterilizing tools or seeds (prevents mold).
- ● Fine sandpaper: Lightly sanding seeds can speed up germination.
- ● Planting medium (e.g., peat moss or coconut coir): If you’re ready to sow seeds immediately.
- ● Refrigerator: For stratification (a cold spell mimics winter, boosting germination rates).
Step-by-step instructions for harvesting cherry seeds
Here's how I extract clean, viable cherry seeds ready for germination in just minutes.
🍒 Step 1: Select and Prepare the Cherries
Pick fully ripe cherries that are deep red or purple—green or underripe fruit won't yield viable seeds. I like to use 4-6 cherries for a good seed harvest. Rinse them gently under cool water to remove any dirt or wax coating, then pat dry with a paper towel.
Here's the thing—cherries with pits that feel soft or hollow inside are past their prime. Tap the cherry against the counter; a fresh one will sound solid. You'll hear a dull thud when it's ready. Avoid cherries that squish easily or have cracks—they won't produce quality seeds.
✂️ Step 2: Extract the Pits Safely
Cut the cherry in half horizontally using a small, sharp knife. I use a paring knife because it gives me better control. Gently twist the two halves apart—you'll see the shiny, brown pit nestled inside. The seed is encased in this hard shell, and we need to remove it carefully.
Don't squeeze the pit or use excessive force—you'll crack the shell and damage the seed inside. Place the exposed pits on a clean paper towel to dry for 10-15 minutes. This step prevents mold growth later. If you're working with wet cherries, extend drying time to 30 minutes to ensure complete dryness.
🌱 Step 3: Clean and Separate the Seeds
Once the pits are dry, place them in a small bowl and gently rub them together using your fingers. The outer shell will start to crack open, revealing the flat, oval seed inside. You'll notice the seed is smooth and slightly shiny—this is what you want for germination.
I like to use a fine-mesh strainer to separate the seed from any remaining shell fragments. Rinse the seeds under cool water to remove any pulp or debris, then let them air-dry on a clean paper towel for 1-2 hours. This ensures they're completely dry before storage or planting.
🪴 Step 4: Store or Plant the Seeds Immediately
For short-term storage (up to 2 weeks), place the dried seeds in a paper envelope and store them in a cool, dark place like a pantry. If you're planning to plant them soon, you can skip storage and move straight to stratification—the next critical step.
Here's where it gets important: cherry seeds need stratification to break dormancy. Place the seeds in a plastic bag with slightly damp sand or peat moss, seal it, and refrigerate for 4-6 weeks. Check the moisture level weekly—it should feel like a wrung-out sponge. This mimics winter conditions and signals the seed it's time to grow.
⏰ Step 5: Prepare for Germination
After stratification, plant the seeds ¼ inch deep in a sterile seed-starting mix using 4-inch pots. I like to use biodegradable pots because they reduce transplant shock. Keep the soil consistently moist but not soggy—you'll know it's right when the surface feels damp but not glistening.
Place the pots in a warm, bright location with indirect light (like a south-facing window with sheer curtains). Germination can take 3-6 weeks, so patience is key. Once the first true leaves appear, you'll know the seeds have successfully broken dormancy and are ready for the next growth phase.
Tips & tricks for perfect cherry seed extraction
A few simple strategies will help you maximize germination success and avoid common pitfalls when preparing cherry pits.
Selecting the Right Cherries: Focus on cherries that have fallen naturally—these are typically riper than those picked early. I've found that cherries with a slight give when pressed gently between fingers yield the cleanest extractions. If working with store-bought cherries, choose the softest ones available, as they'll break down more easily during the rolling process. Avoid any with visible bruising or cracks, as these often contain damaged pits that won't germinate properly.
Efficient Pit Extraction: For Step 1, place your cherries on a clean kitchen towel and roll them between your palms using a gentle but firm motion. The key is to maintain consistent pressure—too light and the pits won't release, too firm and you risk cracking them. I like to work with about 4 cherries at a time, as this batch size makes it easy to maintain even pressure while keeping track of all the pits. The distinctive popping sound signals successful extraction—this is your cue to stop rolling that particular cherry.
Drying Strategy: During the 24-48 hour drying period in Step 2, position your pits on a surface that allows airflow from all sides, such as a wire rack or clean baking sheet. I've discovered that placing them near a gentle fan (not direct airflow) speeds up drying without risking dehydration. The matte finish you're aiming for indicates complete dryness—this prevents moisture buildup that could cause the pits to spoil during storage. If your kitchen is particularly humid, you might need to extend drying to the full 48 hours.
Stratification Success: For the 6-8 week stratification in Step 3, I recommend using a clear container so you can easily monitor moisture levels without opening it frequently. The damp paper towels should feel like a well-wrung sponge—squeeze them gently to test. If condensation forms on the container walls, your environment is too moist; if the towels stick to the pits, they're too dry. This balance is crucial for successful germination, as both conditions can prevent proper root development.
Pro Tips for Harvest Cherry Seeds
- A few simple strategies will help you maximize germination success and avoid common pitfalls when preparing cherry pits.
- Selecting the Right Cherries: Focus on cherries that have fallen naturally—these are typically riper than those picked early.
- Efficient Pit Extraction: For Step 1, place your cherries on a clean kitchen towel and roll them between your palms using a gentle but firm motion.
Frequently asked questions
Got questions about harvesting cherry seeds? You’re not alone! Here are some of the most common queries—plus quick, no-fuss answers to keep you on track.
Can I harvest cherry seeds from any type of cherry?
Not all cherries are created equal! Sweet cherries (like Bing or Rainier) are great for seed harvesting, but sour cherries (like Montmorency) are often better for germination due to their natural resistance to pests. Avoid cherry pits from canned or processed products—they’re often treated or dried, which can reduce viability.
How long do cherry seeds take to germinate?
Patience is key! With proper stratification (cold treatment), cherry seeds typically germinate in 4–12 weeks. Some may take longer, especially if they’re older or stored improperly. Pro tip: Keep them moist and warm (around 70°F) once stratification is complete to speed things up!
What if my cherry seeds won’t sprout?
Don’t toss them just yet! Try these fixes:
- Re-stratify: If seeds were stored improperly, repeat the cold treatment for another 2–4 weeks.
- Check moisture: Overly dry or soggy seeds may fail—aim for damp (not wet) paper towels during germination.
- Test viability: Cut open a few seeds—if the inside is brown or moldy, they’re likely dead.
Can I grow cherry trees from seeds instead of buying seedlings?
While seed-grown trees may take 5–7 years to bear fruit (vs. 2–3 years for grafted trees), they’re a rewarding project. Just know the fruit might not match the parent tree’s quality—cherry trees grown from seeds are often wild-type and less predictable.
Are cherry pits toxic if ingested?
Yes—the pits contain cyanogenic glycosides, which release cyanide when crushed or chewed. While a few accidental bites are unlikely to harm humans, never feed cherry pits to pets (even birds!). Always remove and discard pits safely—composting them is fine, but avoid grinding them into soil.
Wrapping up and next steps
Harvesting cherry seeds is simpler than you think—just follow the steps, and you’ll have germination-ready seeds in no time! 🌱 Whether you’re growing sweet cherries for your garden or experimenting with propagation, patience and precision pay off.
Now that you’ve mastered the extraction, why not plant your seeds or share this knowledge with fellow plant enthusiasts?
Your next step? Start germinating! With your seeds prepped and ready, you’re one step closer to nurturing a thriving cherry tree. Happy growing! 🌿