
How To
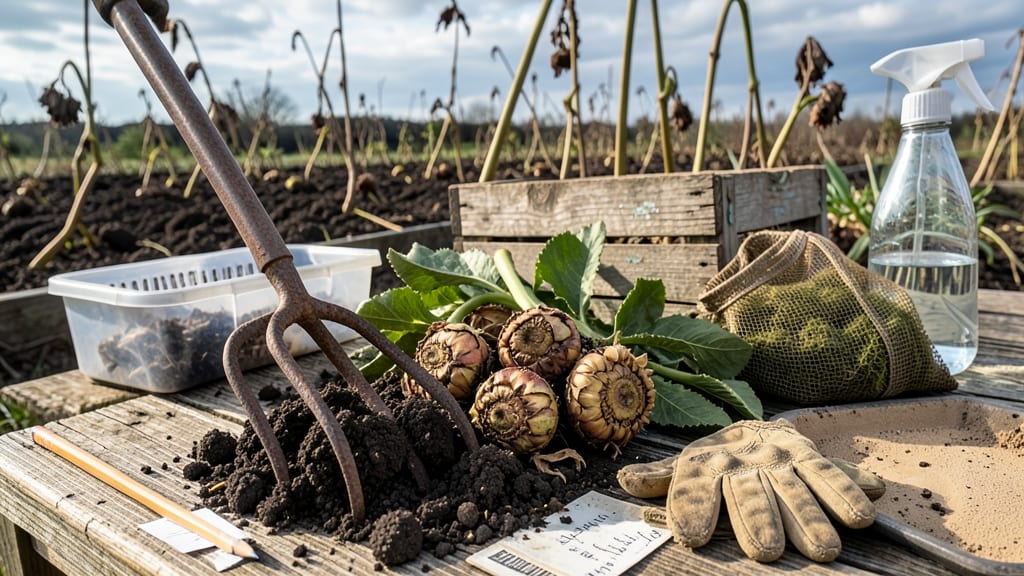
How to keep dahlia bulbs over winter is easier than you’d expect—if you time it right. 🌱 I’ve lost entire collections to winter neglect, but this method—digging at the right time, storing in the perfect mix, and monitoring conditions—keeps them alive for years of blooms.
The secret isn’t complicated: dig tubers after first frost when foliage dies back, shake off soil, and store in a cool, dark spot with 40-50°F temperatures. Use a mix of 50% sand and 50% peat moss to prevent rot—this keeps them dry without suffocating them.
Too much moisture? Mold. Too dry? Shriveling. Balance is everything.
By spring, you’ll replant tubers that look almost as good as new, ready to burst into foot-tall blooms by midsummer. The key is consistency: check monthly for soft spots or sprouts, and never let them freeze.
Even in Zone 7+, a little extra care means no store-bought tubers next year.
Works for gardeners in Zones 3-10, whether you’re overwintering in a basement, garage, or even a refrigerator drawer. Here’s exactly how to do it without the guesswork.
📚 In This Guide
- What you need
- Instructions
- Tips and common mistakes
- Wrapping up and next steps
What you need
Before you start prepping your dahlia bulbs for winter, gather these essentials to ensure a smooth and successful process! Whether you're a seasoned gardener or a first-timer, having the right tools and materials will make all the difference. Here’s your
Step-by-Step instructions for storing dahlia tubers over winter
Here's the foolproof method I've used for years to bring back lush dahlias every spring—no more shriveled tubers or disappointing regrowth.
🪴 Step 1: Dig Up Tubers Before First Frost
Wait until after the first hard frost has blackened the foliage, but before the ground freezes solid. Use a fork or spade to loosen soil around the base, then lift the entire clump carefully. Shake off excess soil—you'll see the thick, knobby tubers connected by smaller roots. This is your plant's winter storage system.
I like to cut back the stems to 6 inches above the tubers with clean pruners. This prevents rot during storage while leaving enough energy reserves in the tubers. Handle them gently—dahlias bruise easily, and damaged spots won't survive storage. Lay them out on newspaper to air-dry for 2-3 days in a cool, dark place.
🌱 Step 2: Clean and Separate the Tubers
After drying, brush off any remaining soil with your fingers or a soft brush. Look for the main tuber—this is the largest, firmest one with visible "eyes" (dormant buds). Smaller tubers can be separated carefully with your hands or a knife. I always keep at least 3-4 tubers per plant for strong regrowth next season.
Discard any tubers that are soft, moldy, or have blackened spots—these won't survive storage. Healthy tubers should feel firm and papery when dry. I dip them in a 1% bleach solution (1 part bleach to 9 parts water) for 10 minutes to prevent fungal issues, then rinse and dry completely. This step saves me from rot problems every year.
⏰ Step 3: Store in Cool, Dark Conditions
Place the cleaned tubers in a paper bag or cardboard box lined with dry peat moss or vermiculite. These materials wick away moisture while allowing airflow—critical for preventing rot. I label each bag with the variety name and date using a permanent marker. Store the container in a location that stays between 35-50°F, like an unheated garage or basement.
Check tubers monthly for signs of mold or softness. If you find any, remove them immediately and discard. The ideal storage environment should feel cool and dry, like a root cellar. Avoid refrigerators—temperature fluctuations and humidity will cause tubers to rot. With proper storage, your dahlias will stay dormant but viable for 6-8 months.
☀️ Step 4: Prep for Spring Planting
About 4-6 weeks before your last frost date, bring the tubers indoors to a 60-65°F spot. This gradual warming triggers growth hormones. I soak the tubers in lukewarm water for 1 hour to rehydrate them before planting. This jumpstarts root development and ensures faster emergence in spring.
Plant the largest tubers 4-6 inches deep in well-draining soil, spacing them 18-24 inches apart. Smaller tubers can be planted closer together. Water lightly after planting, then wait until you see new shoots before watering again. I always plant mine in full sun—dahlias reward generous light with bigger, showier blooms.
Tips & tricks for perfect dahlia tuber storage
Here's what nobody tells you about keeping those precious dahlias alive through winter—these little details make all the difference between next year's showstopper blooms and sad, shriveled tubers.
Timing is Everything: The 2-3 days of drying in Step 1 is non-negotiable. I learned this the hard way after storing damp tubers that developed mold within weeks. Spread them out on newspaper in a dry, dark spot—like a basement corner—and give them that full drying time. The papery texture when dry is your target, not just "looking dry." This prevents rot during the entire storage period.
Storage Environment Secrets: That 35-50°F range in Step 3 is critical, but where you place your tubers matters just as much. I use a cardboard box with holes punched in the sides for airflow, then position it on a wooden shelf in my unheated garage. The wood elevates the box above any potential moisture from concrete floors. Avoid plastic containers—they trap humidity and create the perfect rot environment. Think "root cellar" conditions, not refrigerator conditions.
Bleach Solution Safety: The 10-minute bleach dip in Step 2 might sound scary, but it's your best defense against fungal issues. Use a fresh 1% solution (1 part bleach to 9 parts water) and make sure every tuber gets submerged completely. After rinsing, pat them dry with paper towels—don't just shake them off. This step alone has saved me from losing entire batches of tubers to mold over the years. The bleach evaporates completely during drying, leaving no residue.
Spring Prep Strategy: When you bring tubers indoors 4-6 weeks before last frost, place them in a warm spot (60-65°F) but not direct sunlight. I use the top of my refrigerator, which stays consistently warm. The gradual warming is what triggers those growth hormones—don't rush this step! The 1-hour lukewarm water soak before planting is also crucial. I use a bowl of water at about 70°F (just warm to the touch) and let the tubers soak completely. This jumpstarts root development and gives you that head start on spring.
Pro Tips for Keep Dahlia Bulbs Over Winter
- Here's what nobody tells you about keeping those precious dahlias alive through winter—these little details make all the difference between next year's showstopper blooms and sad, shriveled tubers.
- Timing is Everything: The 2-3 days of drying in Step 1 is non-negotiable.
- Storage Environment Secrets: That 35-50°F range in Step 3 is critical, but where you place your tubers matters just as much.
Frequently asked questions
Got questions about winterizing dahlia bulbs? You’re not alone! Here are answers to the most common concerns—so you can keep those stunning blooms coming back year after year.
Do I need to dig up dahlia bulbs every year?
Yes! Dahlias are tender perennials, meaning they won’t survive freezing temperatures. Digging and storing them indoors (or in a protected spot) is the only way to guarantee they’ll return next spring. Think of it as their annual spa day!
When is the best time to dig up dahlia bulbs?
Wait until after the first hard frost (when foliage is brown and crispy) but before the ground freezes solid. This is usually late fall—aim for 2–3 weeks post-frost. Digging too early stresses the bulbs; waiting too long risks frost damage. Mark your calendar!
Can I leave dahlia bulbs in the ground over winter?
Only in USDA Zones 8–10, where winters are mild (above 20°F). In colder zones, mulch heavily (6–8 inches) with straw or leaves, but still dig them up for long-term health. Frozen soil can rot bulbs even with protection. When in doubt, dig! →
What if my dahlia bulbs rot or mold during storage?
Uh-oh! This usually happens from too much moisture or poor airflow. Next time:
- Dry bulbs thoroughly before storing (2–3 weeks in a cool, dark place).
- Use dry peat moss or vermiculite (not wet sand!).
- Store in a well-ventilated container (like a mesh bag).
Should I refrigerate dahlia bulbs?
Nope! Dahlias don’t need refrigeration—just a cool, dark, and dry spot (40–50°F). A basement, garage, or even a cardboard box in a closet works. Avoid humidity (like a fridge veggie drawer) to prevent rot. Think “cool pantry,” not “icebox.” → / →
Can I propagate new dahlias from my stored bulbs?
While storing, you can divide tubers (the bulb clusters) to create more plants. Wait until early spring before planting, and use a sharp knife to separate sections—each should have at least one “eye” (growth node). It’s like cloning your favorite blooms!
Wrapping up and next steps
Keeping your dahlia bulbs alive through winter is all about timing, protection, and patience—but with these steps, you’ll wake up to vibrant blooms next season! Remember, chilling, drying, and storing them properly are your best friends.
Now that you’re armed with the know-how, why not mark your calendar for next year’s planting season and treat yourself to an even bigger, bolder garden? Your dahlias deserve the spotlight!
Next step: Share your winter prep tips with fellow gardeners—or browse our guides on spring planting to get a head start! 🌱✨