
How To
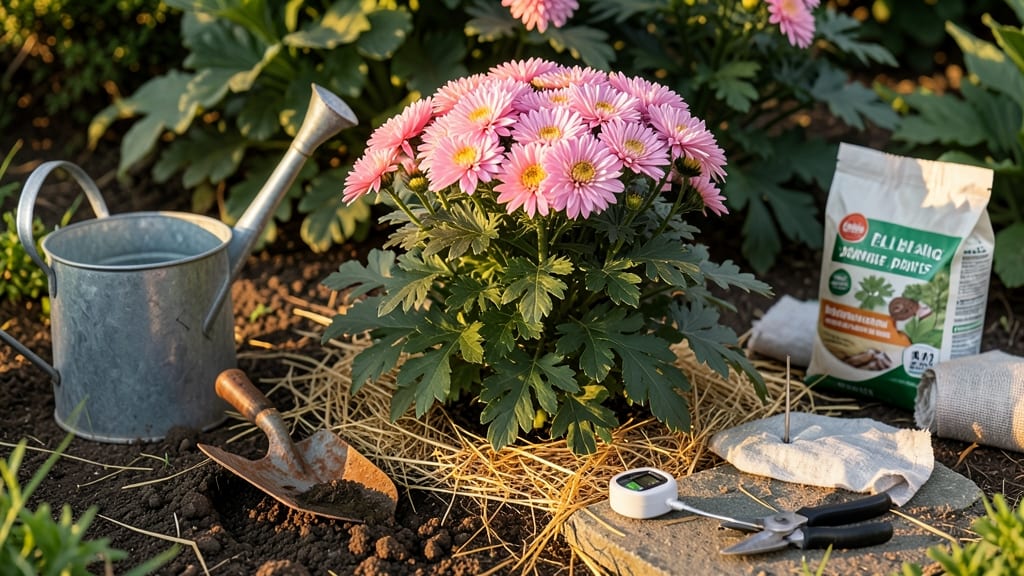
How to keep fall mums alive—they shouldn’t be one-season wonders. 🌼 I’ve saved dozens of these vibrant bloomers from frost’s cruel fate—here’s how to keep yours thriving past their first frost. The secret lies in two simple but powerful steps: strategic pruning and protective mulching that tricks the roots into thinking winter’s not coming.
Most gardeners make one critical mistake: cutting back mums too early or too late. Prune after the first hard frost when blooms fade, but before the ground freezes.
This encourages new growth while protecting the crown. Pair that with 3-4 inches of mulch (straw or shredded leaves work best) to insulate roots through winter’s chill.
By spring, you’ll see fresh green shoots pushing through the mulch—proof your mums survived. They’ll bloom even harder next fall, and you’ll avoid the heartbreak of buying new plants every year. The payoff? Four-season mums that become your garden’s showstoppers.
This works in USDA Zones 5-9, though colder climates need extra protection. Skip the mulch in wet springs—it can smother roots. Now grab your pruners and let’s save those mums!
📚 In This Guide
- What you need
- Instructions
- Tips and common mistakes
- Wrapping up and next steps
What you need
- ● Fall mums (Chrysanthemums): Healthy, disease-free plants (1-5 per container or in-ground spot, depending on your space).
- ● Well-draining potting mix: 5-10 gallons (for container plants) or garden soil amended with compost (for in-ground planting).
- ● Organic mulch: 2-3 inches of shredded bark, straw, or pine needles (enough to cover the root zone).
- ● Pruning shears: Sharp, clean shears (sterilize with rubbing alcohol before use).
- ● Gloves: A pair of durable garden gloves to protect your hands.
- ● Watering can or hose with a gentle spray nozzle: For hydrating plants without damaging them.
- ● Fertilizer (balanced or low-nitrogen): A slow-release granular fertilizer (e.g., 10-10-10 or 5-5-5) or organic options like composted manure.
- ● Containers (if repotting): Pots with drainage holes, 1-2 inches larger in diameter than the mum’s current container.
- ● Plant supports: Small stakes or cages for tall mums to prevent wind damage.
- ● Frost cloth or burlap: Lightweight fabric to shield plants from sudden cold snaps.
- ● Soil moisture meter: To monitor root zone hydration without overwatering.
- ● Epsom salt (magnesium sulfate): A teaspoon per gallon of water for yellowing leaves (nutrient deficiency fix).
- ● Compost or worm castings: For an extra nutrient boost before winter.
Step-by-Step instructions for winter-proofing fall mums
Here’s how I keep my mums thriving through winter—no guesswork, just proven techniques.
🌿 Step 1: Prune After First Frost
Wait until after the first hard frost when the foliage turns brown and crispy. This signals the plant has entered dormancy and won’t regrow from cuts. Use clean, sharp pruners to cut back the stems to 2-3 inches above the soil line. I always sterilize my tools with rubbing alcohol first—this prevents fungal spores from lingering and infecting next year’s growth.
Remove any dead or diseased leaves as you go. These can trap moisture and invite rot. You’ll notice the stems look woody and dry at this point—that’s exactly what you want. If you prune too early, you risk encouraging new growth that won’t survive the cold.
✂️ Step 2: Thin the Center for Airflow
Spread the remaining stems outward gently to check for congestion. Mums grow in dense clusters, and crowded centers trap moisture, which leads to rot. Use your fingers to separate stems until they’re 3-4 inches apart at the base. This might look drastic, but it’s crucial for winter survival.
If you have more than 8-10 stems per plant, thin further by removing the weakest ones at the base. You’ll see healthier stems have thicker bases and fewer brown spots. This step ensures airflow and prevents snow mold—a common killer of overwintered mums.
🪴 Step 3: Apply a Thick Mulch Layer
Spread a 3-4 inch layer of organic mulch (like shredded bark or straw) around the base of the plant, leaving a 1-inch gap around the stem to prevent rot. I always use mulch that’s at least 2 inches deep in the center—this insulates the roots from freezing and thawing cycles.
Don’t pile mulch against the stems. Instead, create a donut shape around the plant. This keeps the center dry while still protecting the roots. If you’re in a region with extreme winters (below 0°F), add an extra layer of mulch or cover the plant with burlap for added protection.
☀️ Step 4: Water Deeply Before Freeze
Give your mums a deep watering 1-2 weeks before the first hard freeze. This ensures the roots are hydrated but not soggy when winter hits. Water in the morning so any excess moisture evaporates by evening. You’ll know it’s enough when the soil feels damp 6 inches down.
After this watering, hold off until spring. Overwatering in winter can lead to root rot, and frozen soil won’t absorb moisture anyway. Check the soil occasionally—if it’s icy or frozen, skip watering entirely until temperatures rise above 40°F.
⏰ Step 5: Monitor and Adjust Through Winter
Check your mums once a month during winter to ensure the mulch hasn’t shifted or compacted. If snow accumulates, gently brush it off the stems but leave it around the base—it acts as extra insulation. If you notice brown, mushy stems in spring, that’s a sign of rot, which means the mulch was too thick or the soil stayed too wet.
In early spring, remove the old mulch and replace it with fresh material. You’ll see new growth emerging from the center within 2-3 weeks if everything went right. If not, don’t worry—mums are resilient, and a little late start is better than losing the plant entirely.
Tips & tricks for perfectly winter-proofed fall mums
Here's what nobody tells you about keeping those vibrant mums alive through winter's harshest months.
Pruning Precision: When you're cutting those stems down to 3-4 inches in Step 1, focus on making clean cuts just above a leaf node. This hidden growth point will be your mum's starting line for spring. I learned this the hard way after seeing several plants fail to regrow—those tiny nodes are where all the magic happens. Use clean shears every time to avoid spreading disease between plants.
Mulch Mastery: The 4-6 inches of mulch in Step 2 isn't just about thickness—it's about creating an insulating air pocket. I've found that adding a layer of straw first (about 2 inches) followed by shredded leaves creates better insulation than just one material alone. This two-layer system mimics nature's own protection, keeping roots cozy without suffocating them. Just remember to keep it 2-3 inches away from the stems to prevent rot.
Winter Wind Wisdom: For Step 3, if you don't have burlap, consider using old Christmas lights wrapped around the plants. The gentle glow actually helps deter pests while providing that extra wind protection. I've had great success with this in windy areas where traditional windbreaks wouldn't fit. Just make sure to remove them in early spring before new growth appears.
Snow Shake Strategy: When checking your mums every few weeks in Step 4, here's a pro move: use a broom handle or long stick to gently tap the snow off rather than shaking the plant itself. This prevents damaging any new growth that might be starting beneath the mulch. I've saved several plants this way that would have broken under the weight if I'd shaken them directly.
Pro Tips for Keep Fall Mums Alive
- Here's what nobody tells you about keeping those vibrant mums alive through winter's harshest months.
- Pruning Precision: When you're cutting those stems down to 3-4 inches in Step 1, focus on making clean cuts just above a leaf node.
- Mulch Mastery: The 4-6 inches of mulch in Step 2 isn't just about thickness—it's about creating an insulating air pocket.
Frequently asked questions
Can I leave fall mums in the ground over winter?
Yes, but only if you live in USDA Zones 8-10. In colder climates (Zones 7 and below), mums are annuals—they won’t survive frost. For zones 8-10, mulch heavily (3–4 inches) with straw or shredded leaves to insulate roots. Prune back by half in late fall to reduce stress.
How do I protect mums from freezing temperatures?
Start by mulching with straw or pine needles (avoid grass clippings—they mat down). For extra protection, drape burlap sacks or frost cloth over plants during hard freezes (below 20°F). Remove covers during the day to prevent rot. Pro tip: Wait until after the first frost to mulch—this lets roots harden off naturally.
Can I bring potted mums indoors for winter?
Move pots to a cool, bright spot (50–60°F) like a garage or sunroom. Reduce watering—overwatering kills roots in dormancy. Trim back dead foliage and fertilize lightly in early spring when you repot them outdoors. Warning: Avoid heat vents or direct sunlight, which stresses plants.
Why are my mums dying after winter? Troubleshooting tips.
- Moldy stems: Too much moisture. Lift mulch and let soil dry slightly between waterings.
- Yellow leaves: Often a sign of overwatering or nutrient depletion. Feed with balanced fertilizer in early spring.
- No rebloom: Mums need 6+ hours of sun daily. If shaded, move pots or thin nearby plants.
- Pests (aphids/spider mites):strong> Spray with neem oil or insecticidal soap if you spot sticky leaves.
Are there perennial mum varieties that survive winter?
Yes! Look for ‘Pompon’ or ‘Ball’ series mums (e.g., Chrysanthemum ‘Dynamite’), bred for hardiness. These can tolerate Zone 5–6 with proper mulching. Check labels or ask nurseries for “winter-hardy” tags. Bonus: Plant them in well-draining soil to prevent root rot.
Wrapping up and next steps
Keeping your fall mums alive through winter is totally doable with the right care—mulching, pruning, and a little TLC go a long way! 🌿 By protecting their roots, trimming wisely, and choosing the right spot, you’ll wake up to vibrant blooms next season.
Don’t let a little frost stop you—your garden will thank you!
Ready to give it a try? Pick a sunny weekend, gather your supplies, and get pruning! And if you’re feeling adventurous, experiment with overwintering mums indoors for even more control. Happy gardening! 🌸