
How To
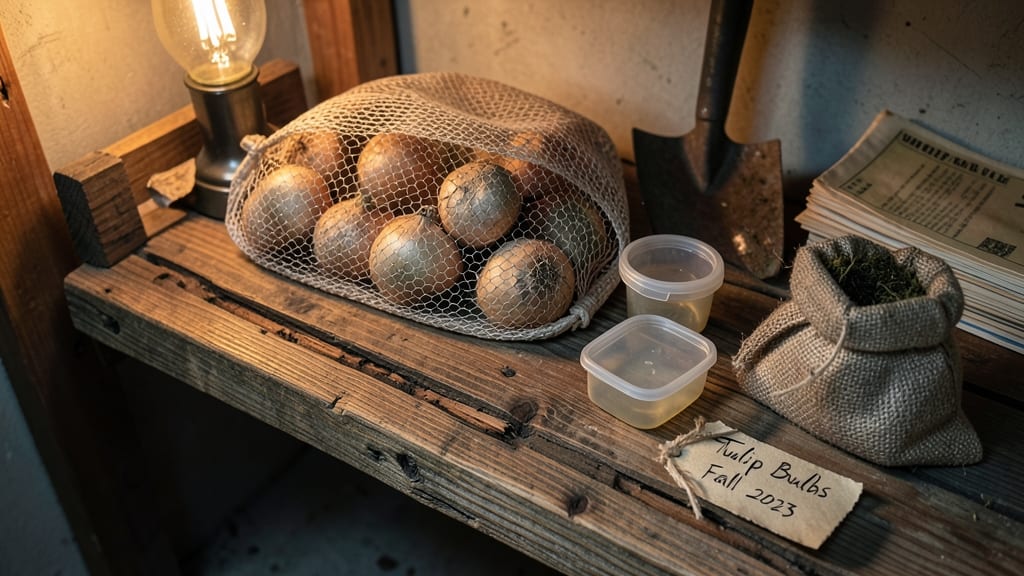
Your tulip bulbs could keep blooming for next year—if you store them right. 🌷 The secret isn’t just digging them up; it’s mimicking their natural winter dormancy with precise timing, airflow, and cool temperatures.
I’ve saved bulbs for five seasons now, and the difference between vibrant reblooms and sad, shriveled clumps comes down to these simple steps.
Start by waiting until after foliage yellows (usually 6-8 weeks post-bloom) before digging. Let them dry in a shady spot for a week, then store in a paper bag or mesh container—plastic traps moisture and causes rot.
Keep them in a cool, dark place (40-50°F) with 50-60% humidity until replanting in fall. This mimics their underground winter conditions perfectly.
Mistakes like storing them too wet or too warm will kill bulbs before spring. I once lost a batch because I used a sealed container—mold spread in days.
The goal is to preserve them without encouraging decay. With the right setup, you’ll replant healthy bulbs that push up stronger stems and bigger blooms than store-bought ones.
This method works for USDA Zones 3-8, but adjust timing slightly for early/late frosts. Southern gardeners may need to refrigerate bulbs longer. Whether you’re saving heirlooms or just want next year’s showstopper blooms, these steps guarantee it. Let’s get those bulbs ready!
📚 In This Guide
- What you need
- Instructions
- Tips and common mistakes
- Wrapping up and next steps
What you need
- ● Mature tulip bulbs: Harvested after foliage dies back (typically 6–8 weeks post-bloom). Aim for firm, plump bulbs (1–2 inches in diameter).
- ● Well-draining container: A perforated plastic bin (12"x12"x6" minimum) or mesh bag (to prevent rot). Avoid metal.
- ● Drying agent: Peat moss, coco coir, or vermiculite (4–6 inches deep) for moisture control.
- ● Storage space: A cool (35–45°F), dark, and humid (60–70%) spot like a basement, garage, or fridge (with ventilation).
- ● Labeling supplies: Waterproof tags or a permanent marker to label bulb varieties (if mixing types).
- ● Fungicide: A light dusting of sulfur or copper fungicide to prevent mold (especially for damp climates).
- ● Humidity tray: A small dish with sphagnum moss to maintain moisture levels (if storage area is too dry).
- ○ Thermometer/hygrometer: To monitor temperature and humidity like a pro (optional but game-changing for perfectionists!).
- ● Glove: A gardening glove to handle bulbs gently (prevents bruising).
Step-by-Step instructions for storing tulip bulbs over winter
Here's the foolproof method I use to revive tulips year after year—no fancy equipment, just smart timing and attention to detail.
🌱 Step 1: Harvest Bulbs After Full Foliage Decline
Wait until 6 weeks after flowering when the leaves turn yellow and wither naturally. This ensures the bulb has stored enough energy for next spring. Use a garden fork to lift bulbs carefully—don't dig too deep or you'll damage the bulb below.
Gently brush away excess soil to expose the bulb. You'll see the papery tunic that protects the bulb—leave it intact. This natural covering helps prevent moisture loss during storage. Handle bulbs with care; bruised or cut bulbs won't survive the storage period.
⏰ Step 2: Cure and Dry Bulbs for Storage
Spread bulbs in a single layer in a dry, shaded spot with good air circulation for 2-3 weeks. This curing process hardens the tunic and prepares bulbs for dormancy. Avoid direct sunlight—it can cause the bulbs to dry out too quickly.
Check daily for signs of mold or soft spots. If you find any, discard those bulbs immediately. Healthy bulbs will feel firm and papery. Once the tunic feels dry to the touch, they're ready for storage. This step is crucial—rushed drying leads to rot during storage.
🪴 Step 3: Store Bulbs in Ideal Conditions
Place cured bulbs in a breathable container like an open mesh bag or cardboard box. Avoid airtight plastic containers—they trap moisture and cause rot. Store in a cool, dark location with temperatures between 40-50°F and humidity around 40-50%.
I keep mine in an unheated garage or basement. Check bulbs monthly for signs of mold or sprouting. If you see green shoots, move them to a cooler spot immediately. Proper storage prevents premature sprouting, which weakens bulbs before planting season.
☀️ Step 4: Prep for Planting in Early Spring
About 6 weeks before your last frost date, remove bulbs from storage and inspect them. Discard any that feel soft, shriveled, or show signs of rot. Healthy bulbs will feel firm and plump. Soak them in a fungicide solution for 30 minutes to prevent disease in the garden.
Plant bulbs 4-6 inches deep in well-draining soil with the pointed end facing up. Space them 4-6 inches apart to allow room for growth. Water lightly after planting to settle the soil. This timing ensures bulbs establish roots before winter returns.
✂️ Step 5: Maintain Bulbs for Future Seasons
After flowering, leave the foliage until it yellows completely. This process recharges the bulb for next year. Deadhead flowers but never cut back leaves until they've fully withered. You'll know it's time to harvest when the leaves turn brown and crispy.
Over time, tulip bulbs naturally decline in vigor. After 3-4 years, replace old bulbs with fresh ones for the best blooms. This simple rotation keeps your garden vibrant year after year. With proper care, your stored bulbs will reward you with stunning spring blooms for seasons to come.
Tips & tricks for perfect tulip bulb storage
These little details make all the difference between bulbs that thrive and ones that rot in storage.
Timing is Everything: That 6-week wait after flowering in Step 1 is non-negotiable. I've learned this the hard way—digging too early means bulbs won't have stored enough nutrients, and you'll get weak stems or no blooms next spring. Mark your calendar the day your tulips finish flowering to set that 6-week reminder. The foliage should be completely yellow and crispy before you even think about digging.
Curing Conditions: The 2-3 week curing period in Step 2 is where most people go wrong. I recommend using a wooden crate with slats for airflow—this prevents bulbs from touching and creates that crucial airflow. If your climate is particularly humid, consider adding a small fan on low setting to maintain that dry environment. The goal is to harden those skins so they can withstand the cold storage without developing mold.
Storage Environment: The 35-45°F range in Step 3 is critical—any warmer and you risk sprouting, any colder and the bulbs can develop frost damage. I keep mine in my unheated garage during winter months, but if you're in a very cold climate, a refrigerator's crisper drawer (not the freezer!) works perfectly. The key is consistent temperature without fluctuations. A simple digital thermometer in your storage container gives you peace of mind.
Post-Storage Inspection: When you pull bulbs from storage 6 weeks before last frost, do a thorough inspection before planting. Healthy bulbs should feel firm and plump—any that feel soft or shriveled won't perform well. This is also when you can separate out your largest bulbs for the best blooms next year. I like to soak them in a weak fungicide solution for 10 minutes before replanting as a preventive measure against any latent diseases.
Pro Tips for Keep Tulip Bulbs For Next Year
- These little details make all the difference between bulbs that thrive and ones that rot in storage.
- Timing is Everything: That 6-week wait after flowering in Step 1 is non-negotiable.
- Curing Conditions: The 2-3 week curing period in Step 2 is where most people go wrong.
Frequently asked questions
Got questions about storing tulip bulbs? You’re not alone! Here are some of the most common concerns—and their solutions—to help you keep those blooms coming back year after year.
Can I store tulip bulbs in my garage or basement?
Yes, but with care! Garages and basements can work if they stay consistently cool (35–45°F) and dry. Avoid damp areas—moisture leads to rot. Use a mesh bag or ventilated container to prevent mold. If your space fluctuates in temperature, opt for a fridge or dedicated bulb storage instead.
How long can I keep tulip bulbs before replanting?
Tulip bulbs can last 1–2 years in storage if conditions are ideal. After that, their vigor declines, and blooms may shrink. For best results, replant them after 6–8 weeks of cold storage. If you’re unsure, test a few bulbs—if they sprout weakly, it’s time to refresh your stock!
What if my bulbs sprout too early in storage?
Early sprouting usually means warmth or light exposure. Move bulbs to a darker, cooler spot immediately. If green shoots appear, you can replant them as soon as soil can be worked (no need to wait for spring). Just be prepared for smaller blooms—they’ll focus energy on growth rather than flowers.
Can I save tulip bulbs from grocery store flowers?
Unfortunately, no! Store-bought tulips are often forced in greenhouses and won’t produce viable bulbs. Their energy is spent on blooming, not storing nutrients. For next-year’s garden, buy fresh, firm bulbs from a nursery—look for plump, dry ones without soft spots.
My stored bulbs smell bad or look mushy—what went wrong?
This is a sign of rot or mold, usually from excess moisture or poor airflow. Discard affected bulbs immediately to prevent spreading. For future storage, dry bulbs thoroughly before storing, use a breathable container, and check them monthly. If you catch it early, you might salvage some bulbs by trimming the bad spots (sterilize your knife first!).
Wrapping up and next steps
Keeping tulip bulbs alive for next year is all about timing, patience, and the right conditions—whether you’re lifting them after blooming or storing them in the ground.
With a little care, you’ll reward yourself with even more stunning spring displays! 🌷 Now that you’ve got the know-how, take action: grab those bulbs, follow the steps, and get ready to enjoy tulips year after year.
Ready to transform your garden into a blooming paradise? Start by reviewing your supplies or clearing up any last questions—then dig in! 🌱