
How To
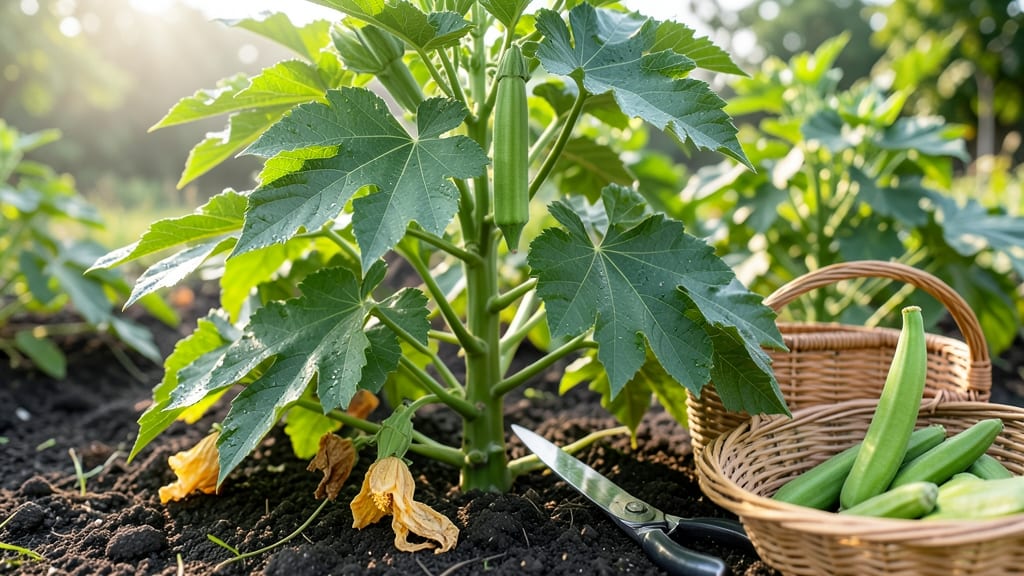
How to know when to pick okra can turn your garden into a flavor powerhouse—or leave you with tough, unpalatable pods. The difference lies in those 2-3 inch pods that scream "harvest me now," but how do you spot them before they turn woody?
I’ve learned the hard way that waiting too long means sacrificing that perfect tender-crisp texture for a chewy, fibrous mess. But here’s the good news: with just three simple visual cues—size, color, and touch—you’ll never miss the ideal moment again.
This summer, your okra harvest could be your easiest (and most delicious) garden success story. Let’s break down exactly what to look for, when to act, and how to keep your plants producing like champs all season long.
From avoiding overripe pods to maximizing your yield, I’ll share the secrets that’ll have you picking like a pro in no time. Ready to transform your garden into a flavor factory?
3 Visual signs your okra is ready for harvesting
Okra thrives when harvested at the perfect moment—too early, and you miss out on flavor; too late, and the pods turn woody and tough. The key lies in three simple visual cues: size, color, and texture. Mastering these will transform your harvest from disappointing to delicious every time.
First, pay attention to the pod length. The ideal harvest window opens when pods reach 2 to 3 inches. This is the sweet spot for tenderness. Smaller pods are still developing, while larger ones quickly become fibrous.
Use a ruler or your thumb as a quick reference—most pods should fit comfortably between your thumb and index finger.
Next, check the color of the pod. Ready-to-harvest okra boasts a vibrant green hue, almost glossy to the touch. If the pods start showing yellow or brown spots, they’ve passed their prime.
Overripe okra loses its signature crispness and develops a bitter, almost inedible texture. Think of it like catching a ripe tomato—timing is everything.
Finally, texture is your best friend. Gently press a pod between your fingers. It should feel firm yet tender, almost like a fresh green bean. If it’s hard or woody, it’s past its peak.
Conversely, pods that feel too soft may still need a few days to mature. This tactile check is non-negotiable for home gardeners.
Pod Length
Harvest when pods are 2-3 inches long for peak tenderness. Smaller pods are underdeveloped; larger ones become tough.
Color
Look for vibrant green pods with a glossy finish. Yellow or brown spots mean overripe okra—avoid these!
Texture
Press pods gently—they should feel firm but tender. Woody or hard pods are past their prime and inedible.
Pro tip: Harvest okra in the morning when pods are cool and crisp. This is when they’re at their freshest, and the stems snap cleanly when you twist them off. Avoid harvesting after heavy rain, as excess moisture can make pods soggy and prone to rot.
For those growing heirloom varieties, like 'Clemson Spineless' or 'Emerald,' the same rules apply, but some types may mature slightly faster. Always check the seed packet for variety-specific guidance. If you’re unsure, err on the side of harvesting smaller pods—they’re more forgiving than overripe ones.
One common mistake is waiting too long because you think "bigger is better." But okra’s woody fibers develop rapidly once pods exceed 3 inches. Think of it like zucchini—if you let it grow too large, you’re left with a tough, seedy mess.
The same principle applies here: harvest early, harvest often.
If you’re new to growing okra, start by marking your calendar 45-50 days after planting, as this is when most varieties begin producing harvestable pods. From there, check your plants every 2-3 days to catch pods at their peak.
Consistency is key—once you establish a routine, you’ll never miss a harvest window again.
For a visual reference, imagine a standard ruler next to your okra plant. When most pods align with the 2-3 inch marks, it’s time to pick.
This simple trick works wonders for beginners and veterans alike. And remember: the more you harvest, the more your okra plant will produce—it’s a self-replenishing cycle!
3 Visual signs your okra is ready for harvesting
Okra thrives when harvested at the right stage—peak ripeness transforms it from tender to tough. The key is catching those 2-3 inch pods before they harden. I’ve learned that even a day or two past this window turns okra into a woody, less flavorful mess.
Let’s break down the three must-check visual cues to nail your harvest timing.
First, pod size is your best friend. Aim for 2-3 inches long—this is the golden window for sweetness and texture. Smaller pods (under 2 inches) are still edible but less flavorful, while larger ones quickly become fibrous and tough.
Use a ruler for precision if you’re unsure—consistency is everything in okra harvesting.
Next, texture tells the real story. Ready-to-pick okra should feel firm but tender, almost like a crisp green bean. Gently press a pod—if it yields slightly under pressure, it’s perfect.
Overripe okra feels hard and woody, almost like a small tree branch. This is your warning sign to harvest more often—neglect leads to tough pods fast.
🌱Visual Cue