
How To
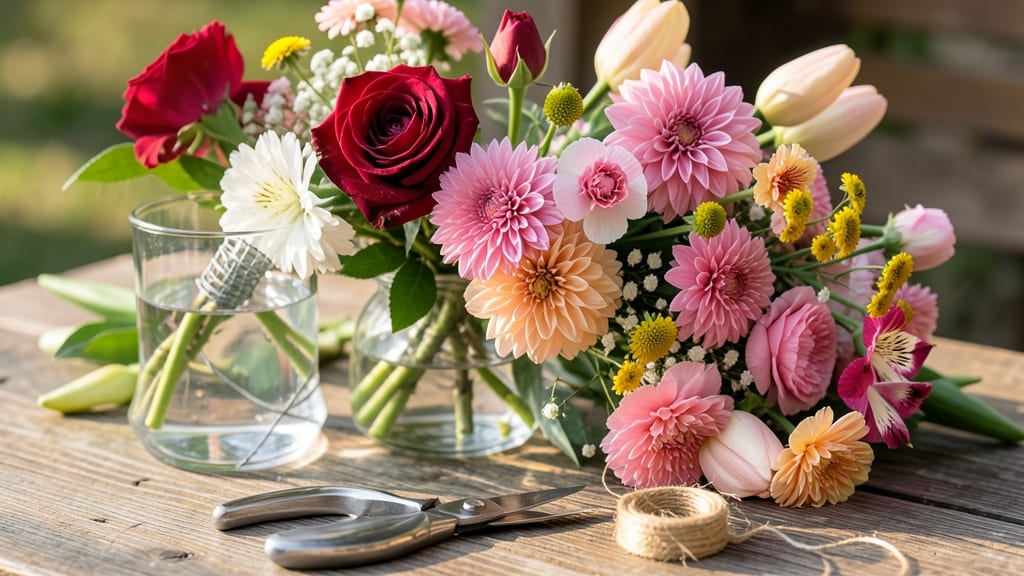
How to make a good bouquet just became your new favorite project—no florist required. ✨ The secret to bouquets that last isn't buying flowers—it's growing them. Sunflowers with crisp stems, roses that open perfectly, even herbs like eucalyptus that add texture and fragrance. When you cut from your own plants, you control freshness, color, and even scent.
Start with what's already thriving in your garden—just 10 minutes of prep transforms stems into showstoppers. Snip at the right angle, strip leaves below the waterline, and group similar stems together. My sunflower-zinnia-eucalyptus combos always get compliments because they look like they came from a professional—but they're all homegrown.
What you'll end up with is bouquets that last 10-14 days instead of 3, with stems that stay sturdy and petals that don't wilt prematurely. The fragrance lingers longer too—roses smell sweeter, lavender stays aromatic, and even the greenery holds its shape.
It's the kind of floral arrangement that makes people pause and ask where you got it.
Works for any garden size, from patio pots to full flower beds. Whether you're making a centerpiece for your dinner table or gifts for friends, this method turns your garden into an endless supply of fresh, vibrant blooms. Let's get cutting!
📚 In This Guide
- What you need
- Instructions
- Tips and common mistakes
- Wrapping up and next steps
What you need
- ● Fresh flowers: Choose a mix of blooms (e.g., roses, lilies, peonies, dahlias, or seasonal favorites). Aim for 3–5 types for texture and color contrast. Quantity: 15–25 stems (adjust based on bouquet size).
- ● Filler flowers/foliage: Baby’s breath, eucalyptus, or statice (5–10 stems) for volume and structure.
- ● Floral preservative: A bottle of commercial floral food (e.g., Chrysal Clear) or a DIY mix (1 tbsp sugar + 1 tbsp bleach + 1 tsp vinegar per quart of water).
- ● Scissors or floral shears: Sharp, clean tools to trim stems at a 45-degree angle.
- ● Bucket or vase: A clean container (5–10 inches wide) filled with lukewarm water.
- ● Ribbon, twine, or floral tape for wrapping stems.
- ● Chicken wire or floral foam for pre-arranged bouquets.
- ● Dried flowers or greenery (e.g., lavender, dried roses) for a rustic touch.
- ● Spray adhesive (for securing loose stems in a wrapped bouquet).
Step-by-Step instructions for designing a long-lasting bouquet
Here's how I create bouquets that stay fresh for weeks—not just days.
🌿 Step 1: Choose Flowers with Longevity in Mind
Start with blooms that naturally last longer, like roses, hydrangeas, or snapdragons. I avoid delicate petals that wilt quickly, such as tulips or daffodils, unless they're part of a larger arrangement. Look for buds that are just opening—they'll bloom gradually, extending the bouquet's life. Hold stems close to the water line when cutting; if they feel woody, they're past their prime.
For extra staying power, pick flowers in the early morning when their stems are full of water. Avoid overripe blooms—they release ethylene gas, which speeds up wilting in nearby flowers. A good rule: if the petals are fully open, the bloom is already on its last legs.
✂️ Step 2: Cut Stems at the Right Angle
Use sharp, clean scissors or pruners to cut stems at a 45-degree angle about 6 inches from the base. This increases the surface area for water absorption, which is critical for longevity. I like to make a fresh cut every 2-3 days to keep stems open and drinking.
Don’t forget to remove any leaves that will sit below the waterline—they’ll rot and shorten the bouquet’s life. Strip leaves gently with your fingers, leaving only the top 2-3 inches of stem exposed. If the stems are thick, like sunflowers or lilies, split them lengthwise to create more surface area for hydration.
💧 Step 3: Prepare a Flower Food Solution
Fill a clean vase with lukewarm water (cold water can shock stems, while hot water may damage delicate petals). Add 1 teaspoon of bleach (to prevent bacteria) and 1 tablespoon of flower food (or mix 1 teaspoon of sugar and 1 teaspoon of white vinegar for a DIY version). This combo keeps water clean and stems hydrated.
Change the water every 2-3 days and trim stems again with fresh cuts. I like to add a drop of bleach to the fresh water each time to keep it bacteria-free. Avoid overcrowding the vase—leave enough space for stems to spread out and drink without competing.
🪴 Step 4: Arrange for Balance and Stability
Start by placing the tallest stems in the center of the vase, then work outward with medium and shorter blooms. I like to use the "odd-number rule"—an odd number of stems (3, 5, or 7) creates a more dynamic, natural look. Space stems evenly so they don’t overcrowd each other, which can cause wilting.
Use floral tape or twine to secure stems in place if needed, especially for heavy blooms like roses or lilies. For extra stability, add a few greenery stems (like eucalyptus or baby’s breath) to fill gaps and reinforce the structure. The goal is a bouquet that feels full but not cramped.
☀️ Step 5: Store and Display for Maximum Freshness
Keep your bouquet away from direct sunlight, heat sources (like radiators or vents), and drafts—all of which speed up wilting. A cool, shaded spot, like a bathroom or kitchen counter, is ideal. If you’re displaying it in a sunny room, move it to a shadier spot in the evening.
Mist the blooms lightly with water once a day to keep petals hydrated and vibrant. If you notice any stems drooping, trim them again and refresh the water immediately. With these steps, your bouquet should stay fresh for at least a week, and some varieties last 10-14 days with proper care.
Tips & tricks for perfect long-lasting bouquets
These little-known tricks will transform your bouquets from wilting in days to thriving for weeks.
The Stem Freshness Factor: In Step 2, when cutting stems at a 45-degree angle, I like to add a quick twist of the wrist as I cut. This creates a spiral pattern on the stem that helps it drink water more efficiently. Think of it like a straw with extra suction—this tiny technique can add 2-3 extra days of freshness to your arrangement.
Hidden Hydration Hack: After arranging your bouquet in Step 4, place the entire vase in the refrigerator overnight before displaying. The cool temperature slows down the flower's metabolism, making them last even longer. Just bring it back to room temperature before showing it off in the morning.
Ethylene Gas Defense: In Step 1, when selecting flowers, keep an eye out for any blooms that are already open or showing signs of browning. These release ethylene gas, which speeds up wilting in nearby flowers. Remove them immediately from your selection—it's like removing spoiled milk from your shopping cart before it ruins everything else.
Water Quality Matters: For Step 3, don't just use tap water—let it sit out for at least 30 minutes before using it in your vase. This allows chlorine to evaporate, which can damage delicate stems. If you're using well water, boil it first and let it cool completely before adding your flower food solution.
Pro Tips for Make A Good Bouquet
- These little-known tricks will transform your bouquets from wilting in days to thriving for weeks.
- The Stem Freshness Factor: In Step 2, when cutting stems at a 45-degree angle, I like to add a quick twist of the wrist as I cut.
- Hidden Hydration Hack: After arranging your bouquet in Step 4, place the entire vase in the refrigerator overnight before displaying.
Frequently asked questions
Got questions about crafting the perfect bouquet? You’re not alone! Here are answers to some of the most common queries to help you create a stunning, long-lasting arrangement with ease.
How long will my bouquet last?
With the right care, a well-made bouquet can last 1–2 weeks! Use fresh flowers, trim stems at an angle, and change the water every 2–3 days. For extra longevity, add flower food or a splash of bleach (1 tsp per gallon of water) to prevent bacterial growth.
Can I use any flowers, or are some better for bouquets?
Not all flowers are bouquet-friendly! Opt for hardy, sturdy blooms like roses, carnations, or chrysanthemums—they hold up well. Avoid delicate flowers (e.g., orchids or tulips) unless you’re gifting them immediately. Mix textures (e.g., velvety roses + feathery eucalyptus) for visual appeal!
How far in advance can I prepare a bouquet?
Prep stems 1–2 days ahead by trimming and storing them in a cool, dark place with a damp paper towel wrapped around the base. Avoid refrigerating cut flowers—temperature fluctuations can shock them. Assemble the bouquet just before gifting for the freshest look!
What’s the best way to fix a bouquet that’s wilting too fast?
Wilting often means thirsty stems! Re-cut stems under water, remove lower leaves (they rot in water), and soak them in lukewarm water with flower food for 30 minutes. For stubborn droop, place the bouquet in a shower (no soap!) to revive petals—just pat dry afterward.
Are there budget-friendly alternatives to fresh flowers?
Try dried flowers (lavender, baby’s breath), foliage (eucalyptus, olive branches), or even preserved flowers for low-maintenance bouquets. For a pop of color, add ribbons, feathers, or dried citrus slices. Thrift stores often have affordable vases too!
Wrapping up and next steps
Creating a stunning, long-lasting bouquet is easier than you think—it’s all about choosing the right flowers, preparing them properly, and nurturing them with care.
Whether you’re crafting a gift for a loved one or brightening your own space, these tips will help your blooms stay fresh and vibrant for days. Now that you’re armed with the secrets, go ahead and experiment with colors, textures, and arrangements—your next bouquet could be your masterpiece! 🌸
Ready to put your skills to the test? Grab some flowers, follow your instincts, and enjoy the process! The more you practice, the more confident (and creative) you’ll become. Happy arranging! ✨