
Flowers
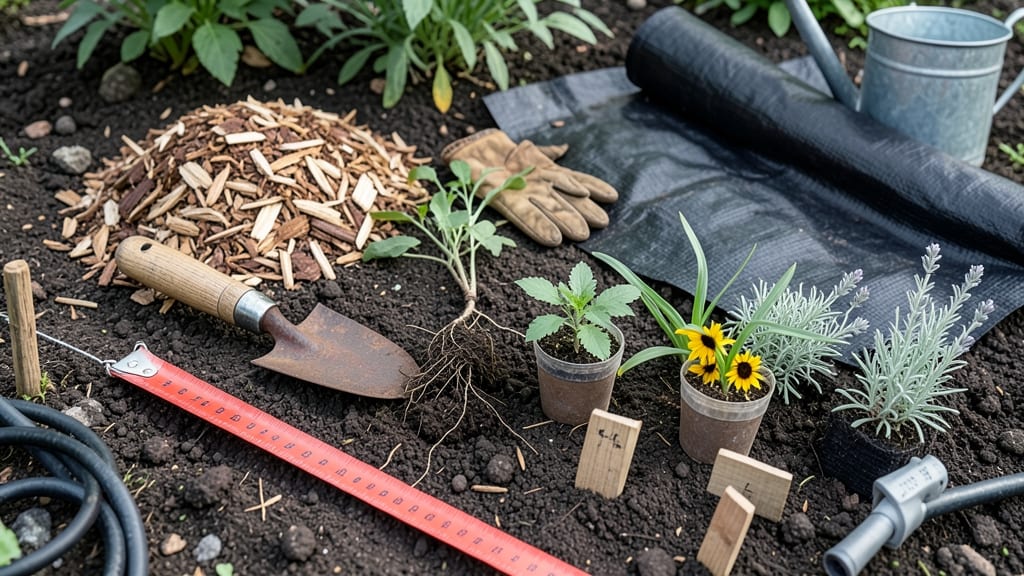
Your first how to make a new flower bed deserves to shine from planting day. ✨ The secret to that showstopping display starts with smart planning—not just digging holes and hoping for the best.
I’ve turned bare patches into vibrant gardens by following these exact steps, and you can too, even if your yard is small or your skills are beginner-level.
Start with a clear layout using spray paint or a garden hose to mark out your bed’s shape and dimensions. Measure sunlight spots (most flowers need 6+ hours daily), then choose plants that thrive where they’ll be planted.
Perennials add long-term color, while annuals fill gaps quickly—my go-to combo keeps blooms going from spring to frost.
Once the soil’s loose and amended with compost, plant in layers: tall back, mid-height middle, and short edging plants up front. Spacing matters—crowded plants compete for nutrients and look messy.
After watering well, add mulch to lock in moisture and keep weeds at bay. Within weeks, you’ll see lush new growth that makes neighbors ask, “How’d you do that?”
This method works for any size bed, from tiny window-box gardens to full backyard borders. The key is patience—give plants 2-3 weeks to settle in before expecting full bloom. Trust the process, and you’ll have a bed that’s not just functional, but a year-round conversation starter.
📚 In This Guide
- What you need
- Instructions
- Tips and common mistakes
- Wrapping up and next steps
What you need
- ● Measuring tape or string – To mark out the flower bed dimensions (10–50 ft, depending on your design).
- ● Spade or garden shovel – For digging and turning soil (preferably a heavy-duty model for tough ground).
- ● Garden hose or sprinkler – To keep the soil moist during prep (ensure it reaches your bed’s full length).
- ● Garden gloves – Protect your hands from thorns, dirt, and sharp tools (waterproof recommended).
- ● Compost or organic matter – 2–4 inches of well-aged compost or peat moss to enrich the soil.
- ○ Mulch (optional but recommended) – 2–3 inches of pine bark, straw, or wood chips to retain moisture and suppress weeds.
- ● Native or low-maintenance plants – Choose 3–5 types of flowers/foliage (e.g., perennials, annuals, or shrubs) suited to your climate.
- ○ Edging material (optional) – Flexible metal, plastic, or stone to define bed borders (e.g., 6–12 inches tall).
- ● Test your soil 🌡️ – Use a DIY soil test kit (available at garden centers) to check pH and nutrient levels. Amend as needed!
- ● Go slow with mulch ✨ – Wait 2–4 weeks after planting to apply mulch to avoid harming young roots.
- ● Drip irrigation kit 💧 – Consider installing one for automated watering (especially for larger beds).
Step-by-Step instructions for designing your dream flower bed
Here’s how I create a thriving flower bed that blooms beautifully from the first season—no guesswork, just proven techniques.
📏 Step 1: Plan Your Flower Bed Layout and Size
Start by sketching your design on paper or with a garden marker in the space itself. A well-planned bed should be at least 3 feet wide to accommodate mature plants comfortably, but avoid exceeding 5 feet—this makes maintenance easier. I like to use a 4-foot by 6-foot rectangle for a balanced look that fits most yards.
Mark the outline with stakes and string for precision. Consider sunlight exposure: full sun areas (6+ hours) work best for most annuals and perennials, while partial shade (3-6 hours) suits delicate blooms like impatiens or asters. Measure twice before digging—trust me, you’ll thank yourself later when the bed fits perfectly.
🪴 Step 2: Clear the Area and Improve the Soil
Remove grass, weeds, and debris from the marked area. I use a flat shovel to slice under the turf, then roll it up like a carpet—this prevents regrowth. For tough weeds, a garden hoe works better to cut roots at the soil line. Once cleared, loosen the top 8-12 inches of soil with a garden fork to break up compaction.
Amend the soil with 2-3 inches of compost (work it into the top 6 inches) to boost fertility and drainage. If your soil is heavy clay, mix in 1 part sand for every 3 parts soil—this prevents waterlogging. For sandy soil, add 1 part peat moss to retain moisture. Test the soil’s pH if possible; most flowers thrive in 6.0-7.0 range.
☀️ Step 3: Define Edges and Add Mulch
Use landscape fabric or a metal or stone edging to keep soil in place and prevent grass from creeping in. I prefer brick or pavers for a polished look, but a simple wooden border works too. Press edges firmly into the ground to secure them. This step is non-negotiable—it saves hours of weeding later.
Spread 2-3 inches of mulch (like shredded bark or pine straw) over the soil surface, leaving a 1-inch gap around plant stems to prevent rot. Mulch locks in moisture, suppresses weeds, and keeps roots cool in summer. Water the bed thoroughly after mulching to help it settle and penetrate the soil.
🌱 Step 4: Plant Your Flowers in Layers
Start with taller plants (like delphinium or hollyhocks) at the back, then medium-height blooms (such as daylilies or black-eyed Susans) in the middle, and low-growing flowers (like petunias or pansies) at the front. Space plants according to their mature width—check the tag for guidance, but 12-18 inches apart is a safe rule for most annuals.
Dig holes twice as wide as the root ball but only as deep as the container’s base. Gently remove plants from pots, loosen tangled roots, and place them in the hole so the top of the root ball sits flush with the soil line. Fill gaps with native soil, tamp lightly, and water deeply to eliminate air pockets. This ensures roots establish quickly.
💧 Step 5: Water and Maintain for Long-Term Success
Water the bed deeply for 10-15 minutes immediately after planting to help roots settle. In the first week, check soil moisture daily—it should feel damp but not soggy 1 inch below the surface. Use a soaker hose or drip irrigation to deliver water slowly at the base, avoiding wetting leaves (this prevents fungal diseases).
After the first month, reduce watering to 2-3 times per week, depending on rainfall. Fertilize lightly with a balanced 10-10-10 formula every 4-6 weeks during the growing season. Deadhead spent blooms regularly to encourage more flowers and keep the bed looking tidy. With this routine, your flower bed will burst into color and stay vibrant all season.
Tips & tricks for perfect flower bed design
Here's what nobody tells you about creating a flower bed that actually thrives from the first season.
Sunlight Strategy: Pay extra attention to sunlight mapping in Step 1. Use a simple app or even your phone's timer to track sunlight patterns for 24 hours before planning. I discovered my "full sun" area actually got only 5 hours of direct light—this explains why my first sun-loving plants struggled. Mark your outline with stakes at the start of each hour to visualize the sun's path accurately. This precision prevents costly mistakes when selecting plants.
Soil Test First: Before amending soil in Step 2, grab a basic soil test kit (they're cheap and available at garden centers). I learned the hard way that my "fertile" soil was actually alkaline at 7.5—perfect for some flowers but deadly for acid-loving plants like azaleas. Adjust your compost mix based on test results: add sulfur to lower pH or lime to raise it. This simple test saves money on plants that won't thrive in your soil's natural state.
Layering Secret: When planting in Step 4, think vertically as well as horizontally. Add a few climbing plants like clematis or morning glories to the back edges to create natural vertical interest. For the middle layer, include plants with different bloom times—like early spring bulbs, summer perennials, and fall mums—to ensure continuous color. This layered approach creates a lush, ever-changing display that keeps your garden looking vibrant year-round.
Mulch Timing: Wait until after your first deep watering in Step 5 before applying mulch. I used to mulch immediately after planting, which created a moisture barrier that prevented roots from establishing properly. The 10-15 minute deep watering first allows water to penetrate below the mulch layer, creating the perfect environment for root growth. This small adjustment makes all the difference in plant survival rates.
Pro Tips for Make A New Flower Bed
- Here's what nobody tells you about creating a flower bed that actually thrives from the first season.
- Sunlight Strategy: Pay extra attention to sunlight mapping in Step 1.
- Soil Test First: Before amending soil in Step 2, grab a basic soil test kit (they're cheap and available at garden centers).
Frequently asked questions
Got questions about creating your dream flower bed? Here are some of the most common ones—and their answers—to help you skip the guesswork and get planting!
What’s the best time of year to start a new flower bed?
The ideal time depends on your climate! In most regions, early spring (after the last frost) or early fall (6–8 weeks before the first frost) are perfect. These windows give plants time to establish roots before extreme heat or cold. If you’re in a warm zone, winter planting can work too—just avoid peak summer heat.
Do I need expensive tools to make a flower bed?
Not at all! Basic tools like a shovel, rake, and garden gloves are enough for small beds. For larger projects, consider renting a rototiller or borrowing a wheelbarrow. Pro tip: A sturdy tarp and some muscle can replace a rototiller for breaking up tough soil!
How do I keep weeds from taking over my new flower bed?
Prevention is key! Start with a thick layer of landscape fabric under mulch to block weeds, and apply 3–4 inches of mulch (wood chips or straw work well). Water deeply but infrequently to discourage weed seeds from germinating. Pull weeds early—before they spread!
Can I plant flowers directly in my existing soil, or do I need to amend it?
It depends! If your soil is clay-heavy, sandy, or compacted, amend it with compost or aged manure (2–3 inches mixed into the top 6–12 inches). A simple soil test (available at garden centers) can reveal pH or nutrient issues. For most gardeners, a little compost goes a long way!
How long until my flower bed looks lush and established?
Patience pays off! With proper care, you’ll see noticeable growth in 4–6 weeks. Full lushness takes 1–2 growing seasons, depending on plant types. Annuals bloom faster (sometimes in weeks), while perennials may take a season to fill out. Pro tip: Deadhead spent blooms to encourage more flowers!
Wrapping up and next steps
Creating a new flower bed is a rewarding project that brings color, life, and beauty to your outdoor space!
By following these steps—from planning and soil prep to planting and maintenance—you’ll set the stage for a thriving garden that blooms with confidence. Remember, every expert gardener started with a single shovel in the dirt!
Now that you’re equipped with the know-how, take the next step—visit your local nursery, grab those dream plants, and get digging! Whether you’re a beginner or a seasoned pro, your flower bed will thank you with vibrant blooms and endless joy. Happy gardening! 🌸✨