
How To
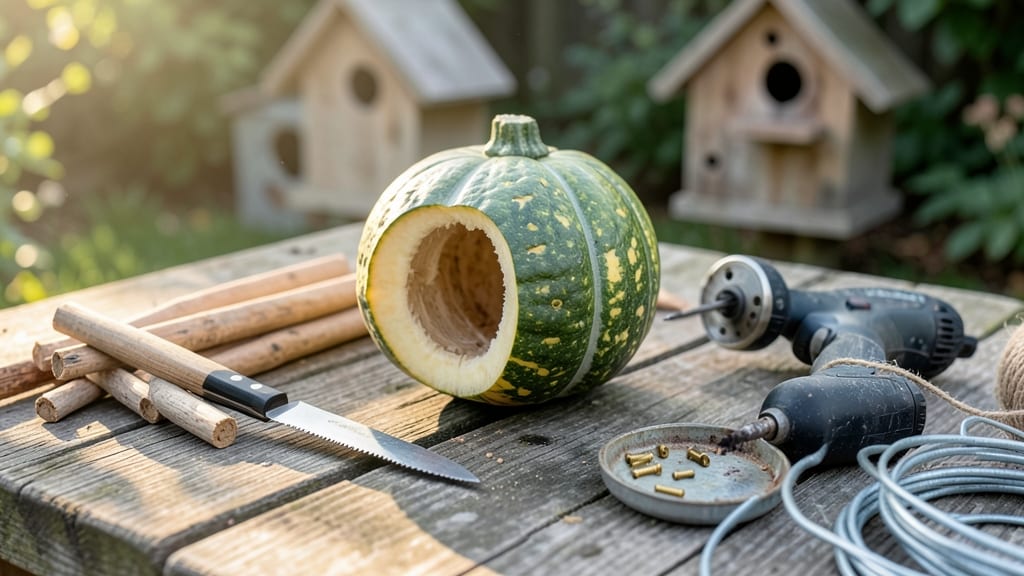
How to make bird houses out of gourds transforms overripe gourds into charming nesting spots with just a few simple cuts. 🌿 I’ve turned dry, mature gourds into rustic birdhouses that double as garden decor—birds love them, and they add unexpected whimsy to any yard. The best part? You only need basic tools and a little patience to create something both functional and beautiful.
Start with dry, mature gourds—they’re lighter to carve and won’t rot quickly. A utility knife, hammer, and drill (or even a handsaw) are all you’ll need, plus a little creativity for design.
Safety first: wear gloves and goggles, especially when drilling—gourds can splinter unexpectedly. Once you’ve hollowed out the inside, it’s time to add entrance holes and decorative details.
Place your finished gourd houses on posts, branches, or fence rails where birds feel safe but can spot predators. Bluebirds, chickadees, and wrens often take to them, especially if you position them 4-6 feet off the ground in sunny spots.
The rustic texture blends seamlessly with cottage gardens, while the natural color palette keeps things earthy and inviting.
Pro tip: Sand rough edges before hanging to prevent splinters, and consider adding a small perch near the entrance for extra appeal. Over time, the gourds weather beautifully, becoming part of the garden’s story—just like the birds that call them home.
📚 In This Guide
- What you need
- Instructions
- Tips and common mistakes
- Wrapping up and next steps
What you need
- ● 1-3 gourds (medium to large size, like Cucurbita pepo or Lagenaria siceraria—dried and hollowed naturally or by you).
- ● Sandpaper (medium-grit, 80-120, for smoothing rough edges).
- ○ Non-toxic wood stain or paint (optional, for weatherproofing and aesthetics—choose bird-safe colors like earthy browns or muted greens).
- ● Natural twine, jute, or hemp rope (for hanging or securing—about 2-3 feet per gourd).
- ○ Small nails or screws (optional, for attaching perches or securing twine).
- ● Drill or awl (for creating entry/exit holes—1.25–1.5 inches in diameter for small birds like chickadees or wrens).
- ○ Small wooden perch (optional, 3–4 inches long, sanded smooth).
- ● Utility knife or craft knife (for precise cutting and shaping).
- ● Measuring tape or ruler (to ensure proper hole sizes and symmetry).
- ● Paintbrush or sponge (if staining/painting—use a natural bristle brush for eco-friendliness).
- ● Safety gloves (to protect hands while handling gourds or tools).
- ● Basic knowledge of birdhouse dimensions (height: 8–12 inches, depth: 6–8 inches—adjust based on gourd size!).
- ● Outdoor space or workbench (for drying, sanding, and assembling).
- ● Natural sealant (like beeswax or linseed oil to preserve the gourd).
- ● Decorative elements (e.g., dried flowers, moss, or carved gourd patterns).
- ● Weatherproof hardware (stainless steel screws or galvanized nails).
- ● Birdhouse plans or template (for reference—free printables are available online!).
Step-by-Step instructions for crafting gourd birdhouses
Here's how I transform humble gourds into charming, functional birdhouses—simple enough for beginners but sturdy enough to last seasons.
🪴 Step 1: Select and Prepare the Gourds
Choose hard-shelled gourds like buffalo or white gourds—they're tough enough to withstand weather. Let them cure naturally in a dry, shaded spot for 4-6 weeks until the stem dries completely and the rind feels hard as wood. This prevents rot once you drill holes. I test by gently pressing my thumbnail into the shell—if it doesn't dent, it's ready.
Clean the gourds thoroughly with a 10% bleach solution (1 part bleach to 9 parts water) to kill any bacteria or mold spores hiding in the crevices. Rinse well and let dry completely before carving. Skipping this step risks attracting pests or disease into your finished birdhouse.
✂️ Step 2: Design and Drill the Entry Hole
Measure 4-6 inches from the base of the gourd to mark your entry hole—this keeps predators from reaching inside. Use a 1-inch diameter hole saw (or a spade bit) to cut the opening, angling slightly downward to deter rain from entering. I like to sketch the hole location first with a marker to visualize the placement before drilling.
Smooth the edges with fine-grit sandpaper to prevent splinters that could injure birds. The finished hole should be clean and sharp-edged—no rough wood fibers. For extra durability, I apply a thin coat of waterproof wood sealant inside the entry hole to protect against moisture.
🌿 Step 3: Carve Ventilation and Drainage Slits
Cut two small ventilation slits (about ½-inch wide × 1-inch long) on opposite sides of the gourd, 2 inches above the base. These prevent condensation buildup, which can harm nestlings. Use a utility knife for precision—avoid jagged edges that could snag nesting materials. I test the airflow by holding the gourd up to a fan; you should feel a gentle breeze through the slits.
Drill two drainage holes at the very bottom of the gourd (just above where it would sit on a mount). These let excess water escape during rain. I use a small nail or ice pick to poke these holes—no need for a drill bit. Place a ¼-inch layer of pebbles inside the base before hanging to further aid drainage.
🪴 Step 4: Mount and Position the Birdhouse
Attach a sturdy wooden dowel or metal hook to the top of the gourd using outdoor-rated screws and waterproof glue. The gourd should hang 5-10 feet high, facing east or northeast to shield nestlings from harsh afternoon sun and predators. I use a level to ensure the gourd hangs straight—tilting can cause water to pool inside.
Secure the mount to a tree branch, post, or fence with galvanized hardware to prevent rust. Avoid placing near feeders—competition for food can stress nesting birds. I like to add a small perch (a ½-inch dowel) just below the entry hole to give birds a landing spot, but this is optional.
🌱 Step 5: Seasonal Maintenance and Upkeep
Inspect the birdhouse twice yearly—once in early spring before nesting season and again in late fall. Scrub the interior with a mild soap solution and rinse thoroughly to remove old nest debris and parasites. Replace the pebbles if they've broken down over time. I mark each house with a small paint dot (non-toxic) to track occupancy and maintenance schedules.
Replace the entire gourd every 3-4 years or when you notice cracks, mold, or excessive wear. Store old gourds in a dry place for future projects—even "retired" houses can become homes for insects or small mammals. This keeps your garden ecosystem thriving year-round.
Tips & tricks for perfect gourd birdhouses
Transforming gourds into birdhouses is more than just a craft—it's an art that blends nature with function. Here's what I've learned to ensure your gourd birdhouses become lasting sanctuaries for feathered friends.
Selection Tip: Not all gourds are created equal for birdhouses. Buffalo and white gourds are your best bets—their thick shells withstand weather far better than delicate varieties. Look for gourds with a sturdy stem; this indicates the shell will be tough enough for drilling. If you're unsure about a gourd's durability, do the thumbnail test: press gently—if it doesn't dent, it's ready for your project. This step is non-negotiable for long-lasting birdhouses.
The Technique That Changed Everything: When sketching your entry hole location in Step 2, use a ruler to measure precisely from the base. I've found that marking with a pencil first—then tracing over with a marker—creates a cleaner, more professional-looking cutout. This precision matters because an improperly placed hole can expose nestlings to predators. Pro tip: Angle the hole slightly downward to keep rainwater out while still allowing easy access for birds.
Ventilation Secret: Those two ventilation slits in Step 3 are crucial for preventing condensation buildup, which can harm nestlings. To test airflow effectively, hold the gourd near a fan and feel for a gentle breeze through the slits. If you don't feel airflow, your cuts might be too small—use a utility knife to carefully widen them just slightly. This simple check ensures your birdhouse stays dry and safe for its tiny tenants.
Mounting Wisdom: When attaching your wooden dowel or metal hook in Step 4, use two screws instead of one for maximum stability. I've seen too many birdhouses sway dangerously in windstorms because of inadequate mounting. For extra security, add a dab of waterproof glue to the screw holes before inserting the screws—this creates a stronger bond that lasts through seasons. And remember, the 5-10 foot height recommendation isn't arbitrary: it's the perfect balance between predator protection and easy access for birds.
Pro Tips for Make Bird Houses Out Of Gourds
- Transforming gourds into birdhouses is more than just a craft—it's an art that blends nature with function.
- Selection Tip: Not all gourds are created equal for birdhouses.
- The Technique That Changed Everything: When sketching your entry hole location in Step 2, use a ruler to measure precisely from the base.
Frequently asked questions
Got questions about turning gourds into cozy bird homes? You’re not alone! Here are answers to the most common queries—so you can craft with confidence and keep your feathered friends happy.
What’s the best type of gourd for birdhouses?
Use hard-shelled gourds like acorn squash or buffalo gourds—they’re durable and last longer. Avoid soft varieties (like zucchini) as they rot quickly. For extra sturdiness, dry them fully before drilling holes.
How long does it take to make a gourd birdhouse?
Plan for 2–4 hours, depending on drying time and decorating. Drying alone takes 1–2 weeks (or use a dehydrator for 6–8 hours). Cutting, drilling, and painting add another 1–2 hours of hands-on work.
What size entrance hole should I drill?
Hole size matters! Use a 1.25-inch diameter for chickadees or wrens, or 1.5–2 inches for bluebirds. Pro tip: Place the hole 4–6 inches from the bottom to deter predators like snakes.
Will a gourd birdhouse stay weatherproof?
Yes, if properly sealed! After drying, coat the outside with non-toxic wood sealant or beeswax to repel rain. Avoid paint on the inside—birds prefer natural textures. Add a small overhang to shield the entrance.
Can I reuse old gourds or broken birdhouses?
Clean and sand old gourds to remove mold, then seal them. For broken houses, reinforce with wooden dowels or hot glue (non-toxic only!). If the gourd is cracked, patch it with epoxy resin—just ensure it’s fully cured before use.
Will bees or wasps take over my gourd birdhouse?
To deter pests, avoid sweet-smelling paints or varnishes. Place houses 5+ feet off the ground and add a fine mesh screen over the entrance (remove it once birds move in). Swap locations if you spot unwanted visitors!
What’s the safest way to paint or decorate gourds?
Use water-based, non-toxic acrylic paints or milk paint (safe when fully dried). Skip oil-based paints—the fumes can harm birds. For a rustic look, try natural dyes (e.g., turmeric for yellow) or twine wraps.
Wrapping up and next steps
Creating bird houses from gourds is a rewarding way to blend creativity with eco-friendly gardening! 🌿 With just a few simple tools and natural materials, you’ve unlocked a sustainable solution to attract feathered friends to your yard.
Whether you’re a DIY beginner or a seasoned crafter, this project is both fun and fulfilling—plus, it’s a great way to support local wildlife.
Now that you’re inspired, why not take the next step? Hang your gourd birdhouses in your garden or share your new skills with fellow nature lovers. Happy crafting—and may your backyard soon become a bustling bird sanctuary! 🐦✨