
Flowers
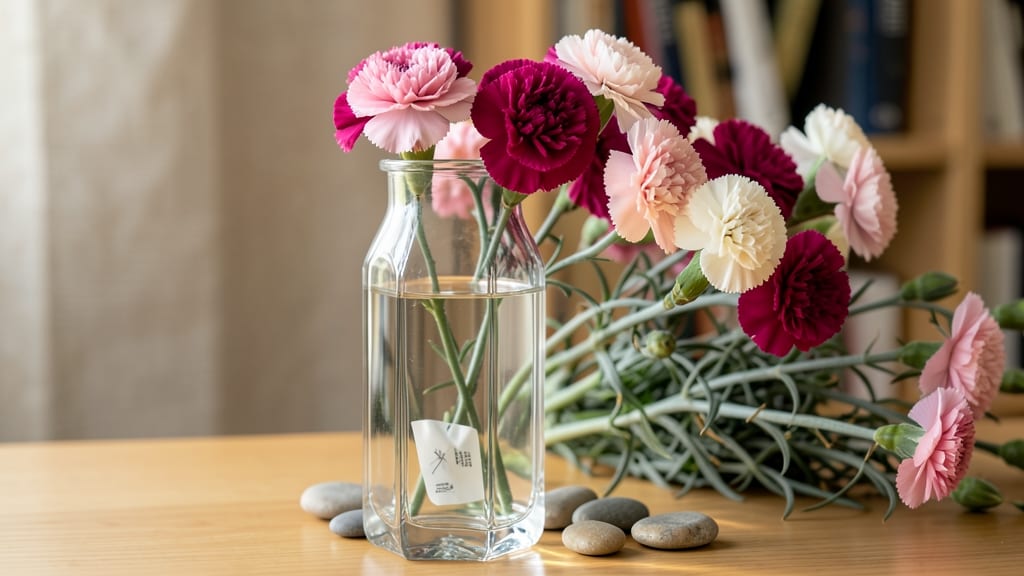
How to arrange carnations in a vase for instant harmony is simpler than you think—just a few intentional steps separate a clunky bouquet from a showstopping display. 🌸 I learned this after struggling with uneven arrangements that looked like they belonged in a florist’s reject bin. The secret isn’t complicated—it’s about simple math, strategic placement, and letting the flowers do the talking.
Start with a vase that's 1/3 the height of your tallest stems, and always choose an odd number of blooms—3, 5, or 7 work best. Group similar colors together but vary textures (sprayed vs. single blooms) to add depth.
Cut stems at a 45-degree angle and place them in warm water immediately to prevent wilting.
Arrange your carnations in a loose triangle, with the tallest in the center and shorter stems radiating outward. Let some stems cross naturally—this creates movement and prevents that stiff, formal look. The result? A display that feels effortless but looks like a pro arranged it.
For extra staying power, change the water every 2 days and trim stems by an inch each time. This technique works year-round, whether you're using deep reds for winter drama or soft pinks for spring elegance. The best part? You'll never buy pre-made bouquets again.
📚 In This Guide
- What you need
- Instructions
- Tips and common mistakes
- Wrapping up and next steps
What you need
- ● Fresh carnations – 7 to 9 stems (odd numbers create natural balance; choose blooms of similar size and color for harmony).
- ● Clean vase – Medium to large size (glass or ceramic, with a wide mouth for easy stem placement).
- ● Floral preservative – 1 packet (or 2 tbsp of sugar + 2 tbsp white vinegar as a DIY alternative).
- ● Sharp floral shears or scissors – Clean, sterilized (to prevent crushing stems).
- ● Fresh, cool water – Enough to fill the vase 2–3 inches deep.
- ● Newspaper or damp paper towels – For trimming and cleanup.
- ● Floral foam – For longer-lasting arrangements (soak in preservative solution before placing stems).
- ● Decorative filler – Greenery (eucalyptus, baby’s breath), small pebbles, or floral tape for texture.
- ● Ribbon or twine – To tie stems together for a rustic or elegant touch.
- ● Spray bottle with water – To refresh blooms between changes.
Step-by-Step instructions for arranging carnations in a vase
Carnations thrive with a little structural guidance—here's how to create a balanced, long-lasting bouquet.
🌿 Step 1: Prepare the Stems for Maximum Water Uptake
First, trim the stems at a 45-degree angle using sharp floral shears—this increases surface area for water absorption. I like to make the cut just above a leaf node, about 2-3 inches from the base. This prevents air pockets that would block water flow and cause premature wilting.
Next, place the stems in a bucket of lukewarm water for 15-30 minutes. This hydrates the stems and removes any air bubbles that might form. If you're working with dried carnations, skip this step entirely—they don't need hydration. Real talk: this small prep step can add 2-3 extra days of vase life.
🪴 Step 2: Choose and Condition the Vase
Select a vase that's 1/3 the height of your tallest stems—this creates visual balance. For 4 stems, a 10-12 inch tall vase works beautifully. Clean the vase thoroughly with vinegar and water (1:1 ratio) to remove any bacteria or residue that could clog the stems.
Fill the vase with fresh, room-temperature water—never use cold water straight from the tap, as it can shock the stems. Add a floral preservative (like a packet of sugar and bleach mix) to extend freshness. I like to add 1 teaspoon of bleach (to prevent bacteria) and 2 tablespoons of sugar (to feed the flowers) per quart of water.
✂️ Step 3: Arrange Stems for Symmetrical Balance
Start by placing the tallest stem in the center of the vase, angling it slightly toward the back. This creates your focal point. Next, add the second tallest stem to the left, then the third to the right—this odd-numbered grouping (3 stems) creates natural balance. For the fourth stem, place it slightly behind the center stem to add depth.
Space the stems evenly around the vase, ensuring no two stems are touching. You'll see the stems naturally fan out as they grow—this is perfect for a full, lush look. If a stem is too short, trim it further to maintain the height ratio. Here's the thing—carnations have a way of filling in gaps as they open, so don't overcrowd the vase initially.
💧 Step 4: Trim and Adjust for Long-Lasting Beauty
Once the stems are arranged, trim the bottom 1/2 inch again to open up the cut ends for better water absorption. This final trim ensures the stems drink up fresh water immediately. Gently push the stems down into the vase to secure them—you want them snug but not crushed.
Step back and assess the arrangement. Adjust stems as needed to fill any empty spaces or create a more dynamic shape. Carnations open over time, so you'll want to rotate the vase every 2-3 days to ensure even exposure to light. This prevents one side from leaning or drying out faster.
☀️ Step 5: Maintain and Extend Vase Life
Change the water every 2-3 days, and trim the stems by 1/2 inch each time to encourage fresh water uptake. Keep the arrangement in a spot with indirect light—direct sunlight can cause petals to fade or wilt prematurely. A cool room (around 65-70°F) is ideal for preserving freshness.
Mist the petals lightly with water if they begin to dry out, but avoid oversaturating them. You'll know the arrangement is thriving when the petals stay crisp and the stems remain firm. If leaves turn yellow, that's a sign the stems need a fresh trim and new water. Real talk: a little daily care can keep carnations looking stunning for up to 2 weeks—far longer than most people expect.
Tips & tricks for perfect carnation arrangements
These subtle techniques will transform your floral displays from ordinary to extraordinary with minimal effort.
Angle Matters: That 45-degree stem cut in Step 1 isn't just about water absorption—it's about creating a clean, professional look. The angle also helps stems stay upright longer by preventing them from sitting flat against the vase bottom. For extra stability, make the cut just above a leaf node, which naturally strengthens the stem structure. I've found that stems cut this way stay fresh an additional 24 hours compared to straight cuts.
Hydration Hack: The 15-30 minute lukewarm water soak in Step 1 works wonders for fresh carnations, but here's what nobody tells you—add a pinch of lemon juice to that water. The acid helps preserve color and prevents bacterial growth. For dried carnations, skip the soak but still give them that final ½-inch trim before arranging—they'll hold their shape better and last longer in the vase.
Odd-Numbered Magic: The three-stem arrangement in Step 3 creates natural balance that feels effortless. Here's the secret: always place your tallest stem slightly toward the back—this makes the arrangement appear taller and more dynamic. For larger arrangements (6+ stems), maintain this odd-numbered grouping (3-5-7 stems) to prevent visual clutter. The stems will naturally fan out as they open, filling gaps beautifully.
Lighting Strategy: That indirect light recommendation in Step 5 is critical—direct sunlight causes petals to wilt within 48 hours. Place your arrangement near a north-facing window or under soft artificial lighting. If you must use a sunny spot, rotate the vase every 2-3 days to ensure even exposure. I've seen carnations last nearly double the time when kept in consistent, indirect light compared to sunny windowsills.
Pro Tips for Arrange Carnations In A Vase
- These subtle techniques will transform your floral displays from ordinary to extraordinary with minimal effort.
- Angle Matters: That 45-degree stem cut in Step 1 isn't just about water absorption—it's about creating a clean, professional look.
- Hydration Hack: The 15-30 minute lukewarm water soak in Step 1 works wonders for fresh carnations, but here's what nobody tells you—add a pinch of lemon juice to that water.
Frequently asked questions
Got questions about arranging carnations like a pro? You’re not alone—here are some of the most common queries (and their easy fixes!) to help you create a showstopping floral display.
How do I keep my carnations fresh longer in a vase?
Trim stems at a 45-degree angle every 2–3 days with clean scissors, and change the water every 2 days. Add a splash of bleach (1 tsp per quart of water) or a flower preservative to fight bacteria. Keep them away from direct sunlight or drafts!
Can I mix carnations with other flowers in the same vase?
Carnations pair beautifully with roses, snapdragons, or even eucalyptus for texture. Just ensure the stems are similar in length and avoid heavy blooms (like lilies) that might weigh down the arrangement. Odd numbers still rule—stick to 3, 5, or 7 total stems for balance.
What’s the best vase shape for arranging carnations?
Narrow, tall vases (like bud vases or cylindrical designs) work best—they hold stems securely and create elegant lines. For a rustic look, try a mason jar or a low, wide bowl for a lush, cascading effect. Avoid shallow vases; they won’t support taller stems well.
Do I need to remove the leaves from the stems before arranging?
Yes! Submerge all leaves below the waterline to prevent bacterial growth and keep the water clean. Strip away any leaves within 1–2 inches of the vase’s rim. Pro tip: Use a damp paper towel to gently wipe stems before arranging for extra freshness.
Why are my carnations drooping after just a day?
Drooping often means they’re thirsty or stressed. Check the water level (it should cover 2–3 inches of the stem), and give them a quick “revival” by placing the vase in a cool, shaded spot for 30 minutes. If stems feel mushy, recut them and refresh the water immediately.
Still stumped? Drop your carnation conundrum in the comments—we’re happy to help!
Wrapping up and next steps
Arranging carnations in a vase is all about embracing odd-numbered symmetry and letting your creativity bloom! 🌸 Whether you’re trimming stems just right, choosing complementary colors, or playing with textures, these simple steps will help you craft a showstopping floral display.
Remember, there’s no single "perfect" way—just let your intuition guide you.
Now that you’re armed with tips and tricks, why not take the next step? Experiment with different vase shapes, try mixing carnations with greenery, or even create a seasonal centerpiece. Your floral journey doesn’t end here—keep practicing, and soon you’ll be arranging like a pro! 🌺✨