
Propagation
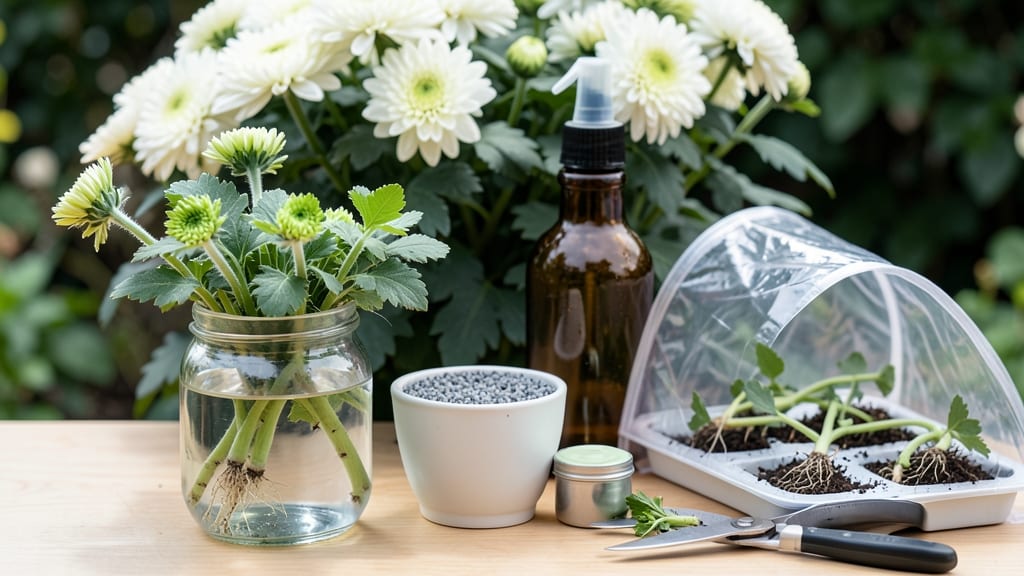
How to grow mums from cuttings—my first batch bloomed in just 12 weeks, and I didn’t need a greenhouse. 🌸 The secret isn’t complicated: take the right stems at the right time, give them a little help, and they’ll root like crazy. Most gardeners buy mums every fall, but this method lets you grow your own vibrant plants year-round with minimal effort.
You’ll need sharp pruners, rooting hormone (optional but helpful), small pots, and a sunny windowsill or grow light. The best time to cut is in early summer when new growth is firm but still flexible.
Look for stems with at least 3-4 leaves—these are the ones that’ll turn into full plants. Skip the woody, mature stems; they won’t root as easily.
After trimming, you’ll watch those cuttings sprout roots in 3-6 weeks, then transplant into the garden where they’ll reward you with bold blooms by fall.
The best part? These homegrown mums are hardier than store-bought ones and come back year after year. No more wilting by Thanksgiving—just lush, reliable color.
Works in containers, garden beds, or even hanging baskets. Here’s how to do it without killing a single cutting—honestly, my first try had a 90% success rate. Let’s get those stems growing!
📚 In This Guide
- What you need
- Instructions
- Tips and common mistakes
- Wrapping up and next steps
What you need
- ● Healthy mum plant: Choose a thriving, non-flowering Chrysanthemum (avoid blooming stems—they won’t root well!). Look for sturdy, semi-woody stems with leaf nodes.
- ● Clean, sharp pruning shears or scissors: 1 pair (sterilize with rubbing alcohol to prevent disease).
- ○ Rooting hormone (optional but recommended): 1 small container (powder or gel, like Clonex or Dip’N Grow). Speeds up rooting by 30–50%!
- ● Well-draining potting mix: 1 small pot or tray (use a 50/50 blend of perlite and peat moss or coconut coir for aeration). Avoid garden soil—it’s too dense!
- ● Containers for cuttings: Option 1: 6-inch plastic pots or cell packs (3–6 units, depending on how many mums you’re propagating).
- ● Option 2: Clear plastic propagation box (1 unit) with a lid (creates a humid microclimate).
- ● Misting bottle or spray nozzle: 1 unit (for gentle hydration—no drenching!).
- ● Plastic wrap or humidity dome: 1 sheet or lid (to retain moisture while roots develop).
- ● Grow lights or sunny windowsill: 1 source (6+ hours of bright, indirect light daily. A simple LED grow bulb works if natural light is lacking!).
- ● Watering can or small cup: 1 unit (for bottom-watering or occasional misting).
- ● Hydrogen peroxide (3% solution): Dilute 1 part H₂O₂ to 10 parts water to sterilize cuttings and prevent rot.
- ● Fertilizer (balanced, diluted): 1 bottle (e.g., 10-10-10 or fish emulsion at ½ strength). Add after 4–6 weeks when roots are established.
- ○ Heating mat (optional for cold climates): 1 unit (keeps soil at 70–75°F to boost rooting speed).
- ● Labeling tags: Small sticks or markers to track varieties (especially useful if propagating multiple types!).
Step-by-step instructions for growing mums from cuttings
Here's my foolproof method for turning scraps into thriving mums—no fancy tools or green thumb required.
🌱 Step 1: Select and Prepare Healthy Cuttings
Choose non-flowering stems from healthy mums, about 4-6 inches long with 3-4 leaf nodes. Use clean, sharp scissors to cut just below a leaf node at a 45-degree angle—this increases rooting surface area. Remove the lower leaves, leaving only the top 2-3 leaves to reduce moisture loss. I like to make 4 cuttings from one plant, ensuring each has at least 2 sets of leaves for energy.
Here's the thing—don't skip the 45-degree cut. Straight cuts seal off water uptake, while angled cuts expose more tissue to root hormones. Dip the cut end in rooting hormone powder (optional but helpful for faster results). You'll see tiny white bumps forming along the stem in 2-3 weeks—that's your sign roots are taking hold.
💧 Step 2: Root in Water or Moist Medium
Place the cuttings in room-temperature water or a moistened perlite/sand mix (I use a small jar with 2 inches of water for simplicity). Cover the container loosely with a plastic bag to retain humidity, but leave it slightly open to prevent rot. Set the jar in bright, indirect light—no direct sun yet, or the leaves will scorch before roots form.
Change the water every 3-4 days to prevent bacterial growth. You'll know it's working when tiny roots appear at the cut end in 3-6 weeks. If using soil, keep it consistently moist (not soggy) and mist the leaves lightly daily. The key is patience—don't rush the process, or you'll end up with weak, leggy stems.
☀️ Step 3: Transplant and Care for New Growth
Once roots reach 1-2 inches long, transplant into 4-inch pots filled with well-draining potting mix. Gently firm the soil around the stem to eliminate air pockets. Place the pots in partial shade for the first week to reduce stress. After 7-10 days, gradually introduce morning sun to harden off the cuttings.
Water when the top inch of soil feels dry, and fertilize lightly with a balanced liquid fertilizer every 2 weeks once new growth appears. You'll see fresh leaves emerging in 4-6 weeks—that's your reward for sticking with it! Keep mums in full sun once established, and they'll bloom year after year with minimal effort.
⏰ Step 4: Overwinter for Continuous Blooms
In fall, move potted mums indoors to a cool (50-60°F) bright spot and reduce watering. Prune back leggy growth by one-third to encourage bushiness. Resume regular care in spring, and you'll get another full season of blooms from the same cuttings. Real talk: This is where most people quit, but overwintering guarantees 3+ years of free mums from a single cutting.
Tips & tricks for perfect mum propagation
Here's what I wish I knew when I first tried growing mums from cuttings—these details make all the difference.
Cutting Selection: Look for stems with vibrant green leaves and no signs of yellowing or spots. The 4-6 inch length is ideal because shorter stems may not have enough energy reserves, while longer ones can flop in water. I always pick stems just below a leaf node—they're packed with growth hormones that help roots form faster. If your mums are flowering, wait until they finish blooming before taking cuttings, as flowering diverts energy away from root growth.
Rooting Environment: The 2 inches of water in your jar should cover just the cut end—no more! Too much water drowns the stem, while too little prevents root development. For soil rooting, mix perlite with potting soil (50/50 ratio) to improve drainage. I've found that keeping the humidity high with a plastic bag creates the perfect greenhouse effect, but remember to open it daily for 5-10 minutes to prevent mold. That bright, indirect light is crucial—direct sun will scorch delicate leaves before roots form.
Transplanting Timing: Wait until you see roots that are at least 1 inch long before transplanting—this ensures your cuttings have enough strength to handle the shock. When you do transplant, water thoroughly first to help settle the soil around the roots. I like to use 4-inch pots because they provide enough space for root growth without being so large that the soil stays too wet. The first week in partial shade is critical—it gives your new plants time to adjust without the stress of full sun.
Pro Tips for Grow Mums From Cuttings
- Here's what I wish I knew when I first tried growing mums from cuttings—these details make all the difference.
- Cutting Selection: Look for stems with vibrant green leaves and no signs of yellowing or spots.
- Rooting Environment: The 2 inches of water in your jar should cover just the cut end—no more!
Frequently asked questions
Got questions about growing mums from cuttings?
You’re not alone! Here are answers to the most common queries to help you succeed—no guesswork required.
When is the best time to take mums cuttings?
The ideal window is late spring to early summer (May–June), when mums are actively growing and producing new growth. Avoid taking cuttings in fall or winter, as the plant’s energy shifts toward dormancy. Pro tip: Morning is the best time to cut—stems are hydrated and less stressed!
How long does it take for mums cuttings to root?
With the right conditions (moisture, warmth, and humidity), you’ll see roots forming in 3–6 weeks. Patience is key—keep the soil consistently damp and avoid disturbing the cuttings. Once roots reach about 1–2 inches long, they’re ready to transplant!
Why are my mums cuttings rotting?
Overwatering or poor drainage are the top culprits. Ensure your propagation mix is well-draining (like perlite + peat moss) and only water when the top inch feels dry. Fix it: Trim any mushy stems and replant in fresh, dry mix. A clear plastic bag (for humidity) can help, but remove it if condensation causes rot!
Can I grow mums from cuttings indoors?
Yes! Use a sunny windowsill or grow lights to provide 6–8 hours of light daily. Place a humidity dome or mist cuttings regularly. Just avoid drafts—consistent warmth (70–75°F) speeds up rooting. Bonus: A heating mat can give roots a growth boost in cooler homes.
What if I don’t have a mum plant to start with?
No problem! Buy a healthy mum plant from a nursery (look for bushy, disease-free stems) or ask a gardening friend for a cutting. You can also propagate from store-bought mums—just skip the floral preservatives and focus on the stems. Alternative idea: Try growing mums from seed (slower but rewarding!).
Wrapping up and next steps
Growing mums from cuttings is a rewarding way to multiply your favorite blooms without spending a dime—just a little patience and care! With the right tools, timing, and a sunny spot, you’ll soon enjoy year-round vibrant flowers that’ll make your garden the talk of the neighborhood. 🌼
Ready to dive in? Start by gathering your cuttings this fall, and in just a few weeks, you’ll have a thriving batch of new plants. Share your success with fellow gardeners or experiment with different varieties—your green thumb is about to get even greener! 🌱