
Propagation
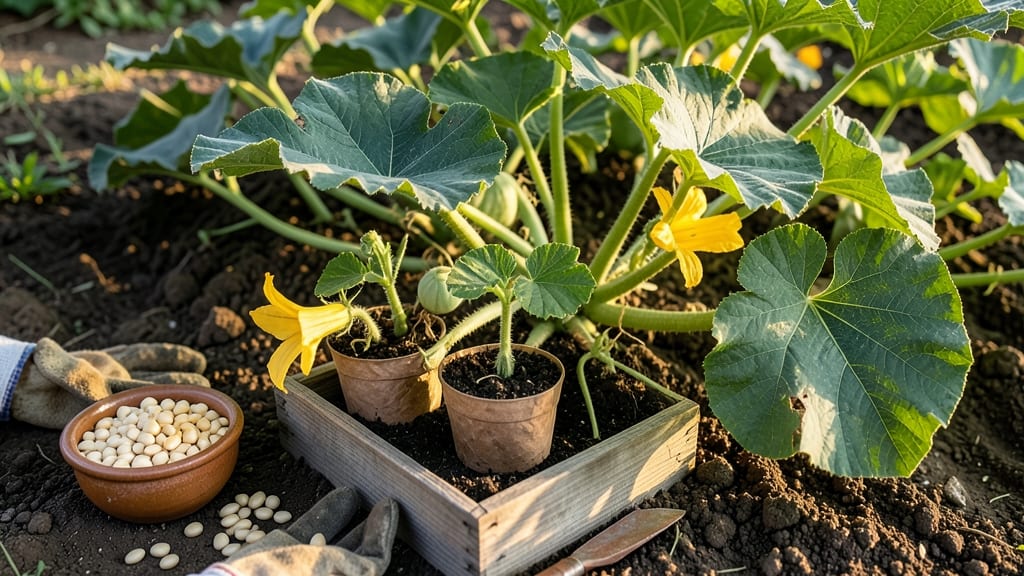
That first pumpkin seed you save from your Halloween carving could grow into a 100-pound vine by next October—if you know how to grow pumpkins from fresh pumpkin seeds. 🌱 I’ve grown pumpkins from grocery-store seeds, and the difference between a sad 5-pound jack-o'-lantern and a thriving vineyard starts with how you prepare and plant those seeds.
The secret isn’t fancy equipment—it’s timing, soil, and patience. You’ll need a sunny spot with at least 8 hours of direct sunlight, well-draining soil mixed with compost, and a way to give those vines room to sprawl (think 20+ square feet per plant).
Most beginners overlook soil prep, which is why their seeds rot or seedlings flop.
By day 30, you’ll see leaves the size of dinner plates, and by 90 days, you could be harvesting pumpkins that outshine your neighbors’. The key milestones—first true leaves, male flowers, then those telltale female blooms—are your roadmap to success. Skip the guesswork with these simple steps.
This method works for squash, gourds, and miniature varieties too, so don’t let small spaces stop you. Whether you’re aiming for a giant patch or just a few vines, the process scales easily. Let’s get those seeds growing!
📚 In This Guide
- What you need
- Instructions
- Tips and common mistakes
- Wrapping up and next steps
What you need
- ● Fresh pumpkin seeds: 5–10 seeds per plant (save seeds from a healthy, organic pumpkin—avoid store-bought seeds treated to prevent sprouting).
- ● Growing containers or garden bed: Containers: 5-gallon buckets or large pots (1 per plant) with drainage holes.
- ● Garden bed: Well-draining soil, 3–5 feet of space per plant (pumpkins spread!), and full sun (6+ hours/day).
- ● Potting mix or garden soil: Light, nutrient-rich soil (add compost for extra fertility).
- ● Watering can or hose: With a gentle spray nozzle to avoid disturbing seedlings.
- ● Fertilizer: Balanced 10-10-10 or organic options like compost tea or worm castings (apply at planting and mid-season).
- ○ Trellis or support (optional but helpful): For smaller varieties like Jack Be Little or Sugar Pie—use a sturdy cage or netting to save space.
- ● Seedling heat mat (if starting indoors in cool climates).
- ● Row covers or shade cloth (to protect young plants from pests or scorching sun).
- ● Pruning shears (for managing vines and removing suckers).
- ● Mulch (straw or grass clippings) to retain moisture and suppress weeds.
- ● pH test kit (ideal soil pH: 6.0–6.8 for pumpkins).
Step-by-Step instructions for growing pumpkins from fresh seeds
Here’s how to transform those leftover seeds into a thriving vineyard—no fancy equipment required.
🌱 Step 1: Extract and Prepare the Seeds
Cut open your pumpkin and scoop out the seeds, rinsing them under cool water to remove any stringy pulp. Lay them on a paper towel to dry for 24 hours—this prevents mold and speeds up germination. I like to spread them in a single layer on a baking sheet in a warm spot, like near a sunny window.
Once dry, store them in a paper envelope in a cool, dark place until ready to plant. Seeds stay viable for 3-5 years, but fresh ones germinate faster. If you’re impatient, you can even plant them right after drying, but I’ve found waiting a few days ensures they’re ready for the soil.
🪴 Step 2: Choose the Right Containers and Soil
Pumpkins need space, so start them in 5-gallon pots or directly in the garden if your last frost date is at least 8 weeks away. Use a well-draining potting mix—I mix 50% garden soil, 30% compost, and 20% perlite for the best results. Fill the container 2/3 full, leaving room for roots to spread.
Pumpkins thrive in full sun (6-8 hours daily), so pick a spot with no shade. If you’re using pots, place them where they won’t be disturbed by wind. I always test the soil by squeezing a handful—if it crumbles easily, it’s ready. If it sticks together, add more perlite or sand to loosen it.
☀️ Step 3: Plant the Seeds and Provide Warmth
Plant 3-4 seeds per container, burying them 1 inch deep—pumpkin seeds are large, so they don’t need light to sprout. Space them 6 inches apart if planting directly in the ground. Water gently until the soil is evenly moist but not soggy. I use a spray bottle for this step to avoid displacing the seeds.
Cover the pot or garden bed with black plastic or a clear dome to retain warmth and moisture. Pumpkin seeds germinate best in 75-85°F soil, so if your climate is cooler, use a seedling heat mat or place the pots in a sunny window. You’ll see sprouts in 7-14 days—don’t be surprised if only one seedling emerges per spot, as they often compete.
🌿 Step 4: Thin Seedlings and Train the Vines
Once the seedlings have 2-3 true leaves (not just the initial cotyledons), thin them to the strongest one per container. Use scissors to snip the others at the base—this prevents disturbing the roots of the remaining plant. Pumpkins grow fast, so keep the soil consistently moist but avoid waterlogging, which causes rot.
When vines reach 12 inches long, start training them along a trellis or fence if you’re growing in containers. This saves space and keeps fruits off the ground. I use soft garden twine to gently guide the vines upward, adjusting as they grow. If you’re planting in the ground, leave 5-6 feet of space between plants—they’ll sprawl.
⏰ Step 5: Fertilize and Harvest at Peak Ripeness
After 4-6 weeks, when vines are 3-4 feet long, feed them with a balanced 10-10-10 fertilizer (follow package instructions). Pumpkins are heavy feeders, so I repeat this every 2 weeks until flowering. Watch for yellowing leaves—this can signal overwatering or nutrient deficiency, so adjust accordingly.
Harvest when the pumpkin’s stem is dry and papery, and the rind is hard to pierce with a fingernail. I cut the stem with 2-3 inches of vine attached and let the pumpkins cure in a sunny, dry spot for 1-2 weeks before storing. With proper care, you’ll have vineyard-ready pumpkins in 90 days—just in time for fall!
Tips & tricks for perfect pumpkin seed growing
Transforming pumpkin seeds into vineyard-ready harvests takes patience and precision—here’s how to avoid common pitfalls and maximize success.
Seed Preparation: The 24-hour drying time in Step 1 isn’t just about preventing mold—it’s about ensuring even moisture distribution. I’ve found that spreading seeds on a baking sheet near a sunny window (not direct sunlight) creates optimal conditions for quick, even drying without overheating. If you’re short on time, you can reduce this to 12 hours, but germination may be slightly slower.
Soil Temperature Matters: While the instructions mention 75-85°F soil temperature, I’ve learned that cooler climates often struggle with germination. If your soil is consistently below 70°F, use a seedling heat mat or place pots in a sunny window to maintain warmth. You can also create a mini greenhouse effect by covering pots with clear plastic wrap instead of just black plastic—this traps extra heat during the day.
Container Space Strategy: The 5-gallon pot recommendation is perfect for containers, but if you’re planting directly in the ground, consider using raised beds. They warm up faster in spring and give you better control over soil quality. For container growers, add a layer of gravel at the bottom of pots to improve drainage—this prevents root rot, especially when combined with the 50% soil/30% compost/20% perlite mix.
Vine Training Visual Cues: When training vines along trellises in Step 4, look for the first tendrils that curl around supports—these are nature’s way of telling you where to guide growth. I tie vines with soft garden twine every 12 inches as they grow, creating a gentle spiral pattern that prevents kinking. For ground planting, use tomato cages as temporary supports until vines establish themselves.
Pro Tips for Grow Pumpkins From Fresh Pumpkin Seeds
- Transforming pumpkin seeds into vineyard-ready harvests takes patience and precision—here’s how to avoid common pitfa...
- Seed Preparation: The 24-hour drying time in Step 1 isn’t just about preventing mold—it’s about ensuring even moistur...
- Soil Temperature Matters: While the instructions mention 75-85°F soil temperature, I’ve learned that cooler climates ...
Frequently asked questions
Got questions about growing pumpkins from fresh seeds?
You’re not alone! Here are some of the most common queries—and their answers—to help you grow a thriving vineyard of pumpkins.
Can I use seeds from any pumpkin, or do I need special ones?
Most fresh pumpkin seeds will sprout, but for the best results, choose seeds from heirloom or pumpkin varieties (like Sugar Pie or Howden) bred for flavor and growth. Store-bought pie pumpkins (like Cinderella) often yield small, bitter pumpkins. If you’re unsure, save seeds from a mature, healthy pumpkin you’ve grown yourself!
How long does it take for pumpkin seeds to germinate?
With the right conditions (warm soil, 70–90°F), seeds typically sprout in 5–10 days. If your soil is cooler (<60°F), germination may take 2–3 weeks. Keep the soil moist but not soggy—patience is key! If nothing sprouts after 3 weeks, try replanting fresh seeds.
What’s the best way to harden off pumpkin seedlings before transplanting?
Start by placing seedlings in a shady, sheltered spot for 1–2 hours daily, gradually increasing exposure over 7–10 days. Avoid direct sun at first—think of it like a pumpkin sunburn prevention plan! Hardening helps seedlings adapt to outdoor conditions and reduces transplant shock.
Why are my pumpkin leaves turning yellow or spotted?
Yellow leaves often signal overwatering, nutrient deficiencies (like nitrogen), or fungal diseases (e.g., powdery mildew). Check the soil moisture—pumpkins hate soggy roots! Spots could mean pests (like squash bugs) or powdery mildew. Boost airflow, remove affected leaves, and consider a light spray of neem oil for prevention.
Can I grow pumpkins in containers, and what size pot do I need?
Choose a 5-gallon minimum container (bigger is better for larger varieties) with drainage holes. Use a lightweight potting mix and support vines with a trellis or cage. Just know: container-grown pumpkins may stay smaller than ground-planted ones. Varieties like Jack Be Little are perfect for pots!
Wrapping up and next steps
Growing pumpkins from fresh seeds is a rewarding journey that connects you to nature’s bounty—and you’ve got everything you need to succeed! With the right soil, sunlight, and a little patience, you’ll soon be harvesting vineyard-ready pumpkins in just 90 days.
Whether you’re aiming for giant jack-o’-lanterns or sweet, nutritious treats, your seed-to-harvest adventure starts today.
Now that you’re armed with tips and tricks, take the next step: grab those seeds, mark your calendar, and let your green thumb shine! Share your progress with fellow gardeners or even plan a fun harvest party—because growing pumpkins is half the fun!