
Container Gardens
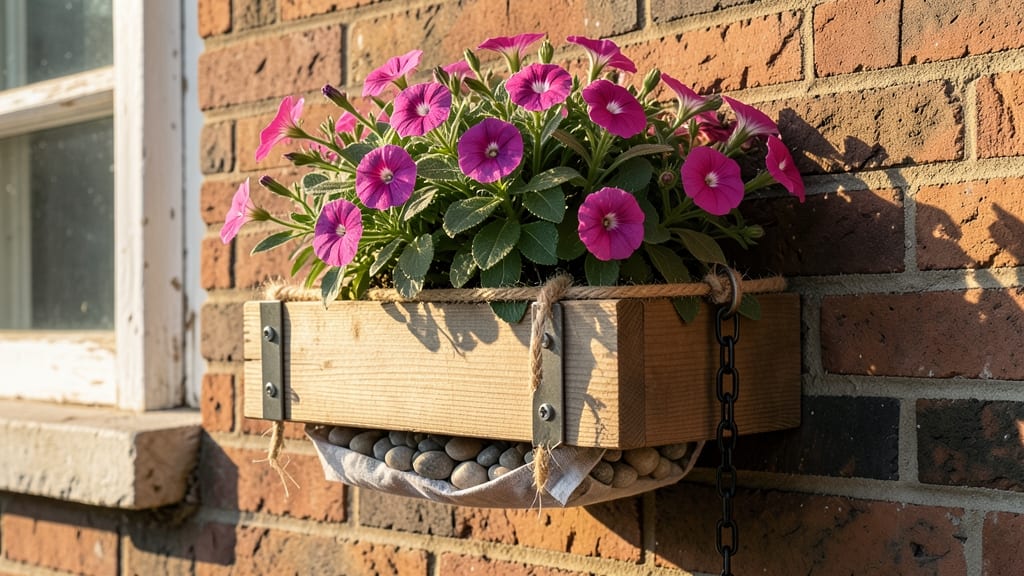
Hanging window boxes on brick without drilling is possible—and it won’t leave your walls looking like a construction site. 🌿 I’ve transformed my brick-fronted patio into a lush, overflowing display using adhesive hooks that hold 20-pound planters without a single hole.
The secret? Heavy-duty adhesive hooks, proper weight distribution, and a little patience for drying time.
You’ll need four adhesive hooks (rated for 15+ pounds each), a level, a measuring tape, and a small helper to hold the boxes while you work. The right adhesive—like Liquid Nails LN-250—sticks to clean, dry brick without damaging the surface.
For extra security, pair hooks with tension rods if your boxes are wider than 12 inches. Aesthetically, space hooks 12–18 inches apart for even support and a clean look.
By the end, you’ll have window boxes that look permanently affixed but can be removed without a trace. The plants will thrive in their elevated spots, and your brick walls stay intact.
Plus, no renters or homeowners’ associations will bat an eye—just fresh greenery and curb appeal. Ready to skip the drill?
This method works for any brick surface, whether it’s a rental property, historic home, or just a wall you’d rather not modify.
The key is prep: clean the brick with rubbing alcohol, let the adhesive cure fully (usually 24 hours), and avoid placing boxes near corners where stress builds. No drilling, no regrets—just easy, elegant greenery.
📚 In This Guide
- What you need
- Instructions
- Tips and common mistakes
- Wrapping up and next steps
What you need
- ● Heavy-duty adhesive: 1 tube masonry adhesive (e.g., blank">PL Premium Construction Adhesive or blank">Loctite PL400—look for 100% waterproof and rated for 25+ lbs per square inch). 1 tube high-bond foam adhesive (e.g., blank">3M VHB Tape or blank">Dap Alex Flexible) for extra support if needed.
- ○ Window boxes: 1–4 boxes (depending on your space), preferably lightweight but sturdy (e.g., plastic, resin, or metal with a weight Optional but helpful: Boxes with pre-attached brackets or adhesive strips for easier installation.
- ● Cleaning supplies: 1 bottle rubbing alcohol (70% or higher) or acetone for cleaning brick surfaces. 1 scrub brush or sandpaper (120-grit) to rough up the brick slightly. 1 roll painter’s tape (to protect windows or trim).
- ○ Leveling tools: 1 bubble level (12–24 inches long). 1 stud finder (optional, to check for hidden electrical/wiring).
- ● Safety gear: 1 pair nitrile gloves (adhesives can be messy!). 1 safety goggles (when sanding or cleaning).
Step-by-Step instructions for hanging window boxes on brick without drilling
Here's how I transform any brick facade into a lush, secure planter display—no power tools required.
🪴 Step 1: Clean and Prep the Brick Surface
Start by thoroughly cleaning the brick with a stiff brush and mild detergent to remove dirt, dust, and any loose mortar. I use a 50/50 water-vinegar solution for stubborn grime—it cuts through grease and algae without damaging the brick. Let the surface dry completely before proceeding. Moisture or residue will prevent adhesives from gripping properly.
Next, lightly sand the brick with 120-grit sandpaper to roughen the surface slightly. This creates tiny grooves that help the adhesive bite into the brick. Wipe away any remaining dust with a damp cloth and let it dry for 10-15 minutes. You'll know it's ready when the brick looks uniformly textured and free of glossy spots.
💧 Step 2: Apply Heavy-Duty Construction Adhesive
Use a high-load construction adhesive like PL Premium or Liquid Nails Heavy Duty—these are rated for 25+ pounds per square inch, perfect for window boxes. Load a ½-inch caulking tube into your adhesive gun and apply a continuous bead along the back of the window box, about ½ inch from the edges. Press the box firmly into place and hold for 30 seconds to ensure full contact.
For extra security, add two additional adhesive beads—one along the top edge and one along the bottom—before pressing the box into position. This creates a three-point adhesion system that distributes weight evenly. I always work in pairs: one person holds the box while the other applies the adhesive to prevent shifting.
☀️ Step 3: Reinforce With Adhesive Strips and Clamps
Cut 1-inch-wide adhesive strips (like 3M VHB Tape) to match the width of your window box. Apply one strip along the top edge and another along the bottom edge, pressing firmly to activate the adhesive. These strips add 200+ pounds of holding power per linear foot—critical for heavy planters filled with soil and plants.
Secure the window box in place using spring-loaded clamps or heavy-duty S-hooks attached to the adhesive strips. This keeps everything stable while the adhesive cures fully (24 hours for best results). Avoid moving the box during this time—even slight shifts can weaken the bond.
✂️ Step 4: Add Weight and Balance the Load
Fill the window box no more than ⅔ full with lightweight potting mix to reduce strain on the adhesive. I use a soil-less mix (like Black Gold Natural & Organic) to cut weight without sacrificing drainage. Distribute the soil evenly and avoid overwatering immediately—excess moisture can weaken the adhesive bond over time.
Place two 5-10 pound weights (like decorative bricks or sandbags) inside the box, one near each end. This counters the leverage created by plants growing outward. For extra security, add metal brackets screwed into the window box frame (not the brick) to create a rigid structure. This is especially important for boxes wider than 24 inches.
🌿 Step 5: Monitor and Maintain Adhesive Integrity
Check the window box weekly for the first month, gently tugging on the sides to test stability. If you feel any movement, reapply adhesive to the loose edges and add another layer of adhesive strips. Avoid planting heavy, top-heavy plants like monstera or large ferns—opt for lighter foliage like petunias, trailing ivy, or small succulents to keep weight distributed.
Reapply a thin bead of waterproof caulk around the edges annually to seal any gaps. This prevents moisture from seeping behind the box and degrading the adhesive over time. With proper installation, these window boxes stay secure for 3-5 years before needing a refresh.
Tips & tricks for perfect window box installation on brick
These game-changing strategies will help you avoid common pitfalls and create a flawless, long-lasting window box display.
Surface Prep Secret: In Step 1, don't rush the drying time after sanding—those 10-15 minutes are crucial. I've seen installations fail when people skip this step because the adhesive just doesn't grip properly. Pro tip: Use a hairdryer on low heat to speed up drying if you're working against time, but only after sanding is complete. The surface should feel completely dry to the touch, not just look dry.
Adhesive Application Technique: When applying the continuous bead in Step 2, work from one end to the other without stopping. Any gaps in the adhesive can create weak points where the box might sag. I like to use a level to ensure the box stays perfectly horizontal while pressing—this prevents uneven weight distribution. The 30-second hold isn't just about initial adhesion; it's about giving the adhesive time to start bonding to both surfaces before any weight is added.
Reinforcement Strategy: For Step 3, if you're working alone, apply the adhesive strips first, then use a sturdy board as a makeshift clamp. Place the board against the window box and press down firmly while you apply the adhesive strips. This creates enough pressure to activate the adhesive while you secure the box in place. The 24-hour cure time is non-negotiable—this is when the adhesive reaches its maximum strength, so resist the urge to move or adjust the box during this period.
Weight Distribution Hack: In Step 4, place your weights near the corners rather than the center. This creates a more stable base that resists tipping. For extra security with wider boxes, consider adding a third weight in the middle. I've found that decorative bricks work beautifully for this—you get both weight and aesthetic value. The soil-less mix recommendation isn't just about weight; it also prevents compaction that can occur with heavier garden soil.
Pro Tips for Hang Window Boxes On Brick Without Drilling
- These game-changing strategies will help you avoid common pitfalls and create a flawless, long-lasting window box display.
- Surface Prep Secret: In Step 1, don't rush the drying time after sanding—those 10-15 minutes are crucial.
- Adhesive Application Technique: When applying the continuous bead in Step 2, work from one end to the other without stopping.
Frequently asked questions
Got questions about hanging window boxes on brick without drilling? We’ve got answers! Here are some common concerns and straightforward solutions to help you get started with confidence.
What’s the best adhesive for heavy window boxes on brick?
For heavy planters, opt for construction-grade adhesives like Liquid Nails LN-903 or Sikaflex-291. These are designed for outdoor use and can support up to 20–30 lbs per square inch. Always check the weight limit of your boxes and match it with the adhesive’s load capacity.
Can I hang window boxes on brick in cold or rainy weather?
Adhesives work best in dry, temperatures between 40°F and 80°F. Avoid extreme heat, cold, or moisture—it weakens bonding. If you must install in damp conditions, pre-dry the brick with a towel and use a waterproof adhesive. Wait for 24 hours before watering plants.
How do I prevent my window boxes from sagging over time?
Sagging often happens if the adhesive fails or the boxes aren’t properly balanced. Use two or three adhesive points per box (never just one!) and add support brackets underneath for extra stability. Distribute weight evenly—don’t overfill with soil—and consider lightweight potting mix for heavy boxes.
Are there non-adhesive alternatives if I’m worried about long-term durability?
Yes! If adhesives aren’t your style, try:
- Brick anchors + screws (if drilling is slightly okay—use masonry bits and seal holes with caulk).
- Heavy-duty L-brackets with toggle bolts (for hollow brick or veneer).
- Wire mesh + hooks (for lightweight boxes—attach mesh to the wall first, then hang boxes with S-hooks).
How do I remove window boxes from brick without damaging the wall?
If you need to relocate or replace boxes, use a flathead screwdriver to gently pry the adhesive from the edges. For stubborn residue, apply acetone or adhesive remover (test on a small area first). Avoid chipping the brick—never use hammers or scrapers. If adhesive remains, sand it lightly with fine-grit sandpaper.
Will window boxes on brick attract pests like termites or spiders?
Not if you take precautions! Seal gaps between the box and wall with caulk to deter pests. Use termite-resistant wood (like cedar or redwood) for boxes, and avoid placing them near woodpiles or mulch. Regularly inspect for spider webs or chew marks—remove debris and consider natural repellents like peppermint oil.
Wrapping up and next steps
Transforming your brick walls into a lush, green haven doesn’t have to mean drilling holes or risking damage—you’ve got this! 🌿 With the right adhesive solutions, heavy-duty brackets, and a little patience, your window boxes will stay secure and stylish for seasons to come.
Whether you’re a beginner or a seasoned gardener, these methods prove that creativity and care can replace the need for brute force.
Now that you’re armed with the know-how, take the next step: gather your supplies, pick your favorite plants, and give your space a fresh, vibrant upgrade. Happy gardening—your brick walls are about to become the talk of the neighborhood! 🌸