
How To
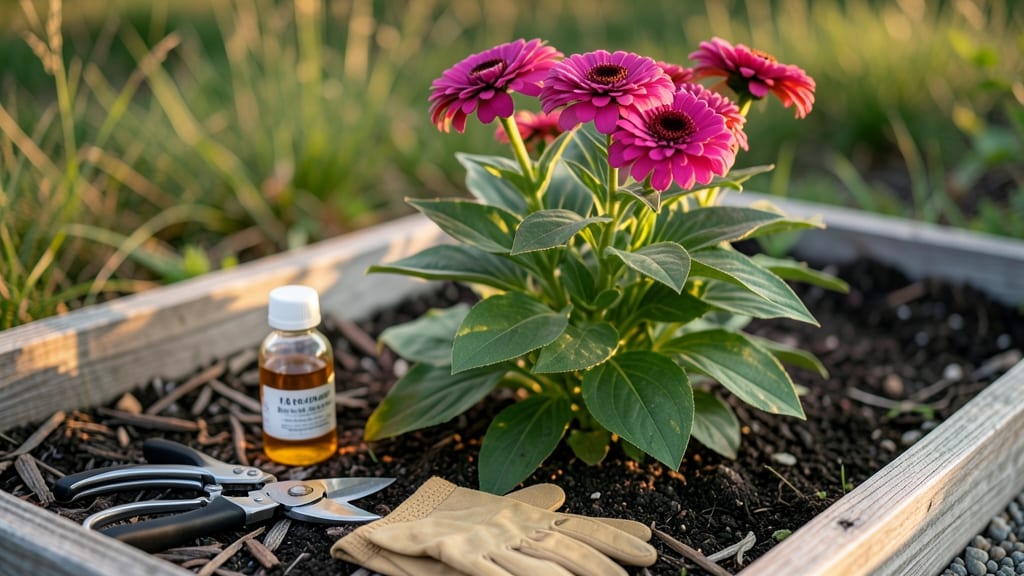
Leggy zinnias stealing your garden’s spotlight? ✂️ The secret to bushier blooms isn’t luck—it’s strategic pinching and pruning. I’ve turned my once-skinny zinnias into thick, flower-covered bushes using just three simple techniques, and you can too.
Start by pinching off the top set of leaves when plants hit 6 inches tall. This forces energy into side shoots instead of one long stem. Repeat every 2-3 weeks until you’ve got a full, rounded shape. The key is timing—do this before flowers form, or you’ll stunt blooms.
You’ll see new growth within days, with more stems and bigger flowers by summer’s end. Combine this with proper spacing (12-18 inches apart) and balanced fertilizer, and your zinnias will outperform store-bought plants. Works for all zinnia varieties, from dwarf to giant.
Here’s how to do it right the first time—no guesswork!
📚 In This Guide
- What you need
- Instructions
- Tips and common mistakes
- Wrapping up and next steps
What you need
- ● Ready to transform your zinnias into lush, bushy beauties? 🌸 Here’s everything you’ll need to get started—no fancy tools required, just a few essentials and a little elbow grease!
- ● Pro tip: 🌡️ Timing matters! Gather tools on a cloudy day or early morning to reduce stress on your plants during pruning.
Step-by-Step instructions for pinching and pruning zinnias
Here's how I transform leggy, sparse zinnias into full, bushy bloomers with just a few simple cuts.
🌱 Step 1: Identify the Right Time to Pinch
Wait until your zinnias have grown 4-6 inches tall and developed 4-5 sets of true leaves—those are the small, mature leaves that appear after the initial seed leaves. This usually happens 3-4 weeks after germination, but don't rush it. Pinching too early stunts growth, while waiting too long means missing the best window for bushier stems.
Look for a strong central stem with multiple leaf nodes—these are the spots where new branches will form. The first pinch is the most critical, so take your time to find the perfect spot. I always check the underside of leaves for tiny side buds forming; if you see them, your plant is ready.
✂️ Step 2: Make the First Pinch Correctly
Using clean, sharp pruners or your fingers, pinch off the top set of leaves just above a leaf node where a side branch is starting to form. This forces the plant to focus energy on growing multiple stems instead of one tall, weak one. I like to make the cut at a 45-degree angle about ¼ inch above the node—this prevents water from pooling and causing rot.
Don't be afraid to get bold here. The first pinch might look drastic, but it's what kickstarts that bushy growth. After pinching, step back and admire your work—you're about to trigger a whole new wave of branching. Water the plant lightly after pinching to help it recover quickly.
🌿 Step 3: Encourage Side Branches to Develop
Over the next 7-10 days, watch for new shoots emerging from the leaf nodes below your pinch. These side branches are your plant's response to the pruning, and they'll eventually become the bushy framework of your zinnia. If you see any shoots growing straight up instead of outward, pinch them back too—this keeps the plant balanced and encourages more lateral growth.
Here's where patience pays off. Avoid the temptation to over-prune now. Let these new branches grow to 3-4 inches tall before you consider another pinch. You'll know you're on the right track when your zinnia starts looking like a miniature bush instead of a single stalk.
☀️ Step 4: Provide Optimal Conditions for Bushy Growth
After pinching, give your zinnias full sun (6+ hours daily) and consistent moisture—zinnias hate drying out or sitting in soggy soil. I water deeply 2-3 times per week, letting the top 1-2 inches of soil dry out between waterings. This balance keeps stems strong and encourages robust branching.
Also, feed your plants with a balanced liquid fertilizer (10-10-10) every 2-3 weeks after the first pinch. The extra nutrients help the new growth recover quickly and develop into thick, sturdy stems. Avoid heavy nitrogen fertilizers—too much leaf growth at this stage will delay flowering.
⏰ Step 5: Continue Light Pruning for Ongoing Bushiness
Once your zinnia has developed multiple strong stems, switch to light maintenance pruning. Remove any dead or yellowing leaves regularly to keep air circulating and prevent disease. When you see flower buds forming, pinch back the top set of leaves one last time to encourage a second flush of blooms.
This ongoing pruning keeps your zinnias producing flowers for weeks longer than unpruned plants. I always make a final round of pinching in early summer to extend the blooming season into fall. The key is to stay consistent—zinnias respond beautifully to regular attention and will reward you with lush, full plants bursting with color.
Tips & tricks for perfect zinnia pruning
Transforming leggy zinnias into full, bushy plants takes patience—but these tricks make all the difference. Here's what I've learned after years of trial and error.
Timing is Everything: The 4-6 inch height guideline is your best friend, but don't obsess over exact measurements. Instead, focus on the leaf count—you want those 4-5 sets of true leaves. I've pinched plants at 5 inches with 4 leaves and seen great results, while others at 6 inches with 5 leaves needed the extra height. The key is strong stems and no flowers yet—that's your perfect window.
Pruning Precision: When you're ready to pinch in Step 2, make your cut just above the leaf node—about ¼ inch up. This might seem like a small detail, but cutting too close risks exposing the stem to rot, while cutting too far above can stunt new growth. I use my fingernail to gently lift the stem and make a clean pinch right at that sweet spot. For thicker stems, clean pruners work better than fingers.
Recovery Matters: After pinching, your zinnias will look a bit sad—but that's normal! The critical 7-10 day recovery period is when magic happens. During this time, water lightly at the base in the morning only. Overwatering now can drown those emerging side shoots. I've seen plants that looked dead after pinching come back stronger than ever after proper recovery care.
Light and Water Secrets: Those 6-8 hours of full sun aren't just about quantity—they're about quality. If your zinnias start looking sparse again, check your light source. South-facing windows or direct garden sun work best. For indoor plants, supplement with a grow light 12 inches above the plants for 6 hours daily. And remember: water when the top inch feels dry, not when it's bone-dry.
Pro Tips for Make Zinnias Bushier
- Transforming leggy zinnias into full, bushy plants takes patience—but these tricks make all the difference.
- Timing is Everything: The 4-6 inch height guideline is your best friend, but don't obsess over exact measurements.
- Pruning Precision: When you're ready to pinch in Step 2, make your cut just above the leaf node—about ¼ inch up.
Frequently asked questions
Got questions about transforming your zinnias into lush, bushy beauties? You’re not alone! Here are some of the most common queries—and straightforward answers—to help you grow zinnias that steal the show in your garden.
When is the best time to pinch zinnias for bushier growth?
Pinch zinnias when they’re young—around 6 to 8 inches tall—but before they start flowering. This encourages branching and a fuller plant. Avoid pinching after buds form, or you’ll delay blooms. Early spring or late winter (if starting indoors) is ideal for container-grown zinnias, while outdoor plants can be pinched in early summer.
How much should I prune zinnias to encourage bushiness?
When pruning, cut back about one-third of the plant’s height, focusing on leggy stems or overgrown branches. Use clean, sharp shears to avoid damaging the plant. For zinnias, this usually means trimming just above a set of leaves or a lateral bud. Avoid heavy pruning late in the season, as it may reduce fall blooms.
Can I use the same techniques for all zinnia varieties?
Most zinnia varieties—like Benary’s Giant, Profusion, or Angel Wings—respond well to pinching and pruning. However, dwarf zinnias (likeThumbelina) may not need as aggressive pruning. Always check your variety’s growth habits; some, like the towering Zinnia elegans, benefit from more aggressive trimming, while smaller types might only need light pinching.
Why aren’t my zinnias getting bushier after pinching?
If your zinnias aren’t responding, check these common culprits:
- Overcrowding: Too many plants competing for nutrients can stunt growth. Space zinnias 12–18 inches apart.
- Poor soil: Zinnias thrive in well-draining, fertile soil. Amend with compost if your soil is compacted or nutrient-poor.
- Pests or disease: Yellowing leaves or wilting could signal aphids, spider mites, or fungal issues. Treat promptly with neem oil or fungicide.
- Lack of water: Inconsistent watering stresses plants. Keep soil evenly moist (but not soggy) for best results.
Do zinnias need full sun to stay bushy?
Zinnias love full sun (6–8+ hours daily) to grow vigorously. Partial shade can lead to leggy, sparse growth. If your zinnias are stretching toward light, they’re not getting enough sun. Consider relocating them to a sunnier spot or supplementing with a grow light if growing indoors.
Wrapping up and next steps
With the right techniques—like pinching back young shoots, pruning strategically, and providing proper care—your zinnias can transform into lush, bushy powerhouses! 🌿 Remember, consistency is key, and soon you’ll be rewarded with vibrant blooms that steal the show in your garden.
Ready to see the magic unfold? Grab your pruners and get growing—your zinnias are waiting for their big break!
Next up: Share your progress with fellow gardeners or experiment with zinnias in containers for even more creative blooms! 🌸